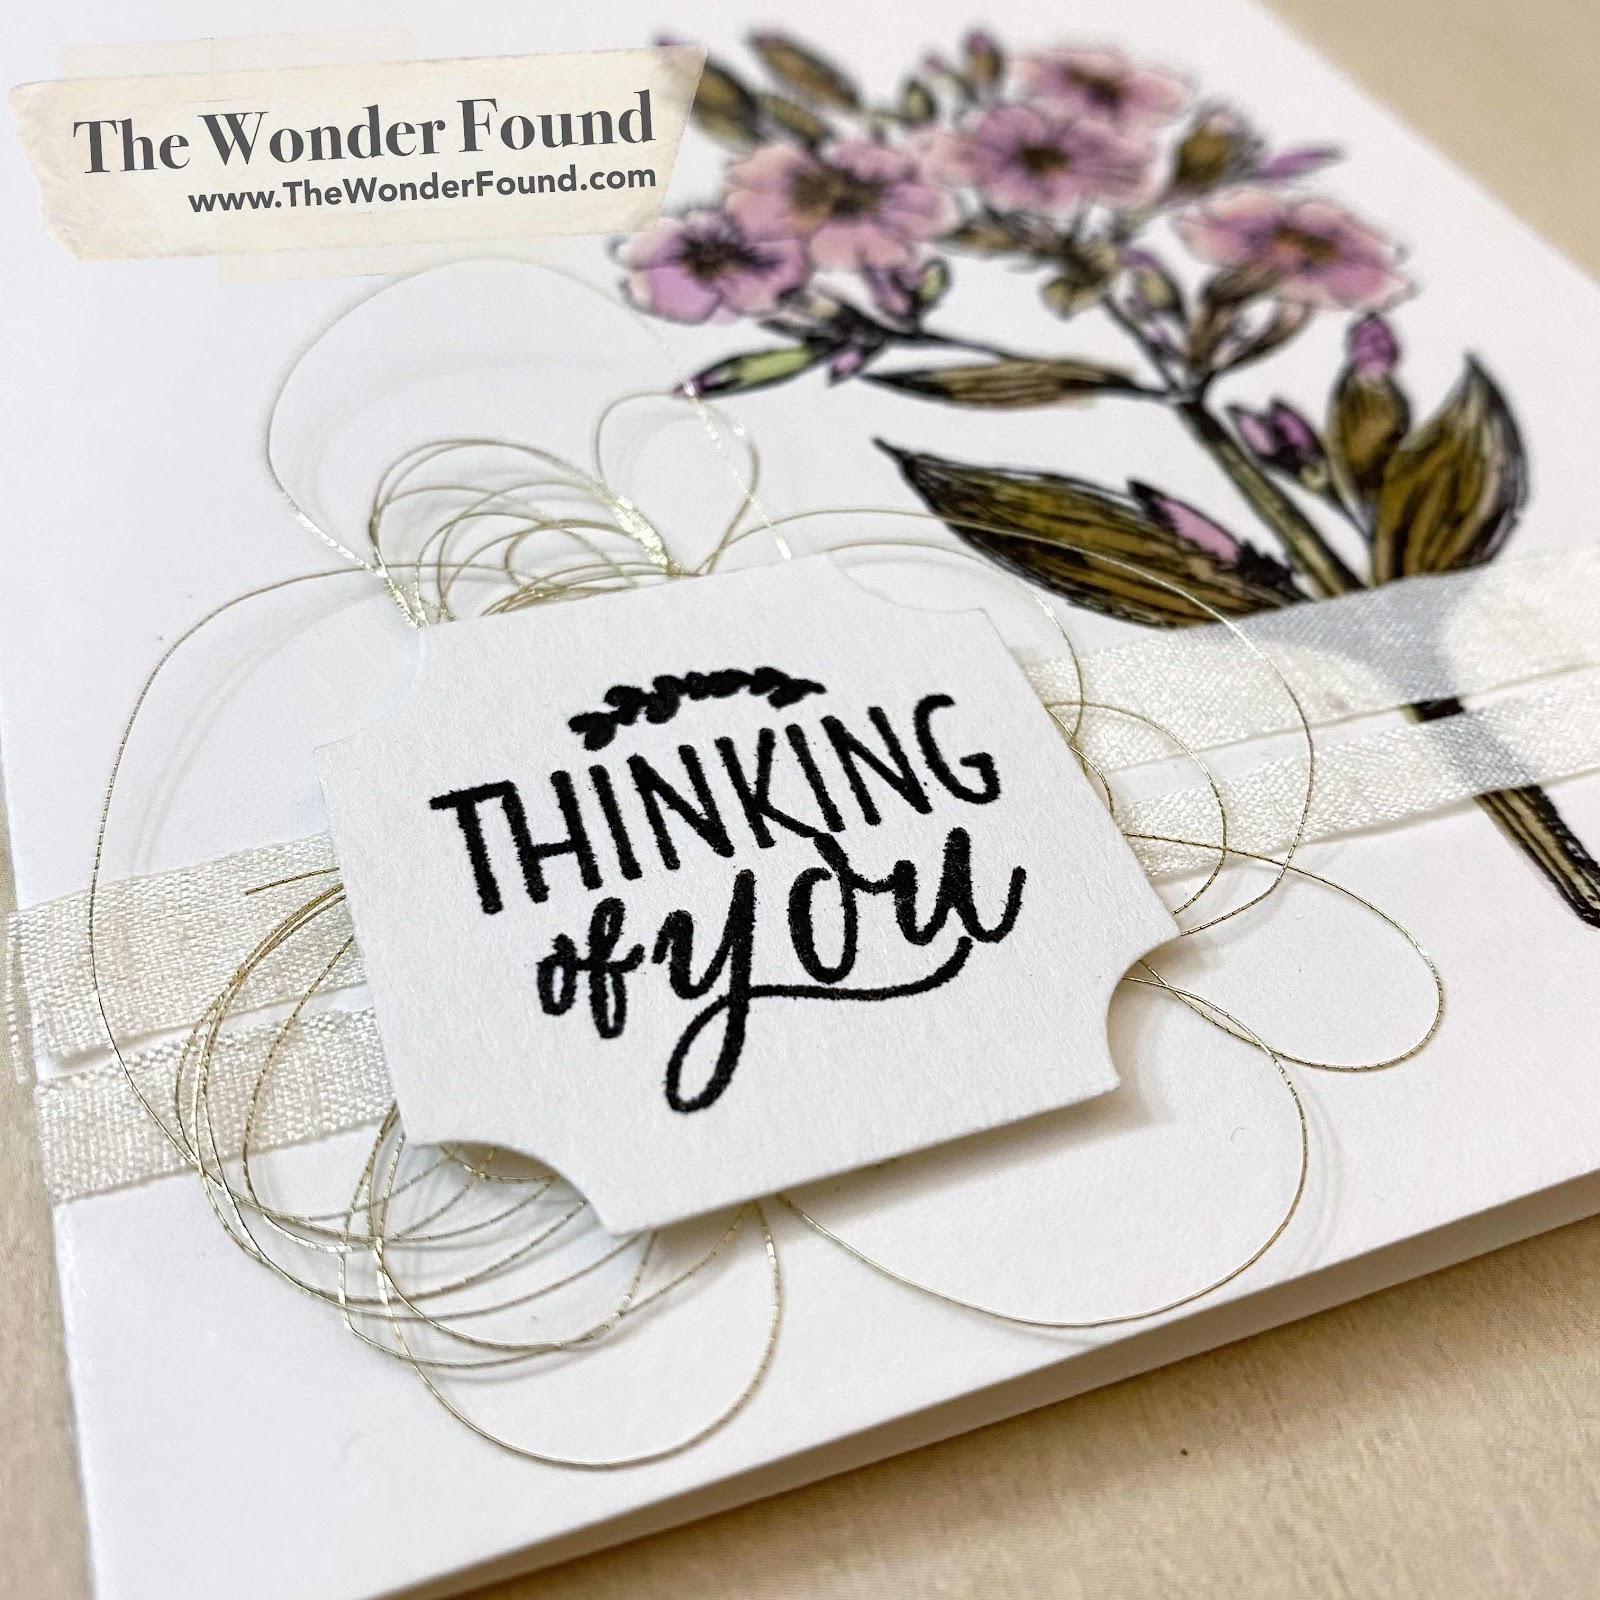
Hello & thanks for checking out my simple “thinking of you card”.
For this card I stamped a flower from the Tim Holtz set, Illustrated Garden onto a watercolor paper card base and used a water pen and some distress markers to color it in.
For more project inspiration follow me on Instagram and don’t forget to subscribe to my YouTube channel!!
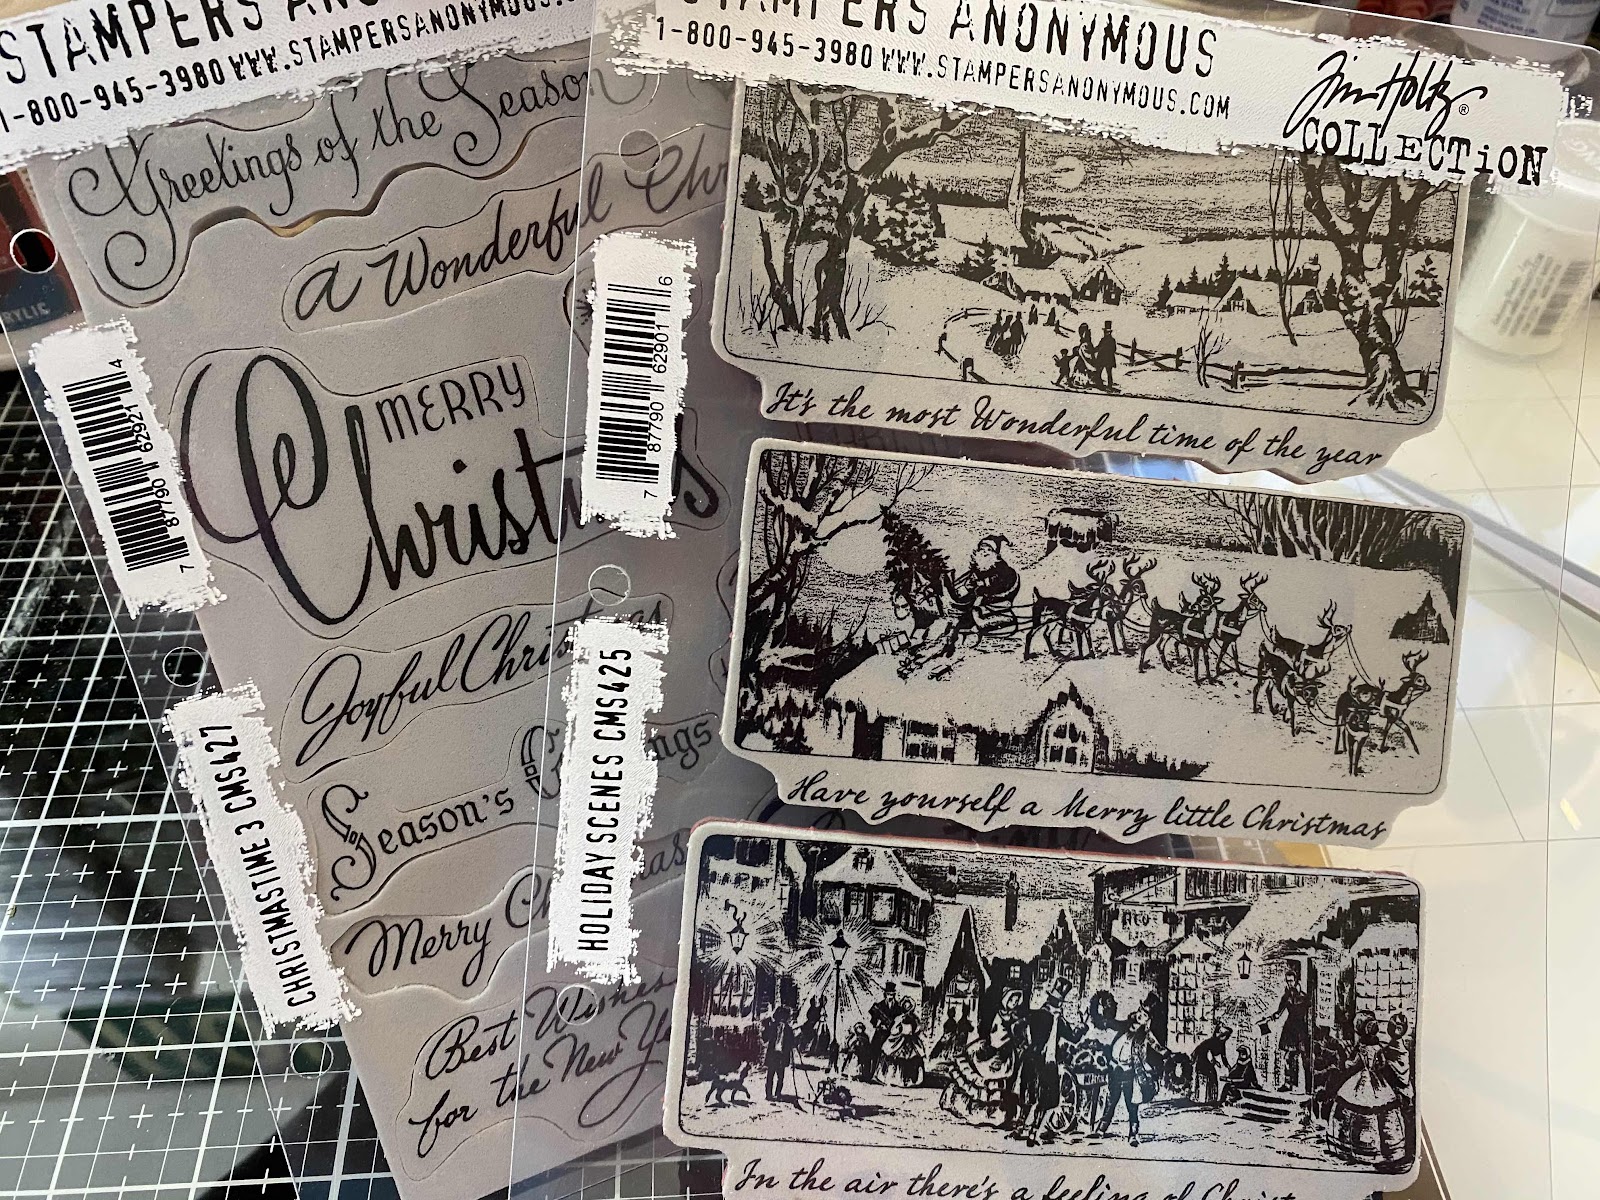
Hello! Thank you for checking out my Christmas Scene Card Set, I hope you enjoy! Make sure to comment below and subscribe to my YouTube to get as much inspiration as you want!
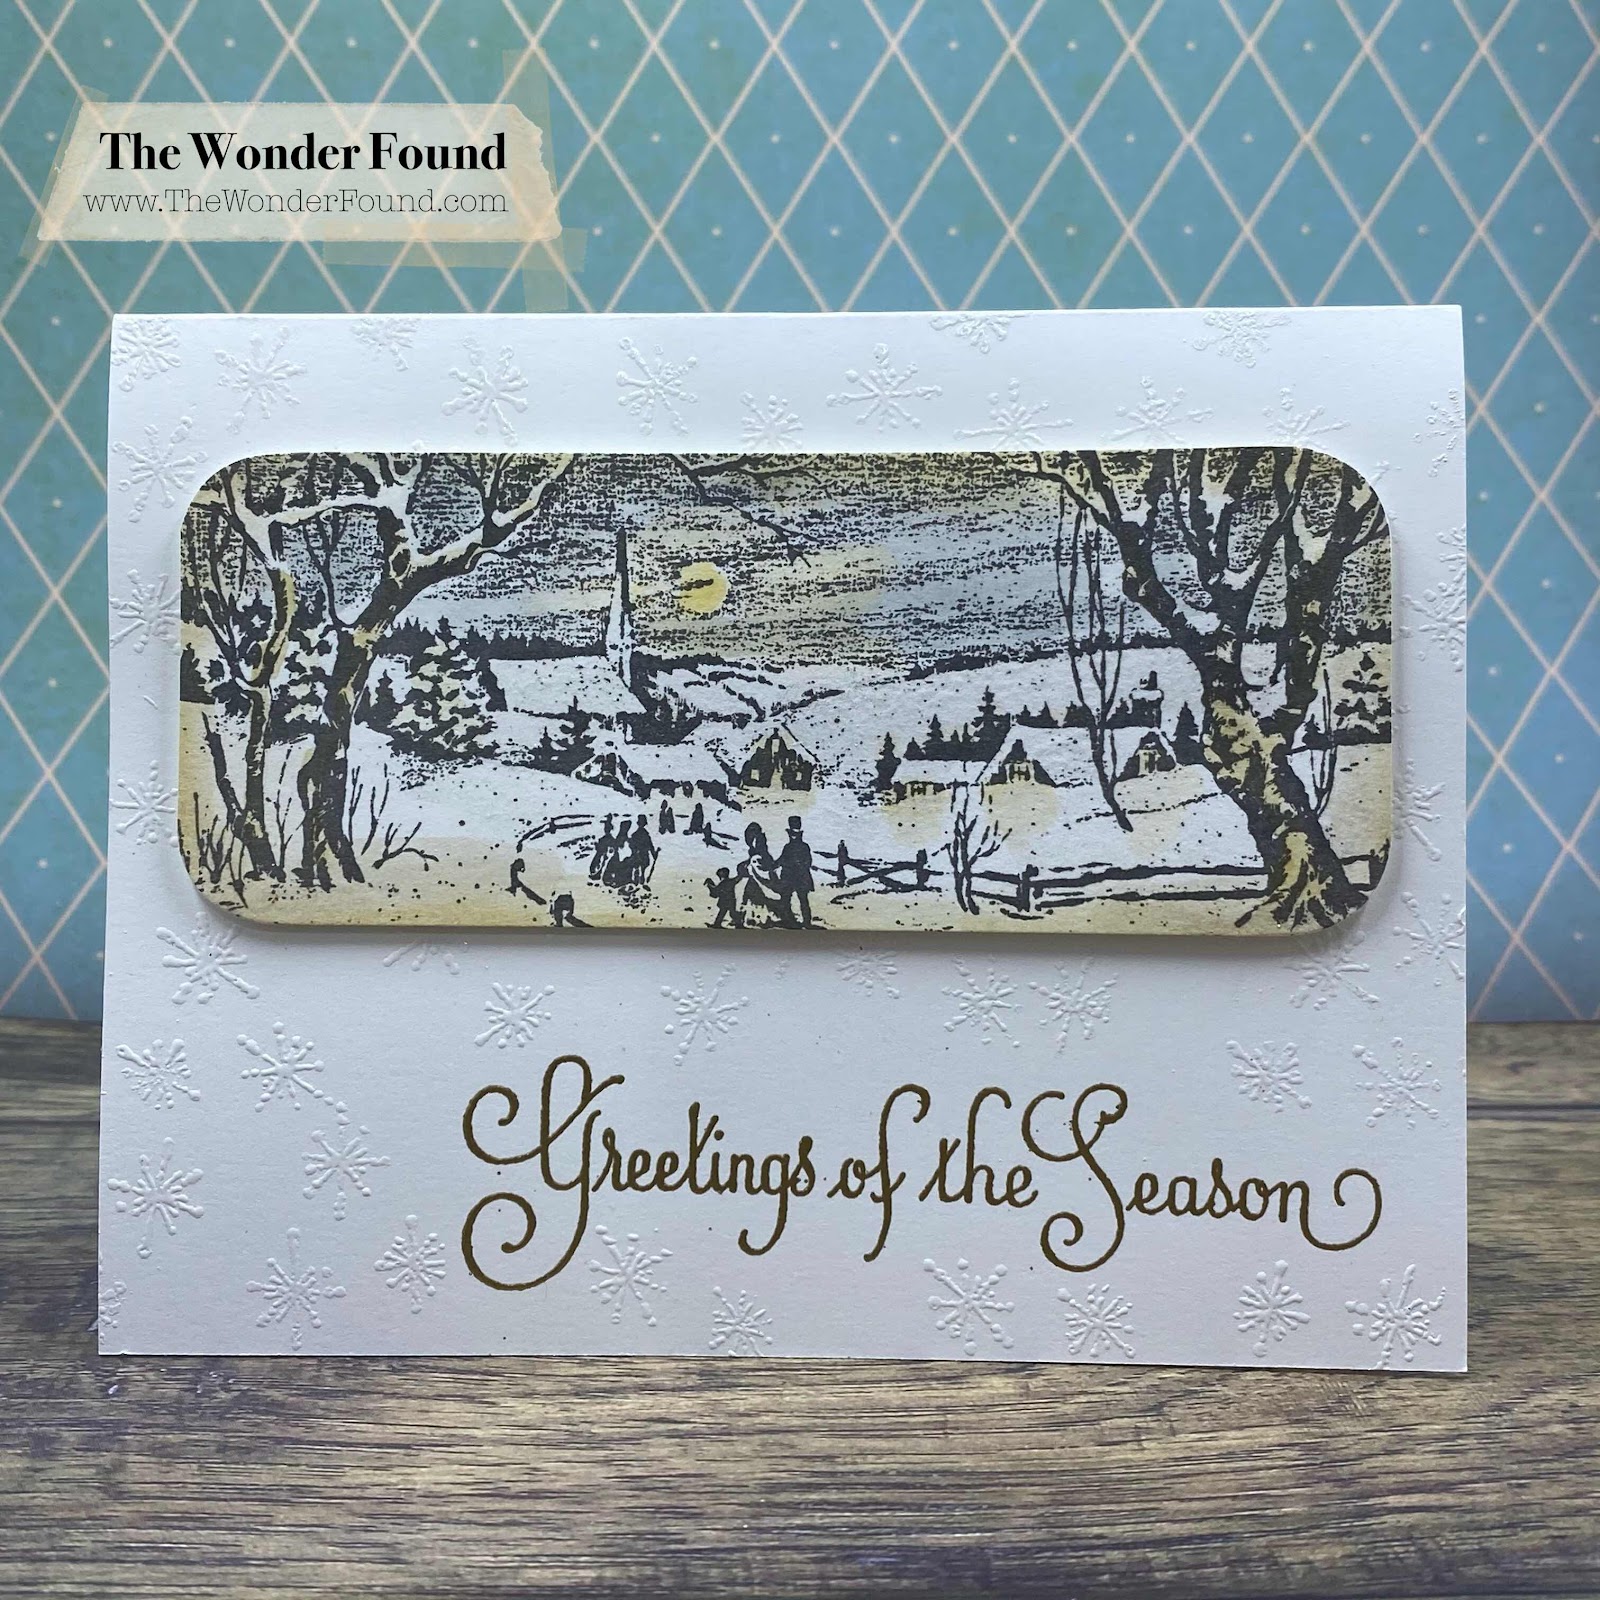
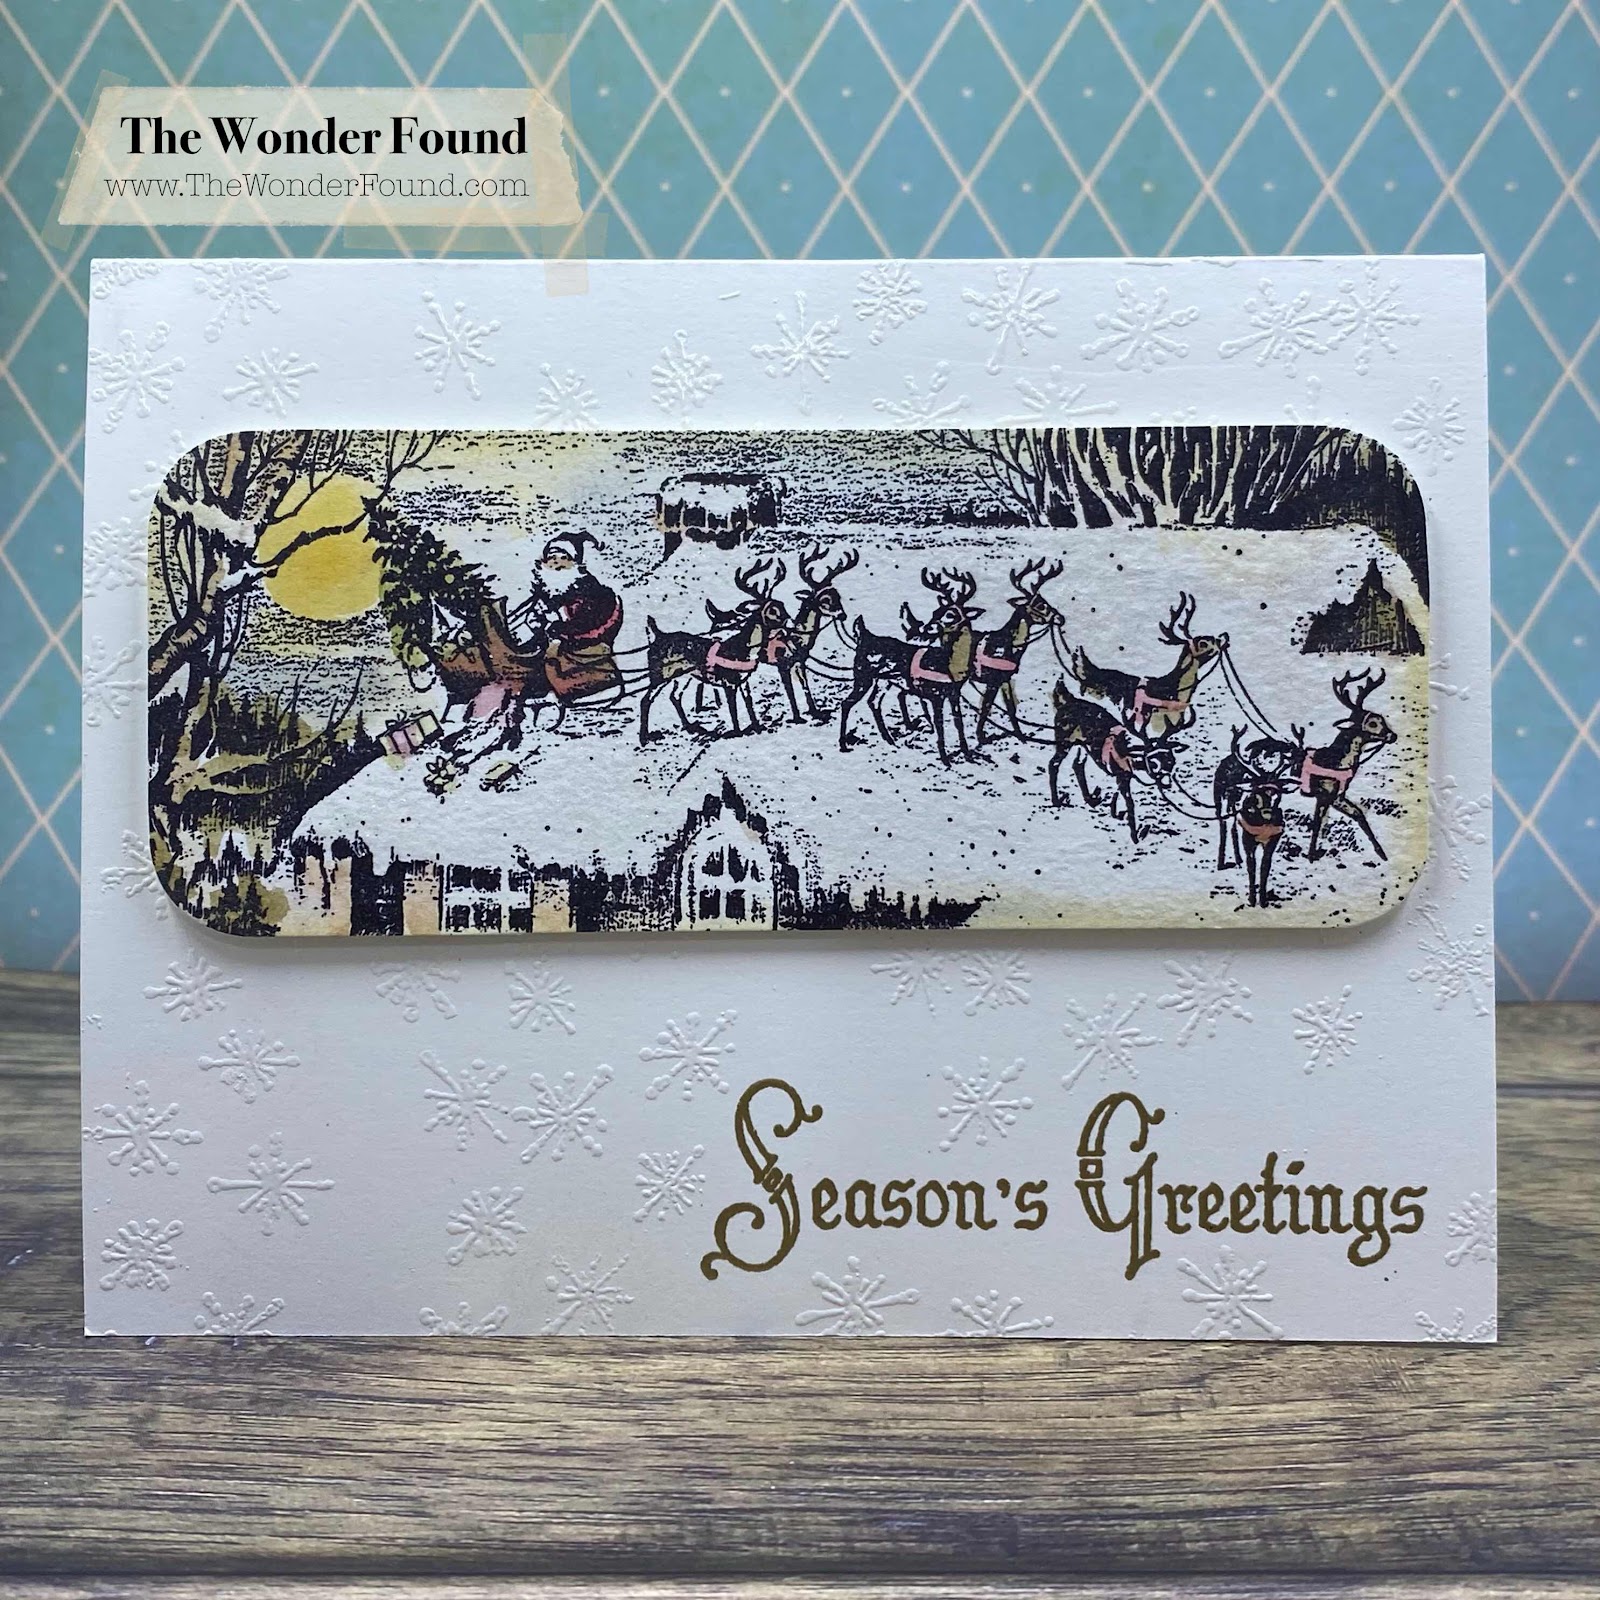
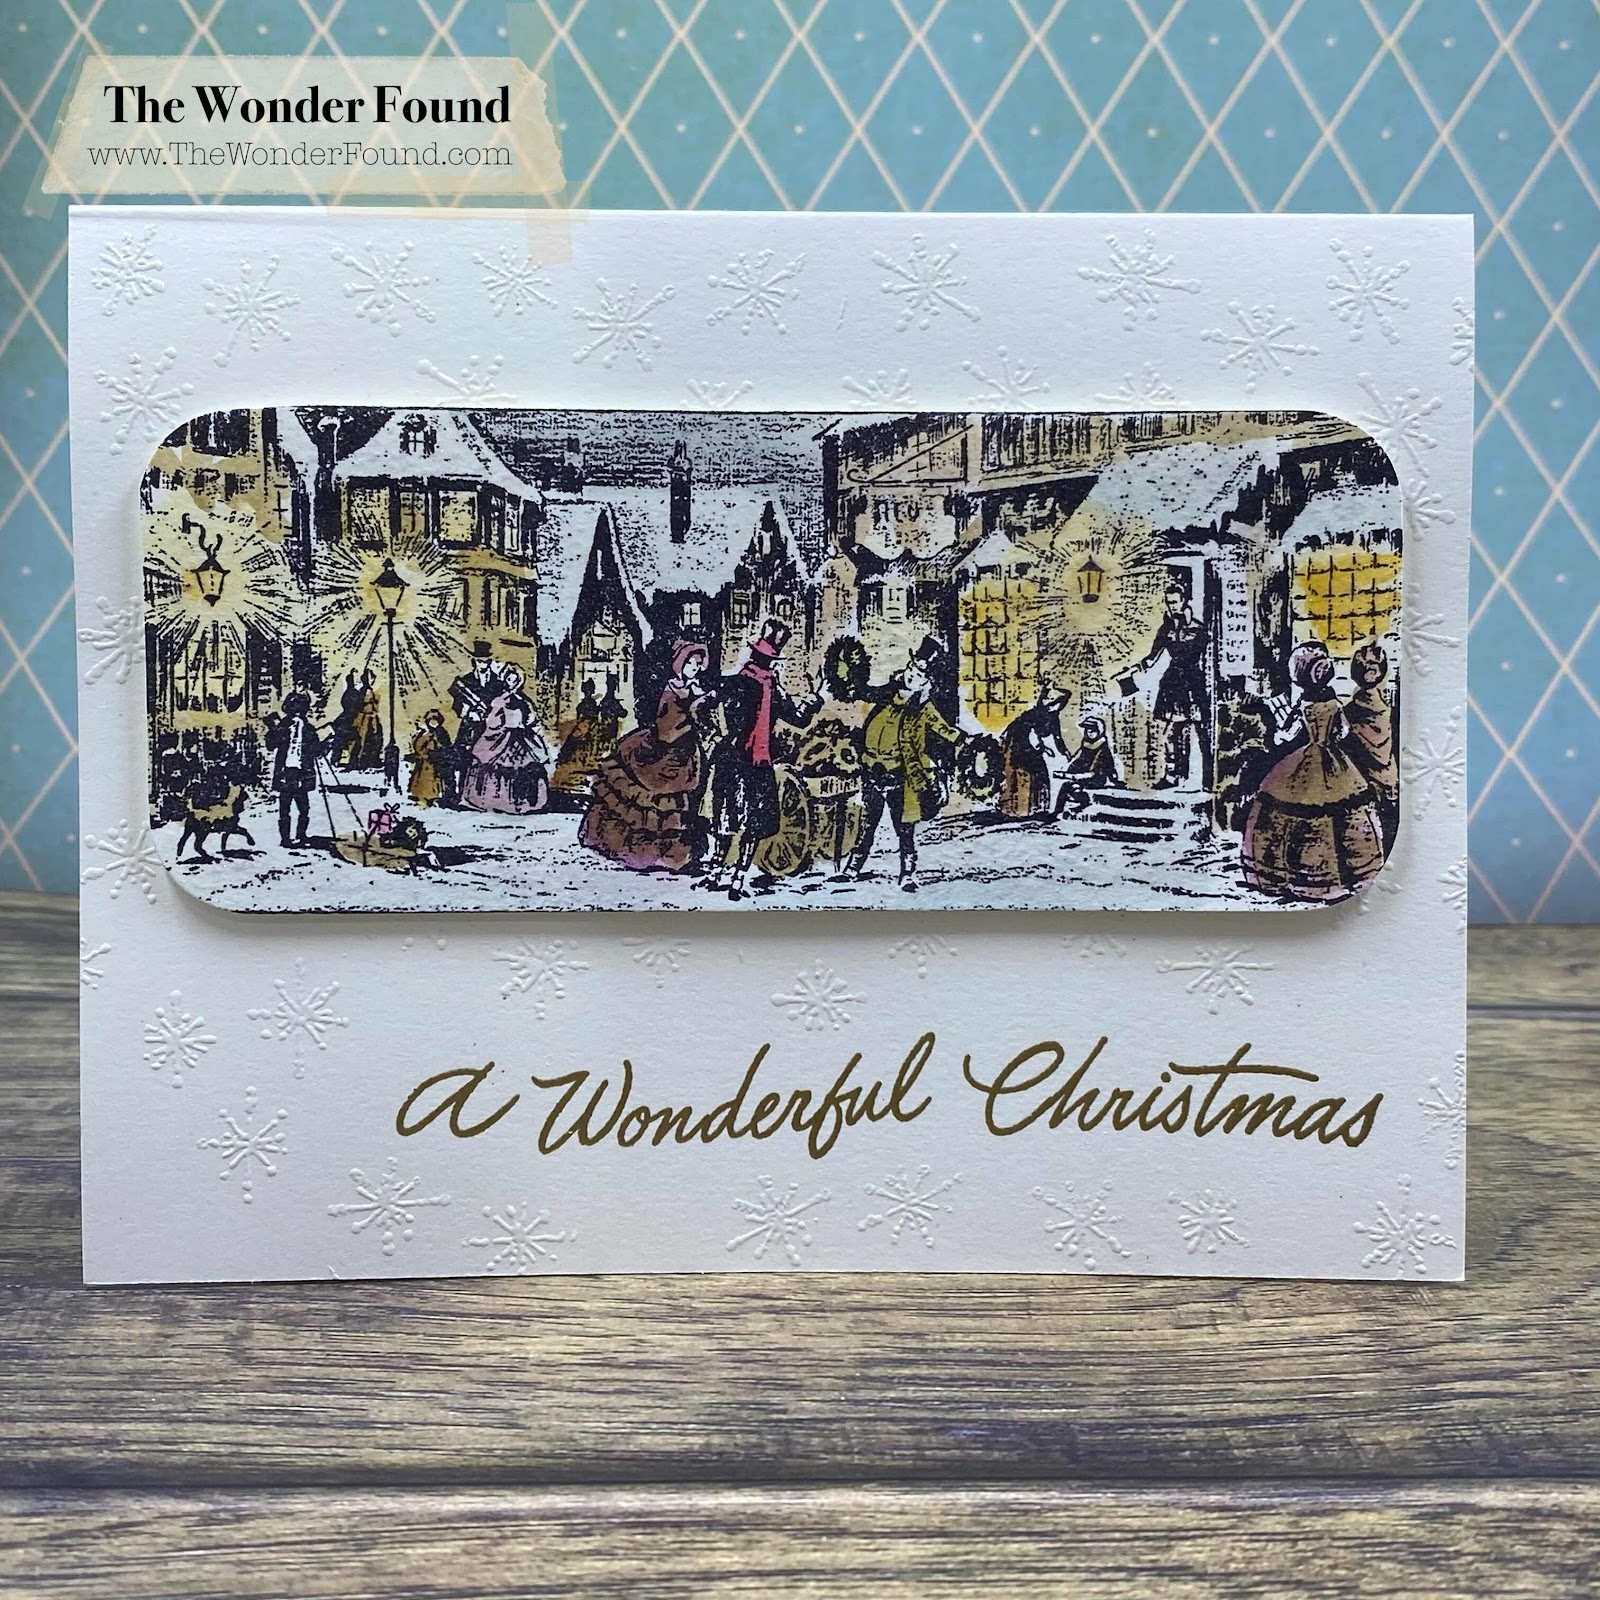
All three of these cards feature stamps from some of the 2020 Tim Holtz Stampers Anonymous stamps, ChristmasTime 3 and Holiday Scenes.
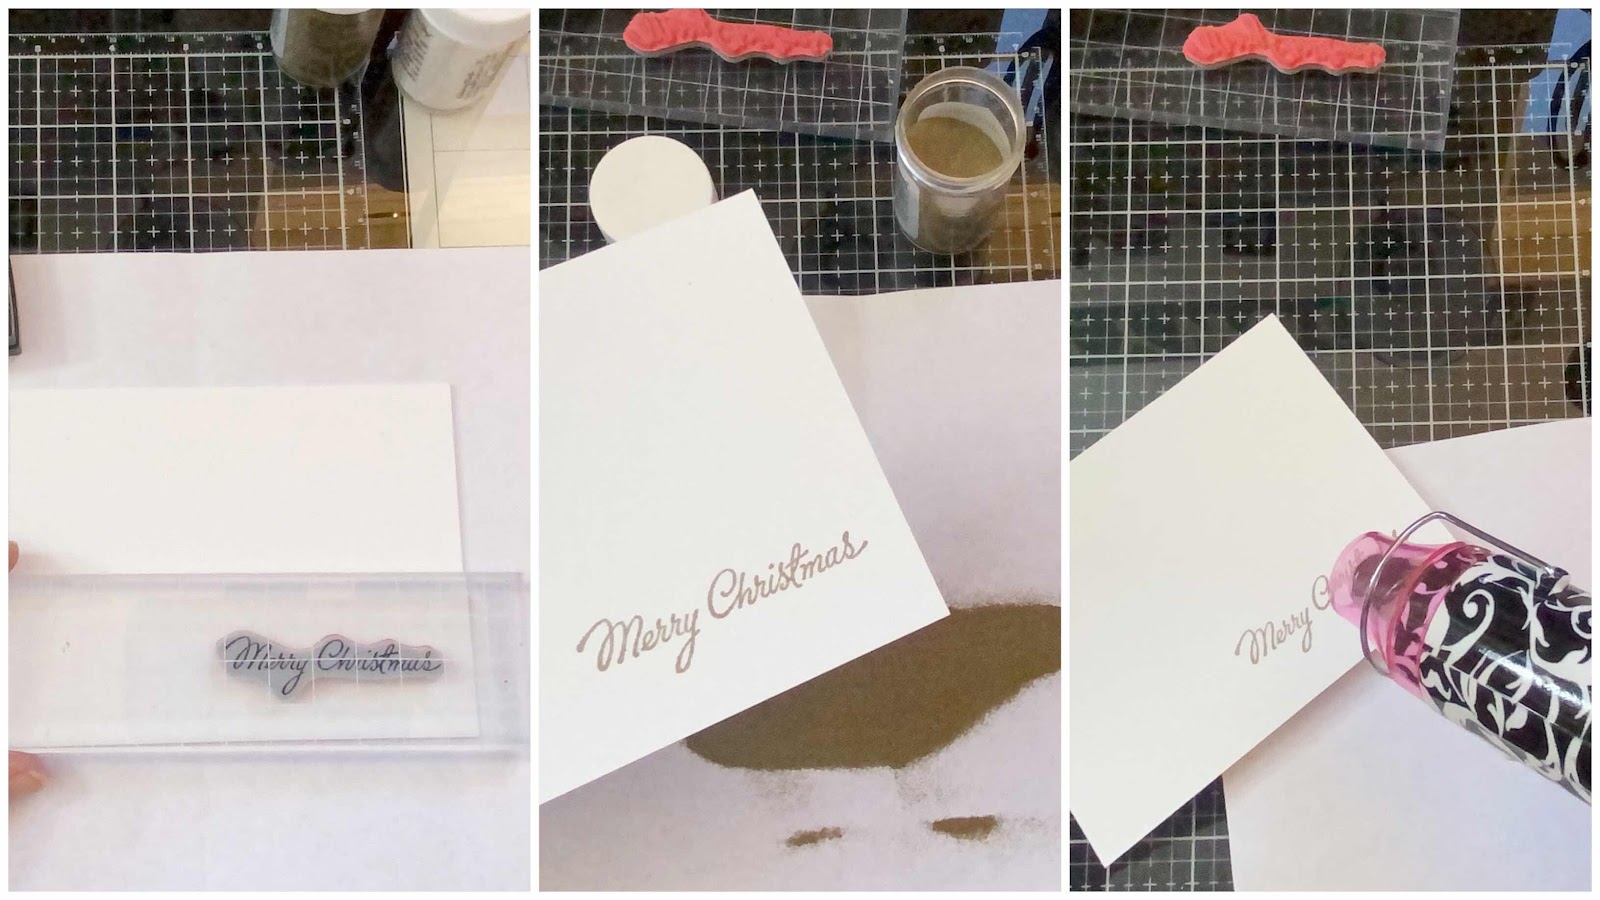
To start these cards I did the same thing, with some Ranger Archival Ink I used my stamp platform to ensure I got the darkest stamped image.
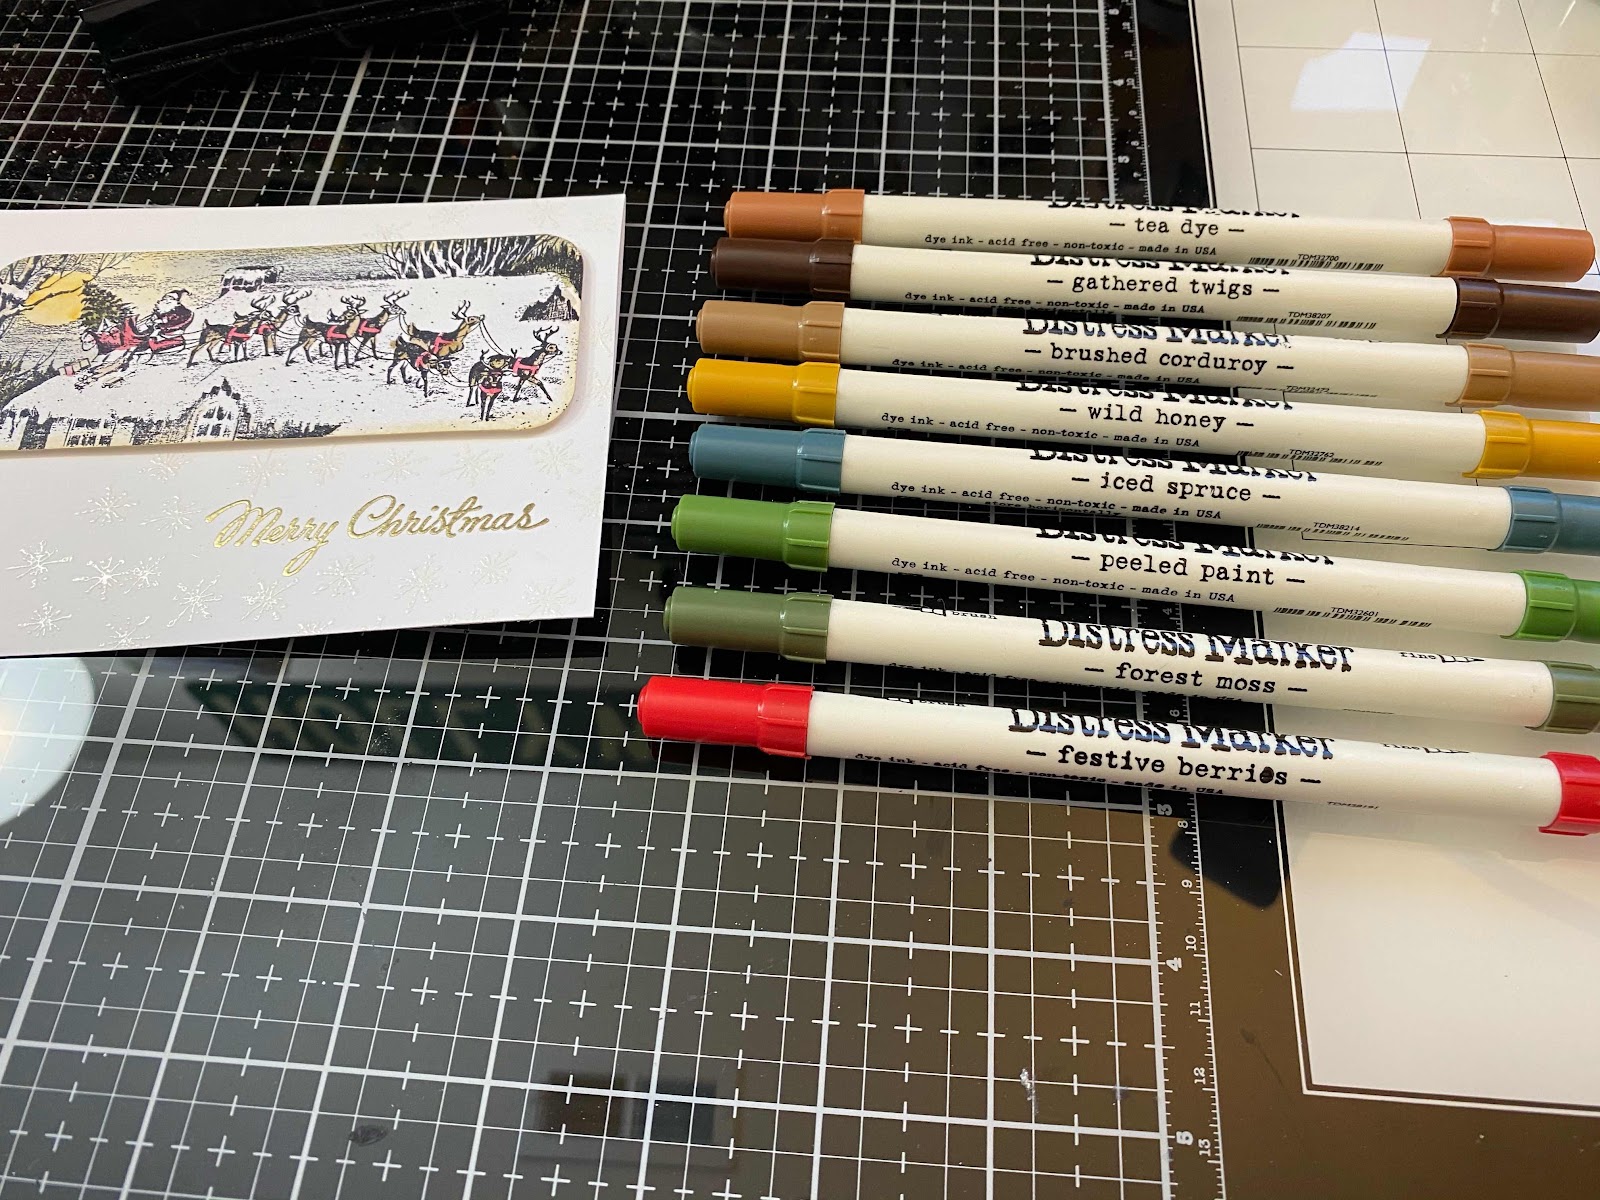
Then I picked out a few distress markers and used them with some water to paint the stamped images.
For this particular card I used the following markers:
- Tea Dye
- Gathered Twigs
- Brushed Corduroy
- Wild Honey
- Iced Spruce
- Peeled Paint
- Forest Moss
- Festive Berries
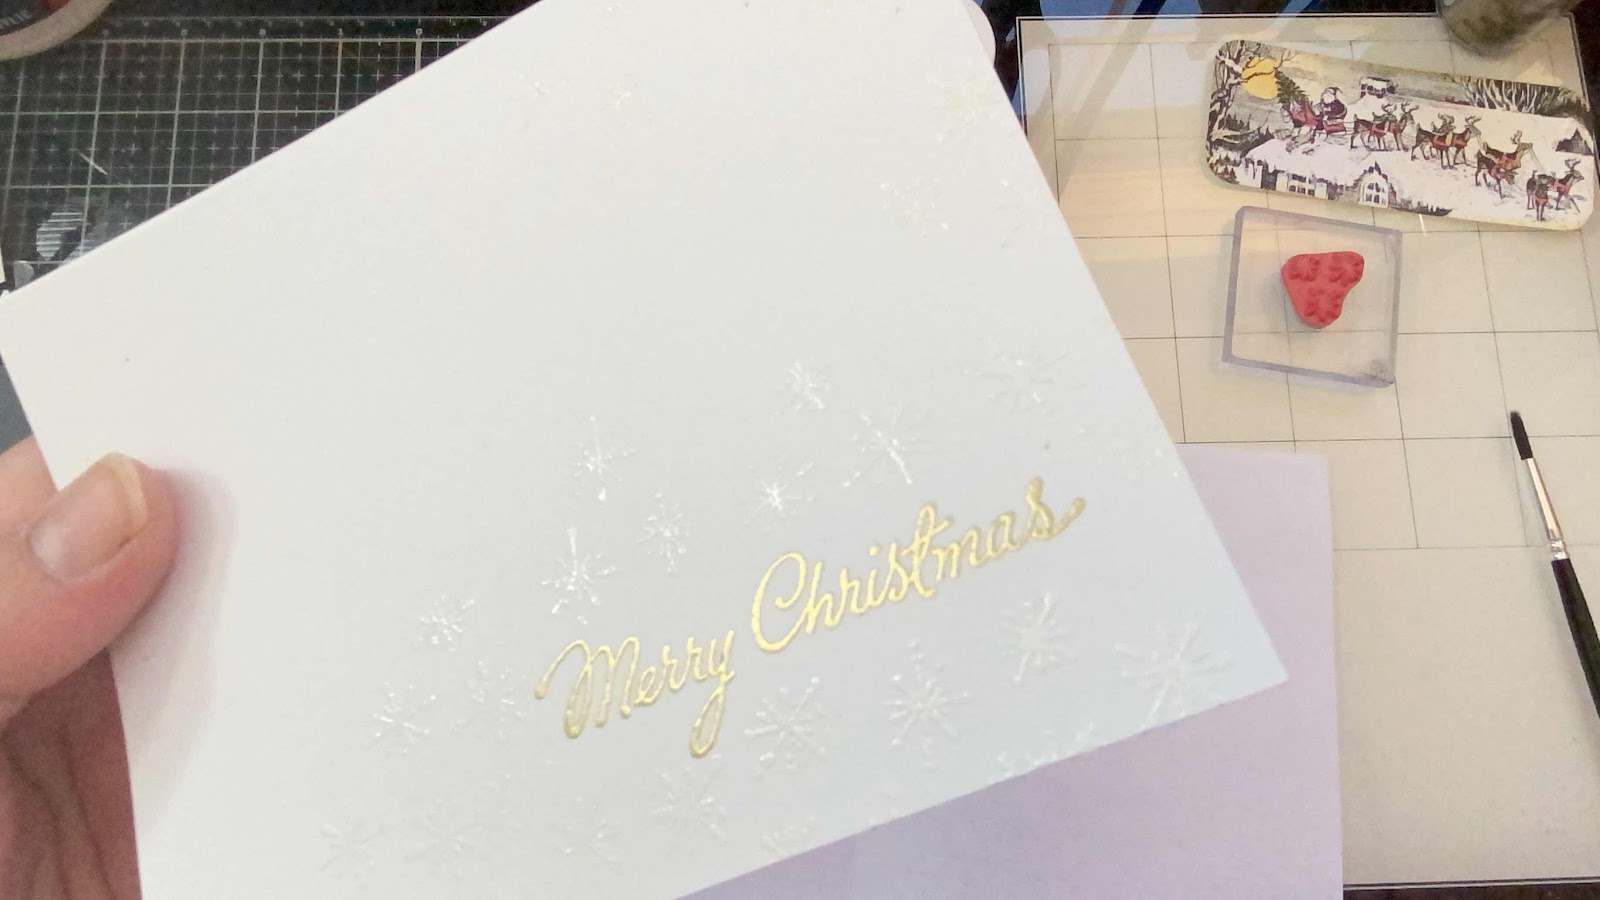
I added a little bit of shimmer with Wink of Stella pen to all the areas with snow to give it a pretty sparkle, without using messy glitter!
I cut out the stamped image, rounded the corners and I added a little Antique Linen around the edge of the image with a blending tool to give it a little vintage look
Using StazOn ink I stamped my greeting, poured some gold embossing powder on and used a heat gun to finish it off. Then I stamped the little star burst from the same stamp set around the outer edge of the card base, poured white embossing powder and used the heat gun to finish it off.
Using some foam mounting tape I taped the image to the base to give it a little dimension.
And there you have it! Beautifully simple cards!
For more project inspiration follow me on Instagram and don’t forget to subscribe to my YouTube channel!!
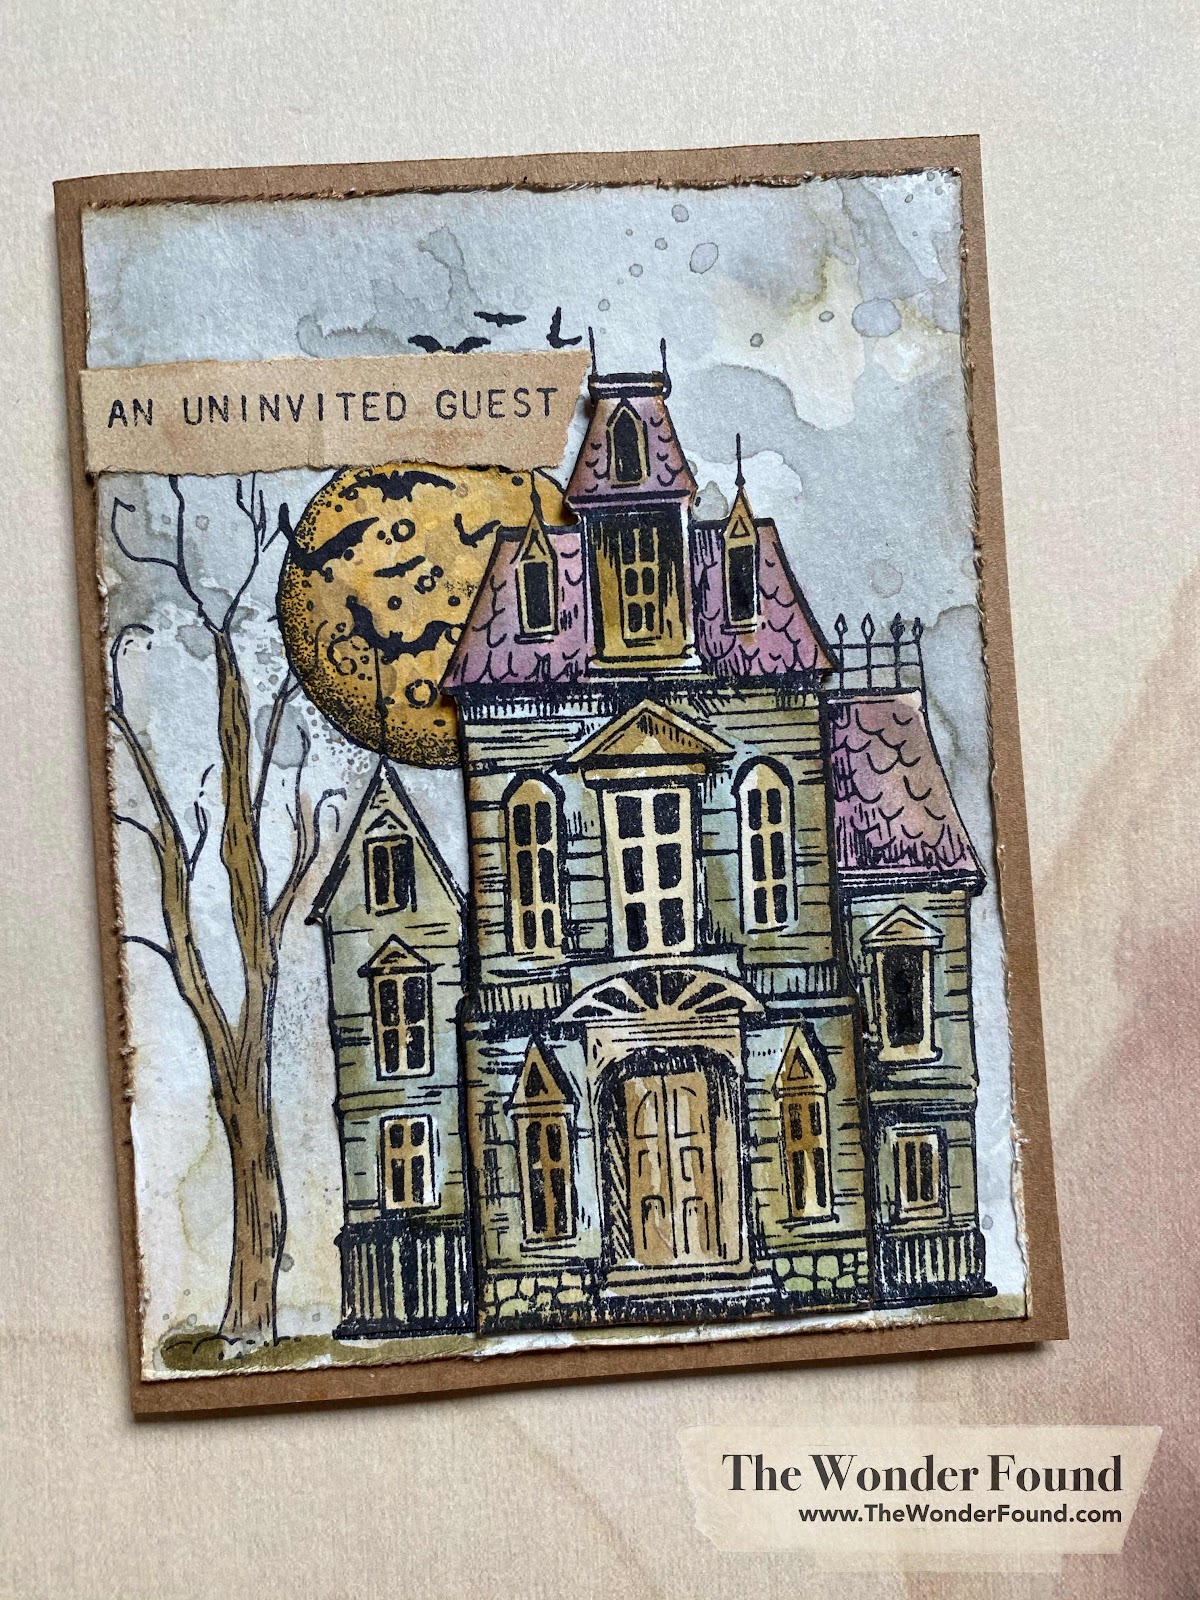
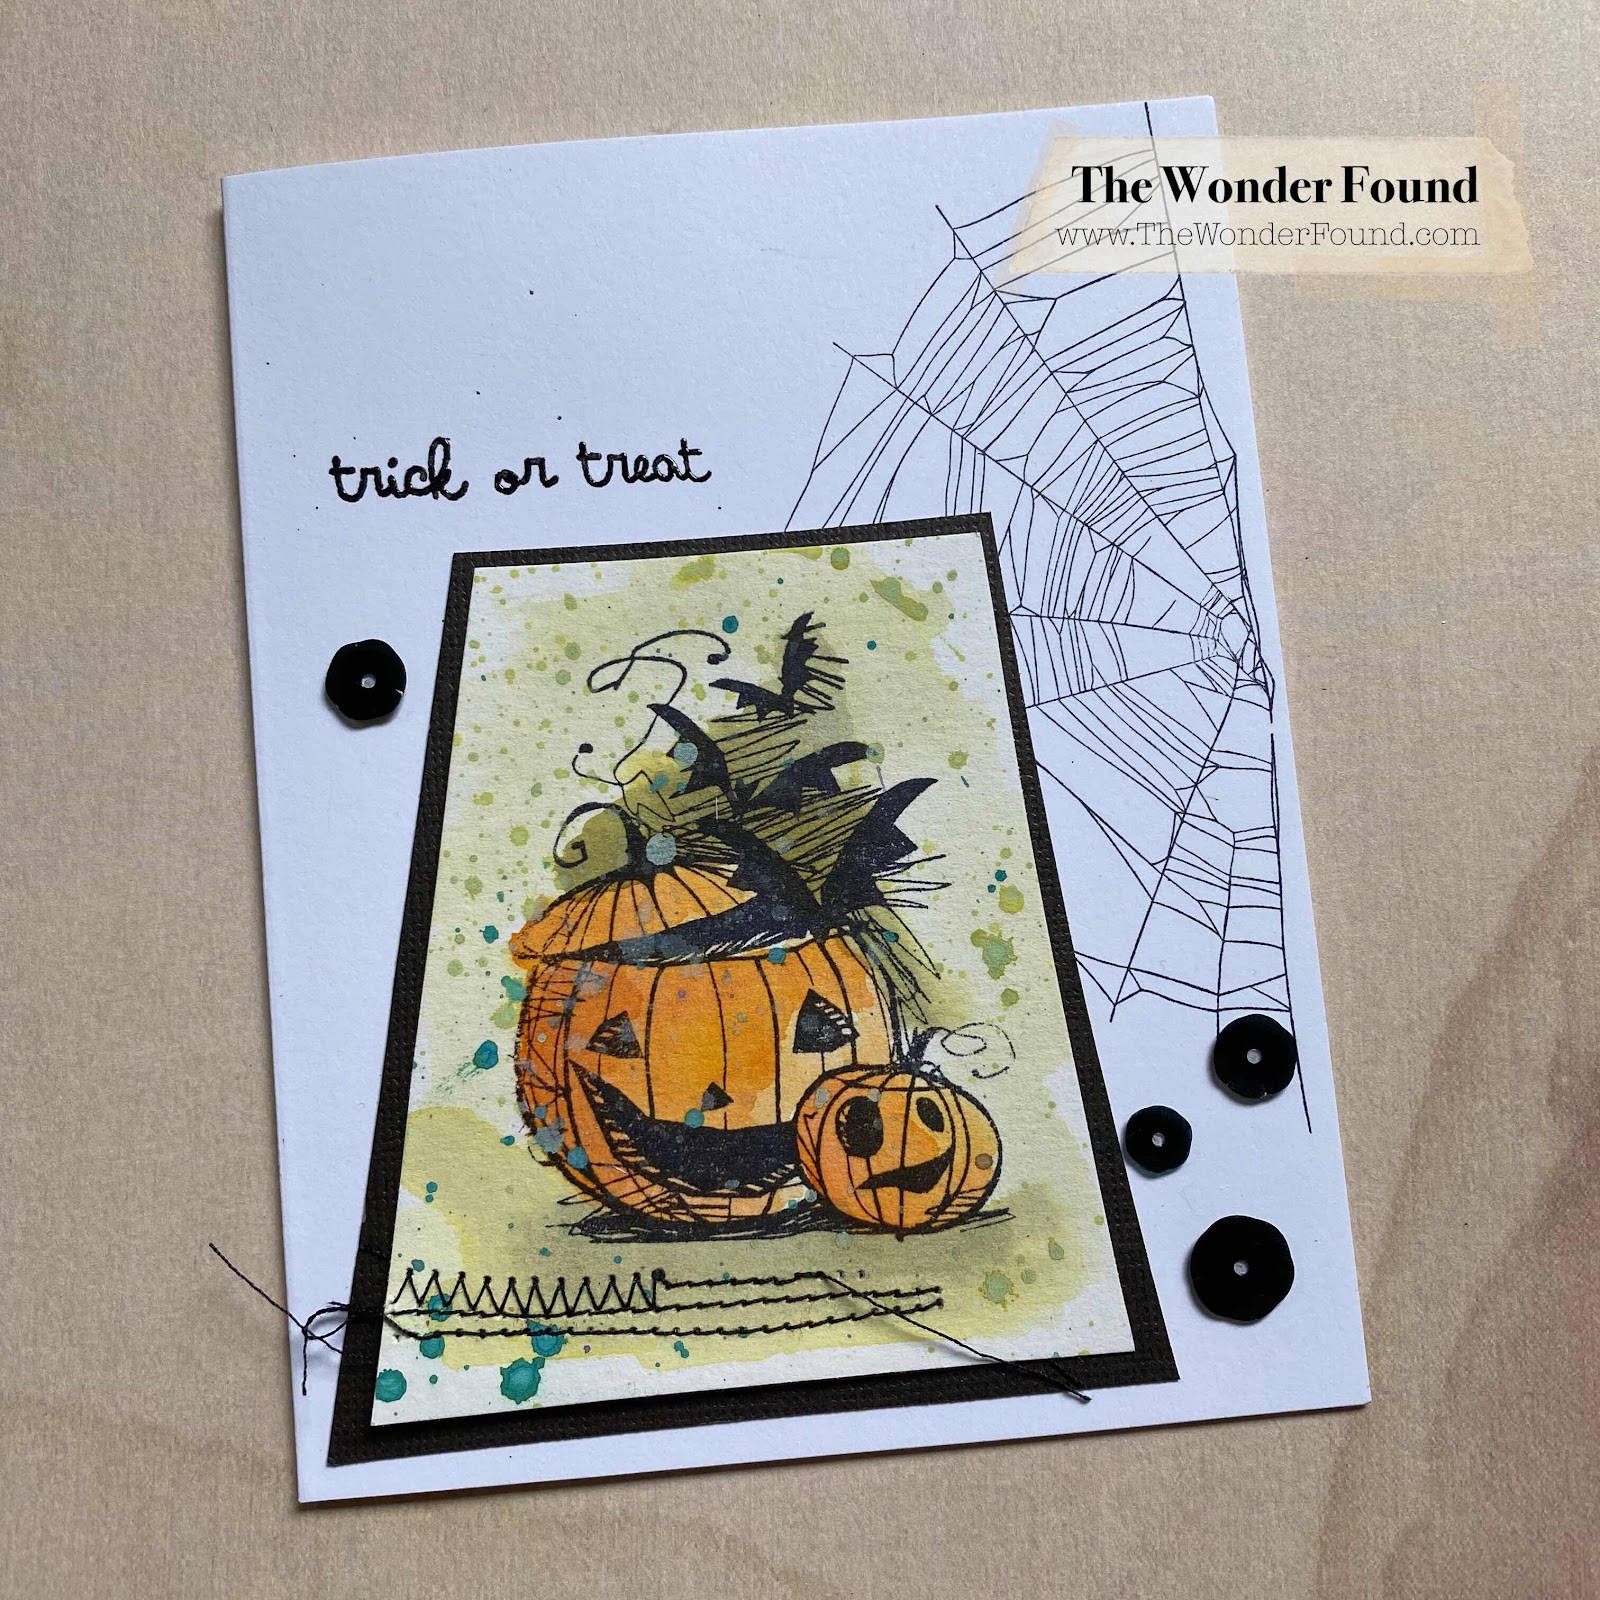
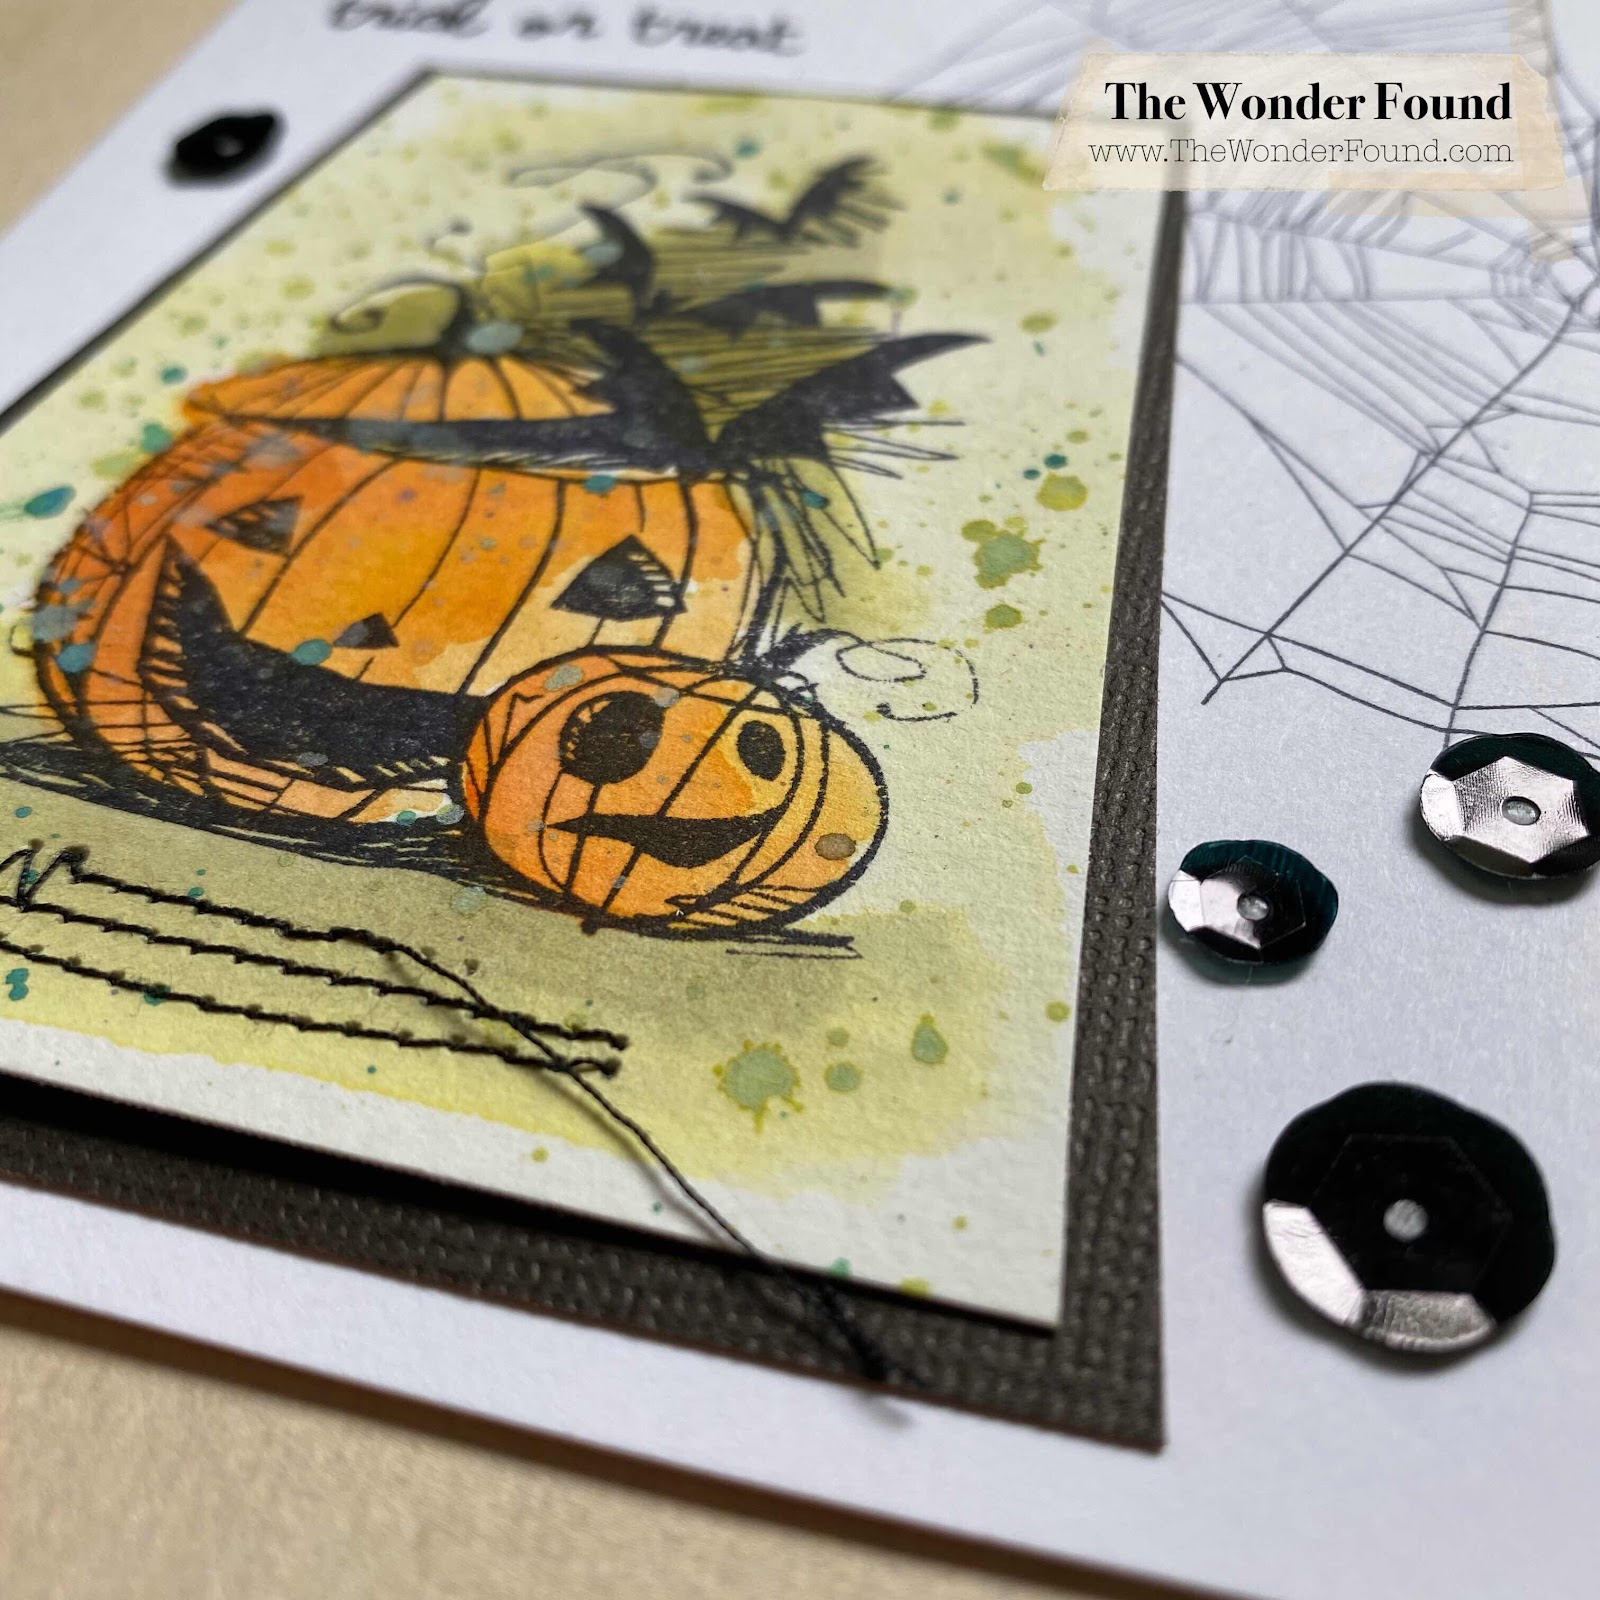
I created this card using the new Tim Holtz ‘Sketch Manor’ stamp set.
I started by dipping a piece of water color paper into inks, drying in between dippings. I then created my scene, I stamped the house, tree, moon and bats on to the base paper. I also stamped an additional house onto another piece of water color paper.
I colored the moon and tree with the water color method using distress inks and a water pen.
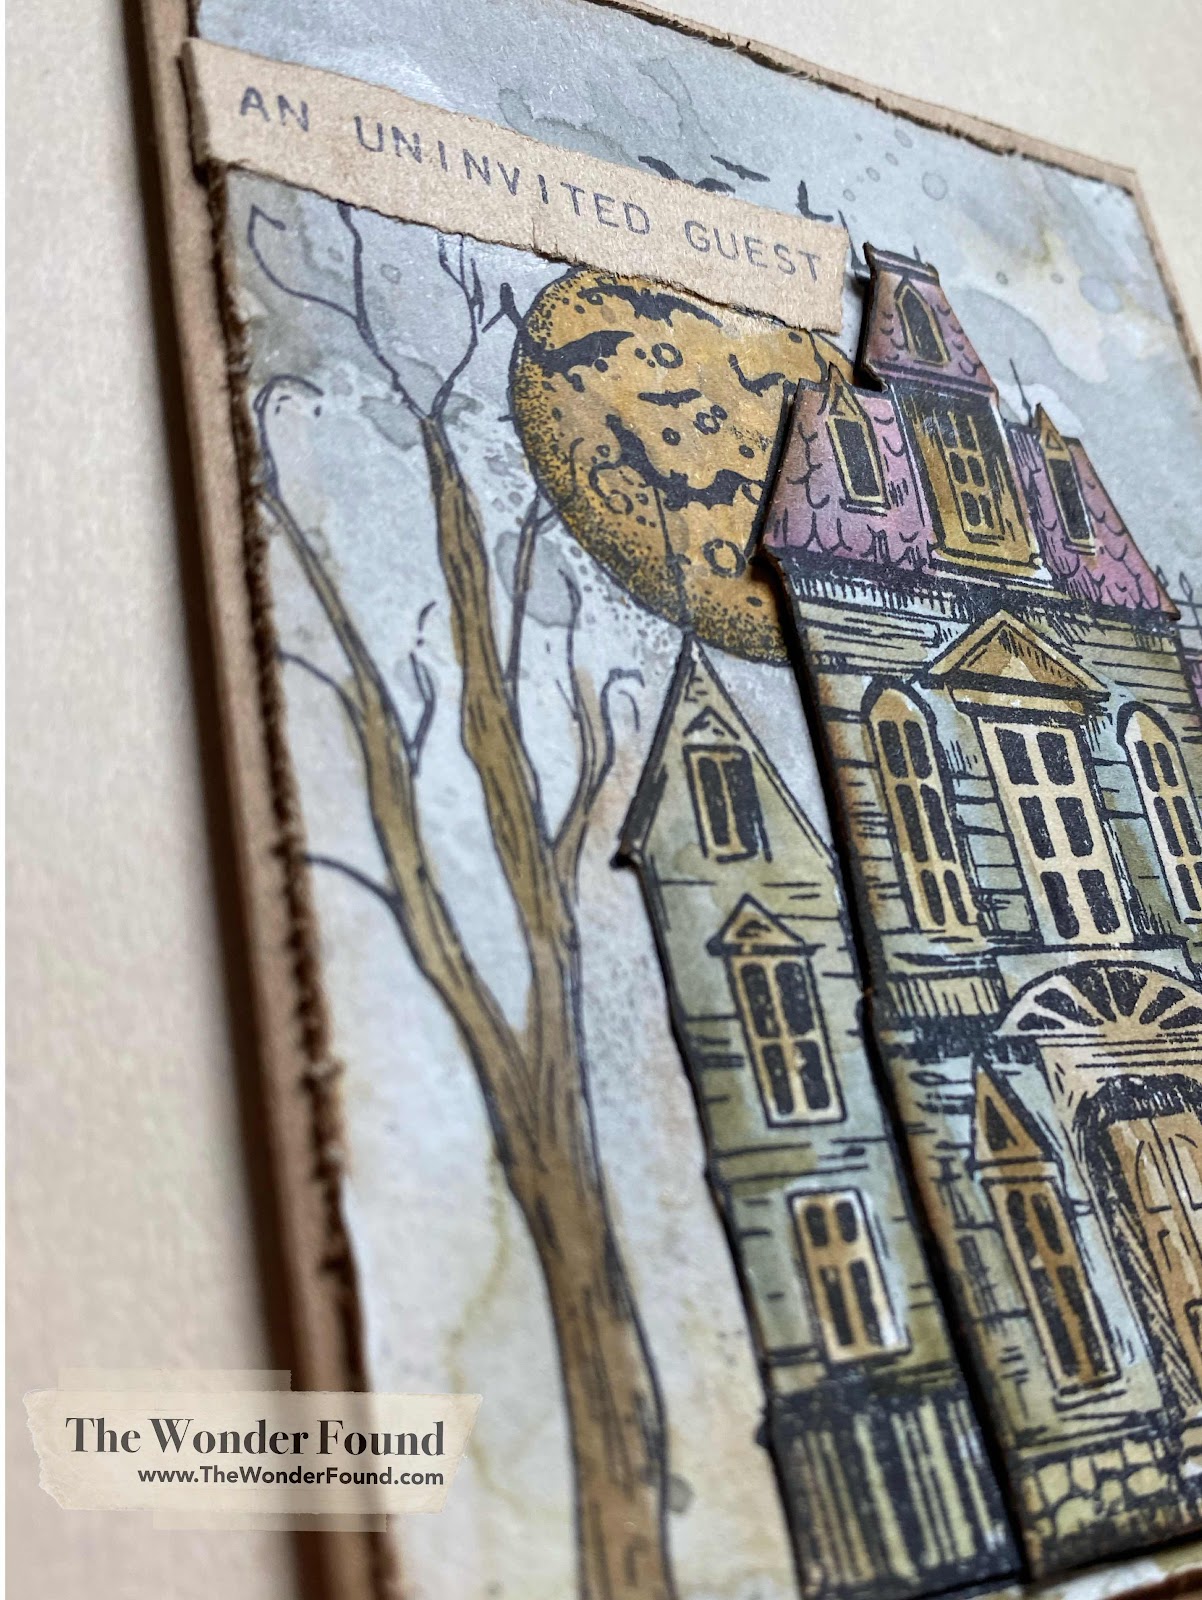
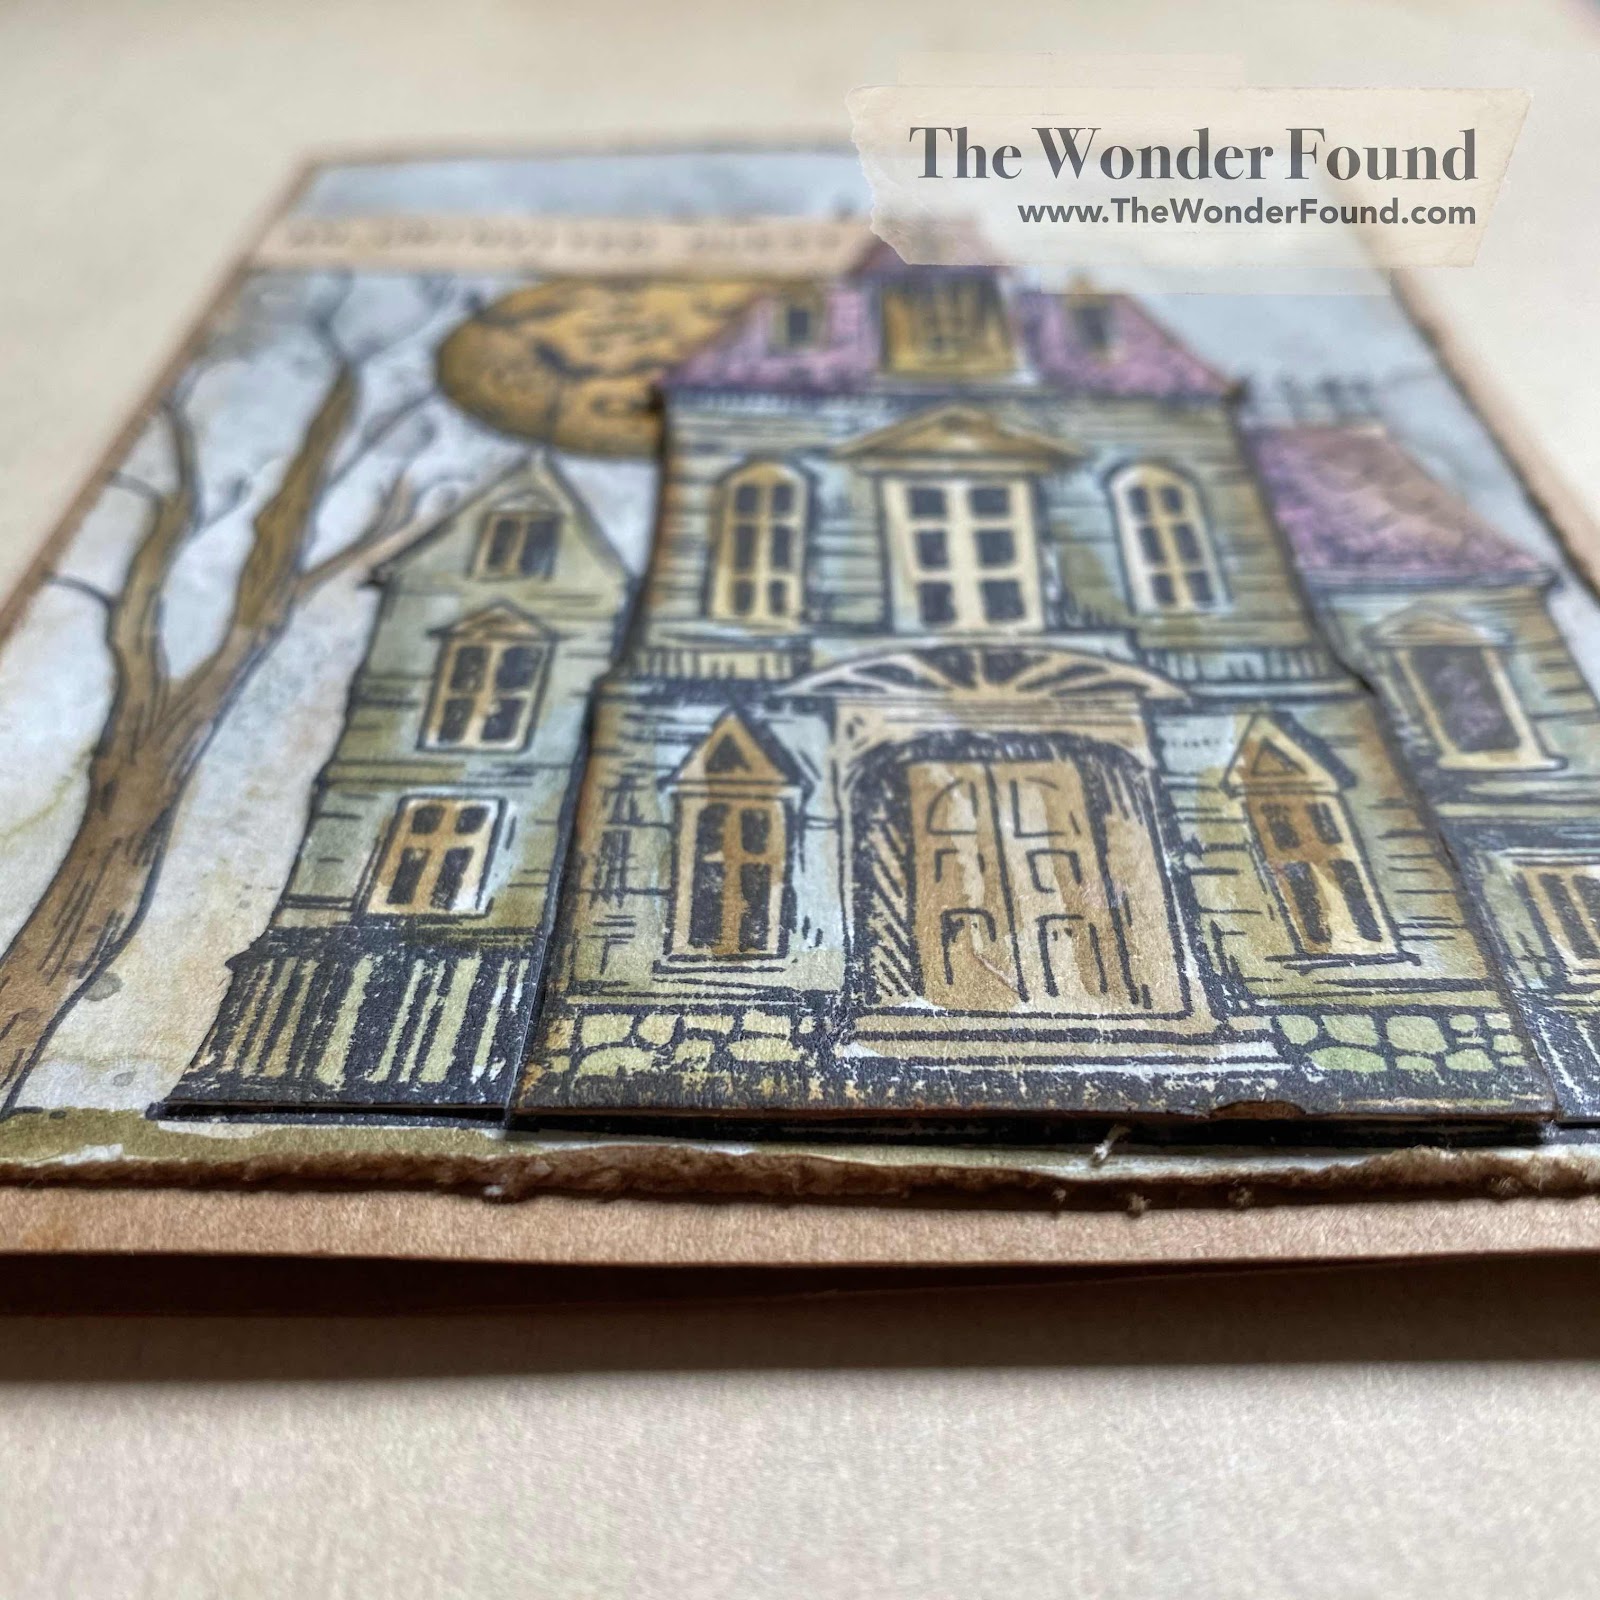
Next I colored the “extra” stamped house using the same method. I cut the house into three sections; the left wing, the middle part of the house and the right wing. I then glued the “wings” down onto the base of the card. I took the middle of the house and glued it onto another piece of paper so it would stand off of the card a little more.
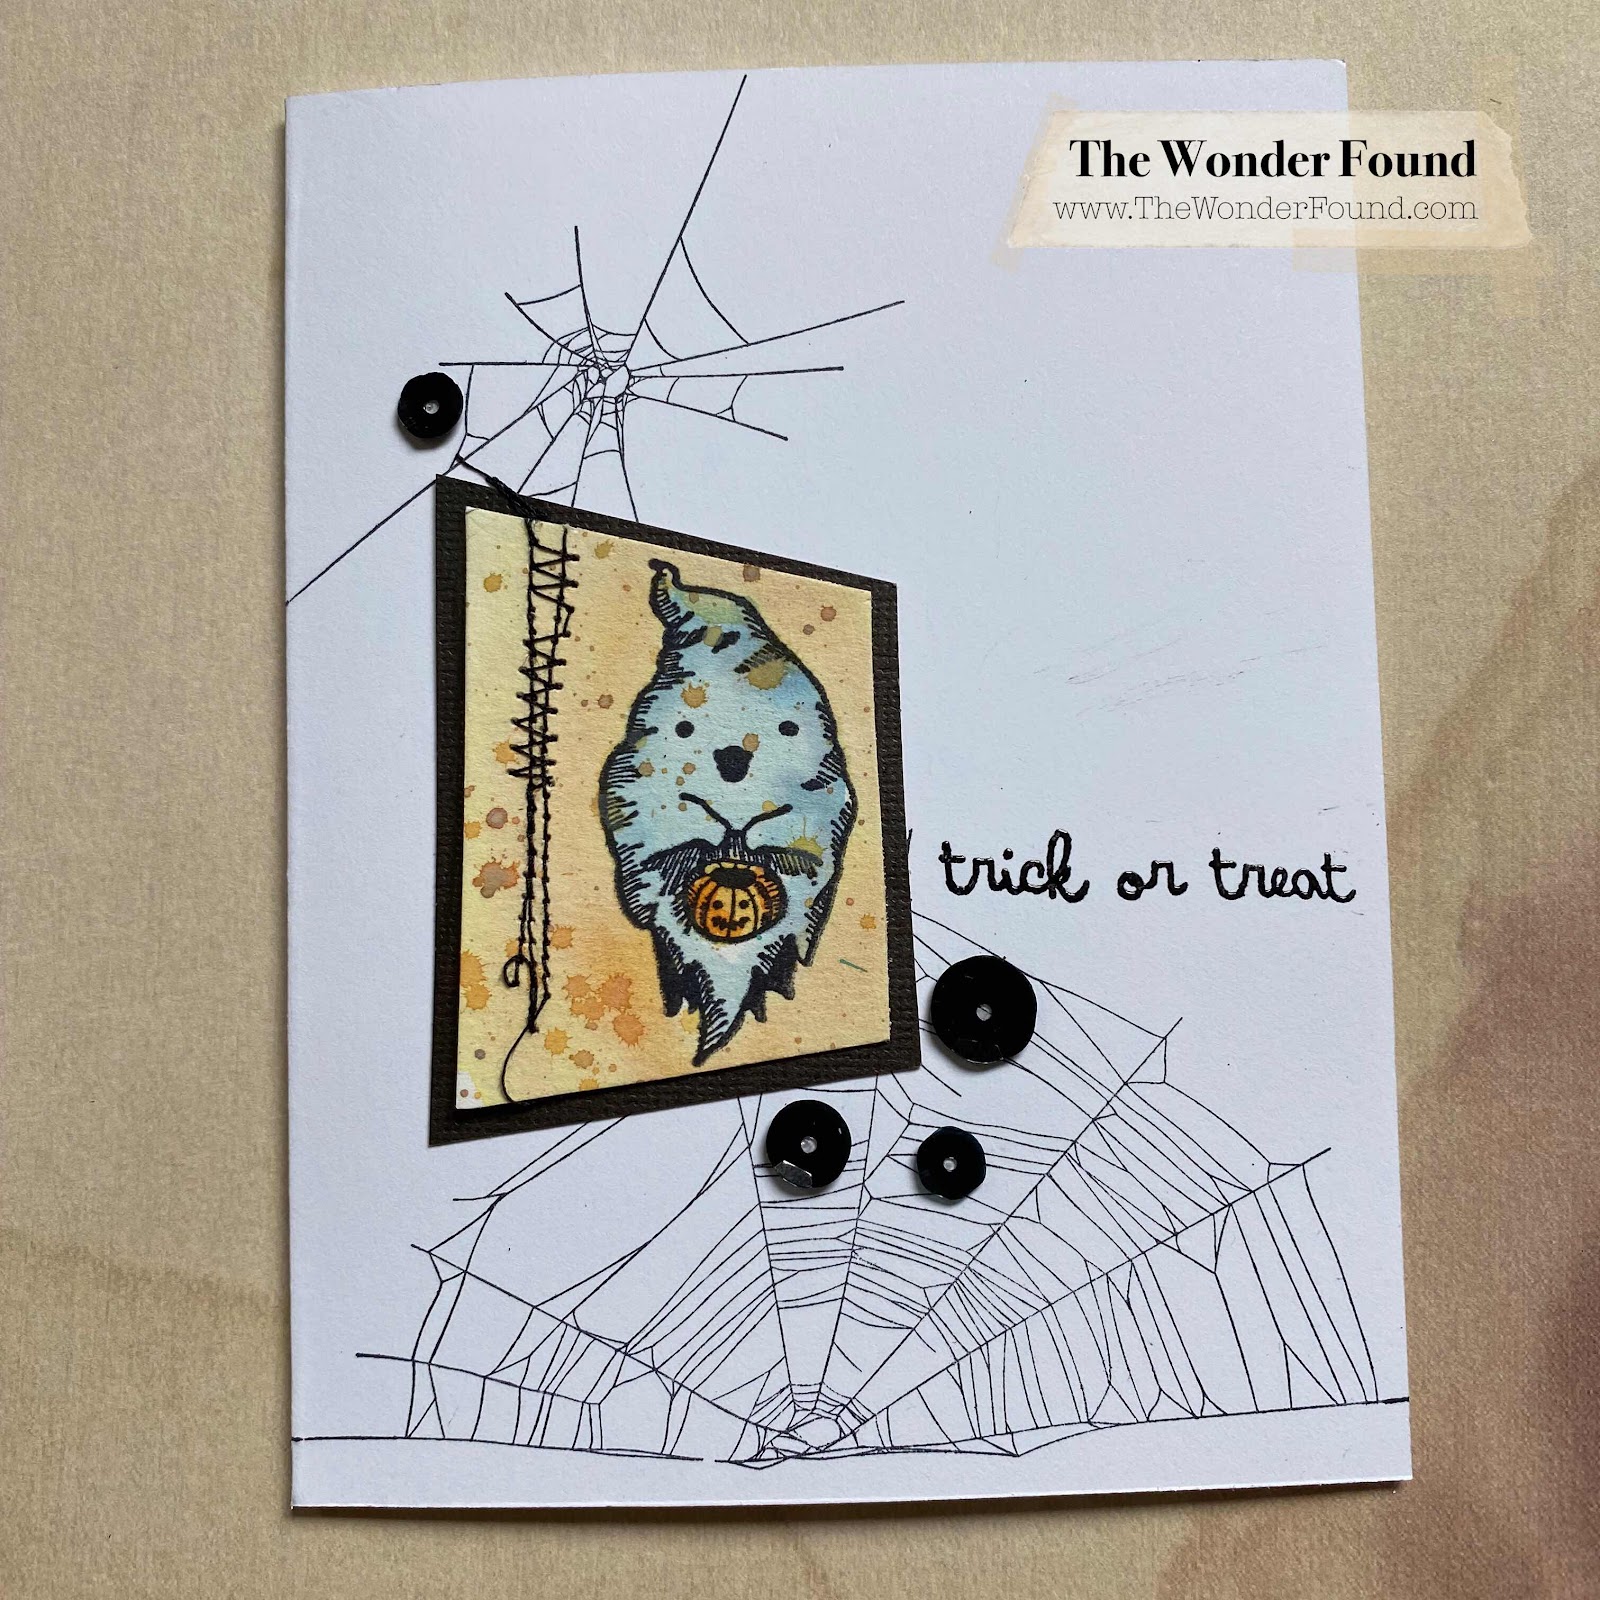
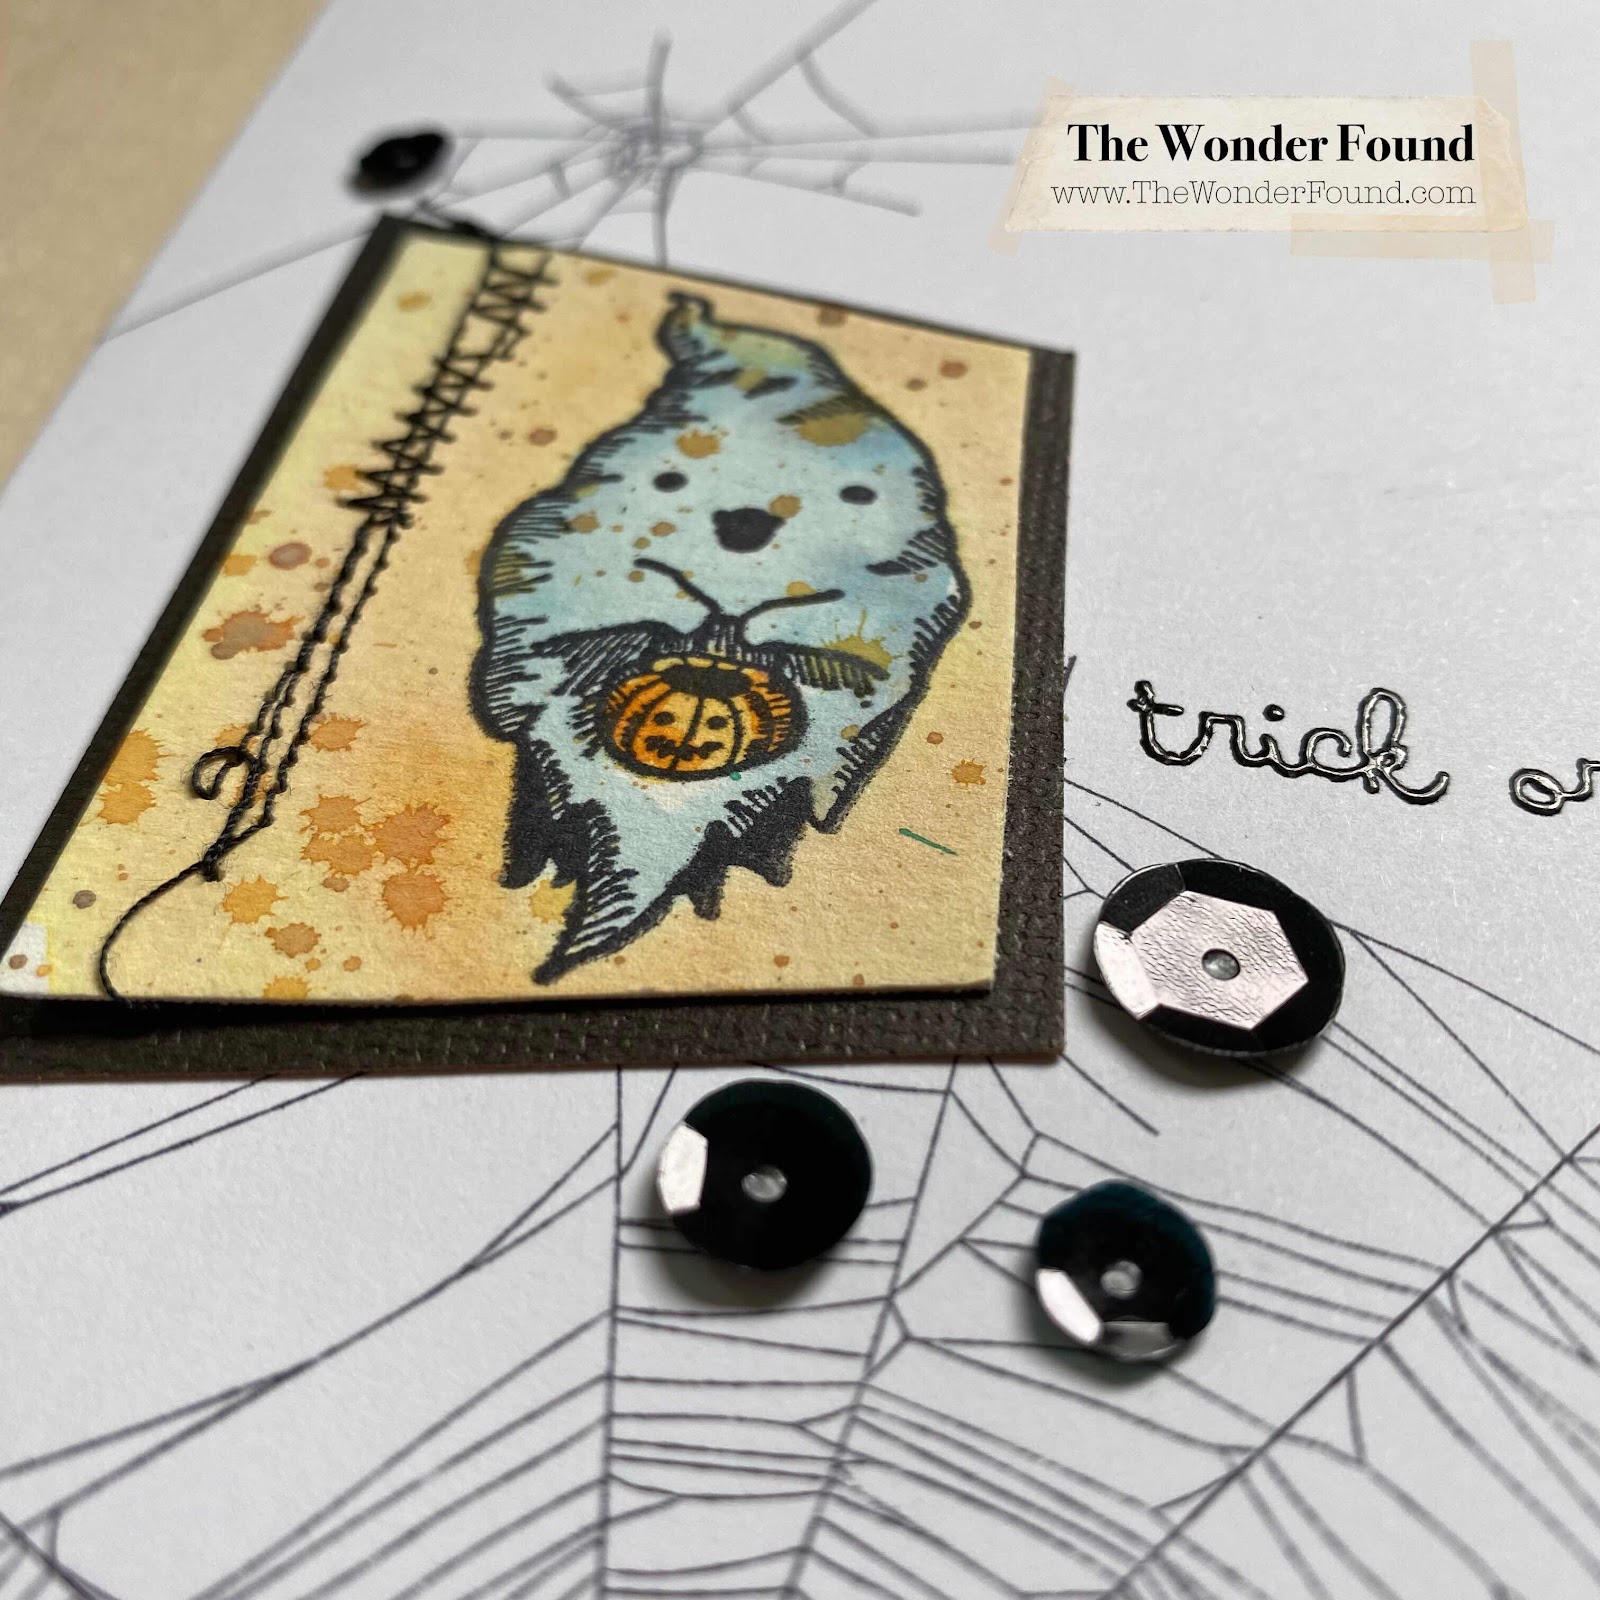
I used a blank page form an old book and stamped ‘an uninvited guest’ from the ‘Tiny Text - Halloween’ stamp set.
For more project inspiration follow me on Instagram and don’t forget to subscribe to my YouTube channel!!
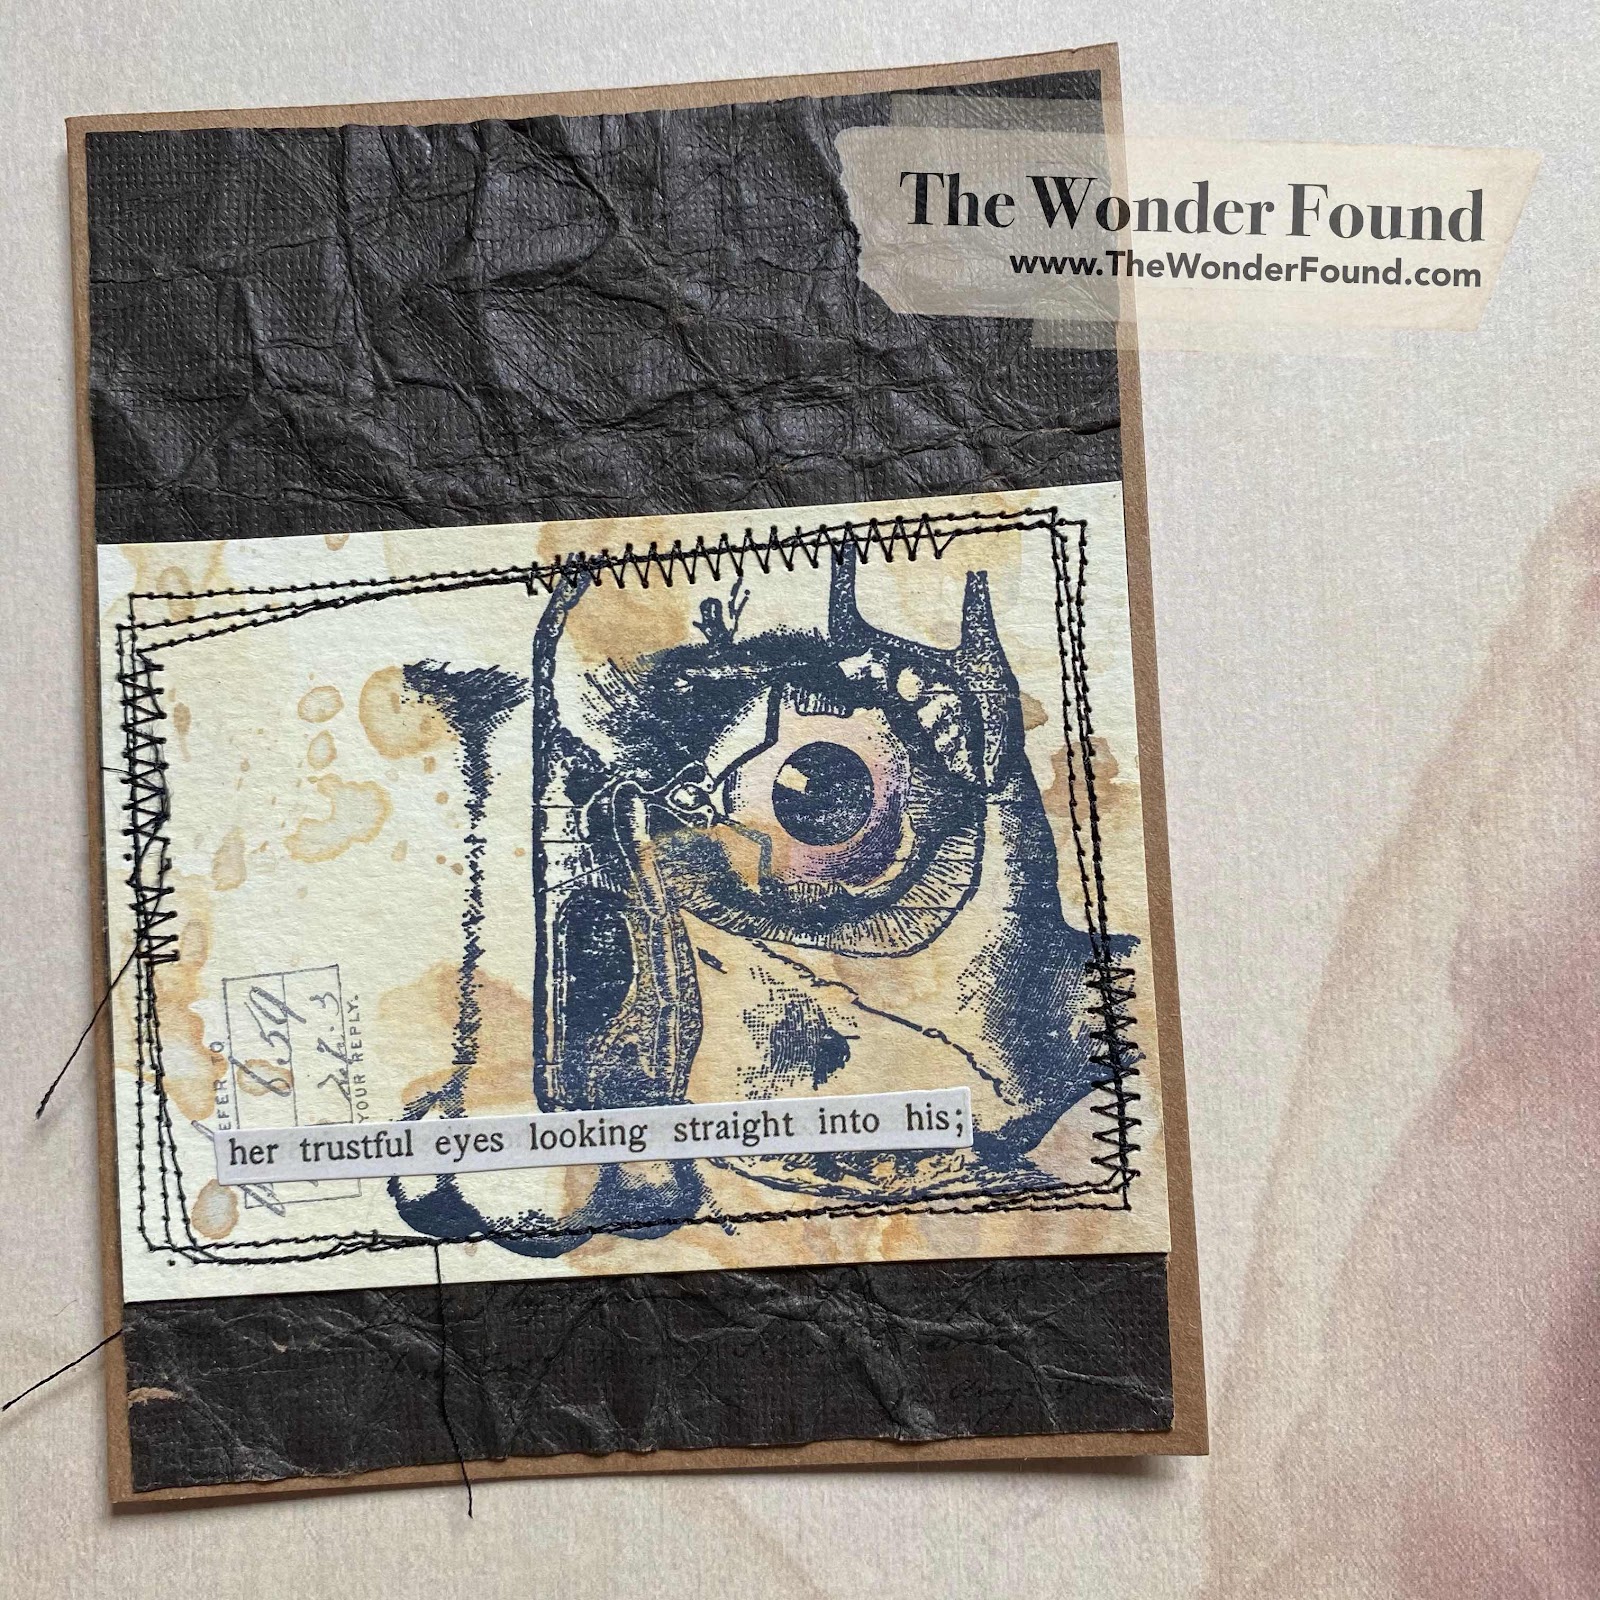
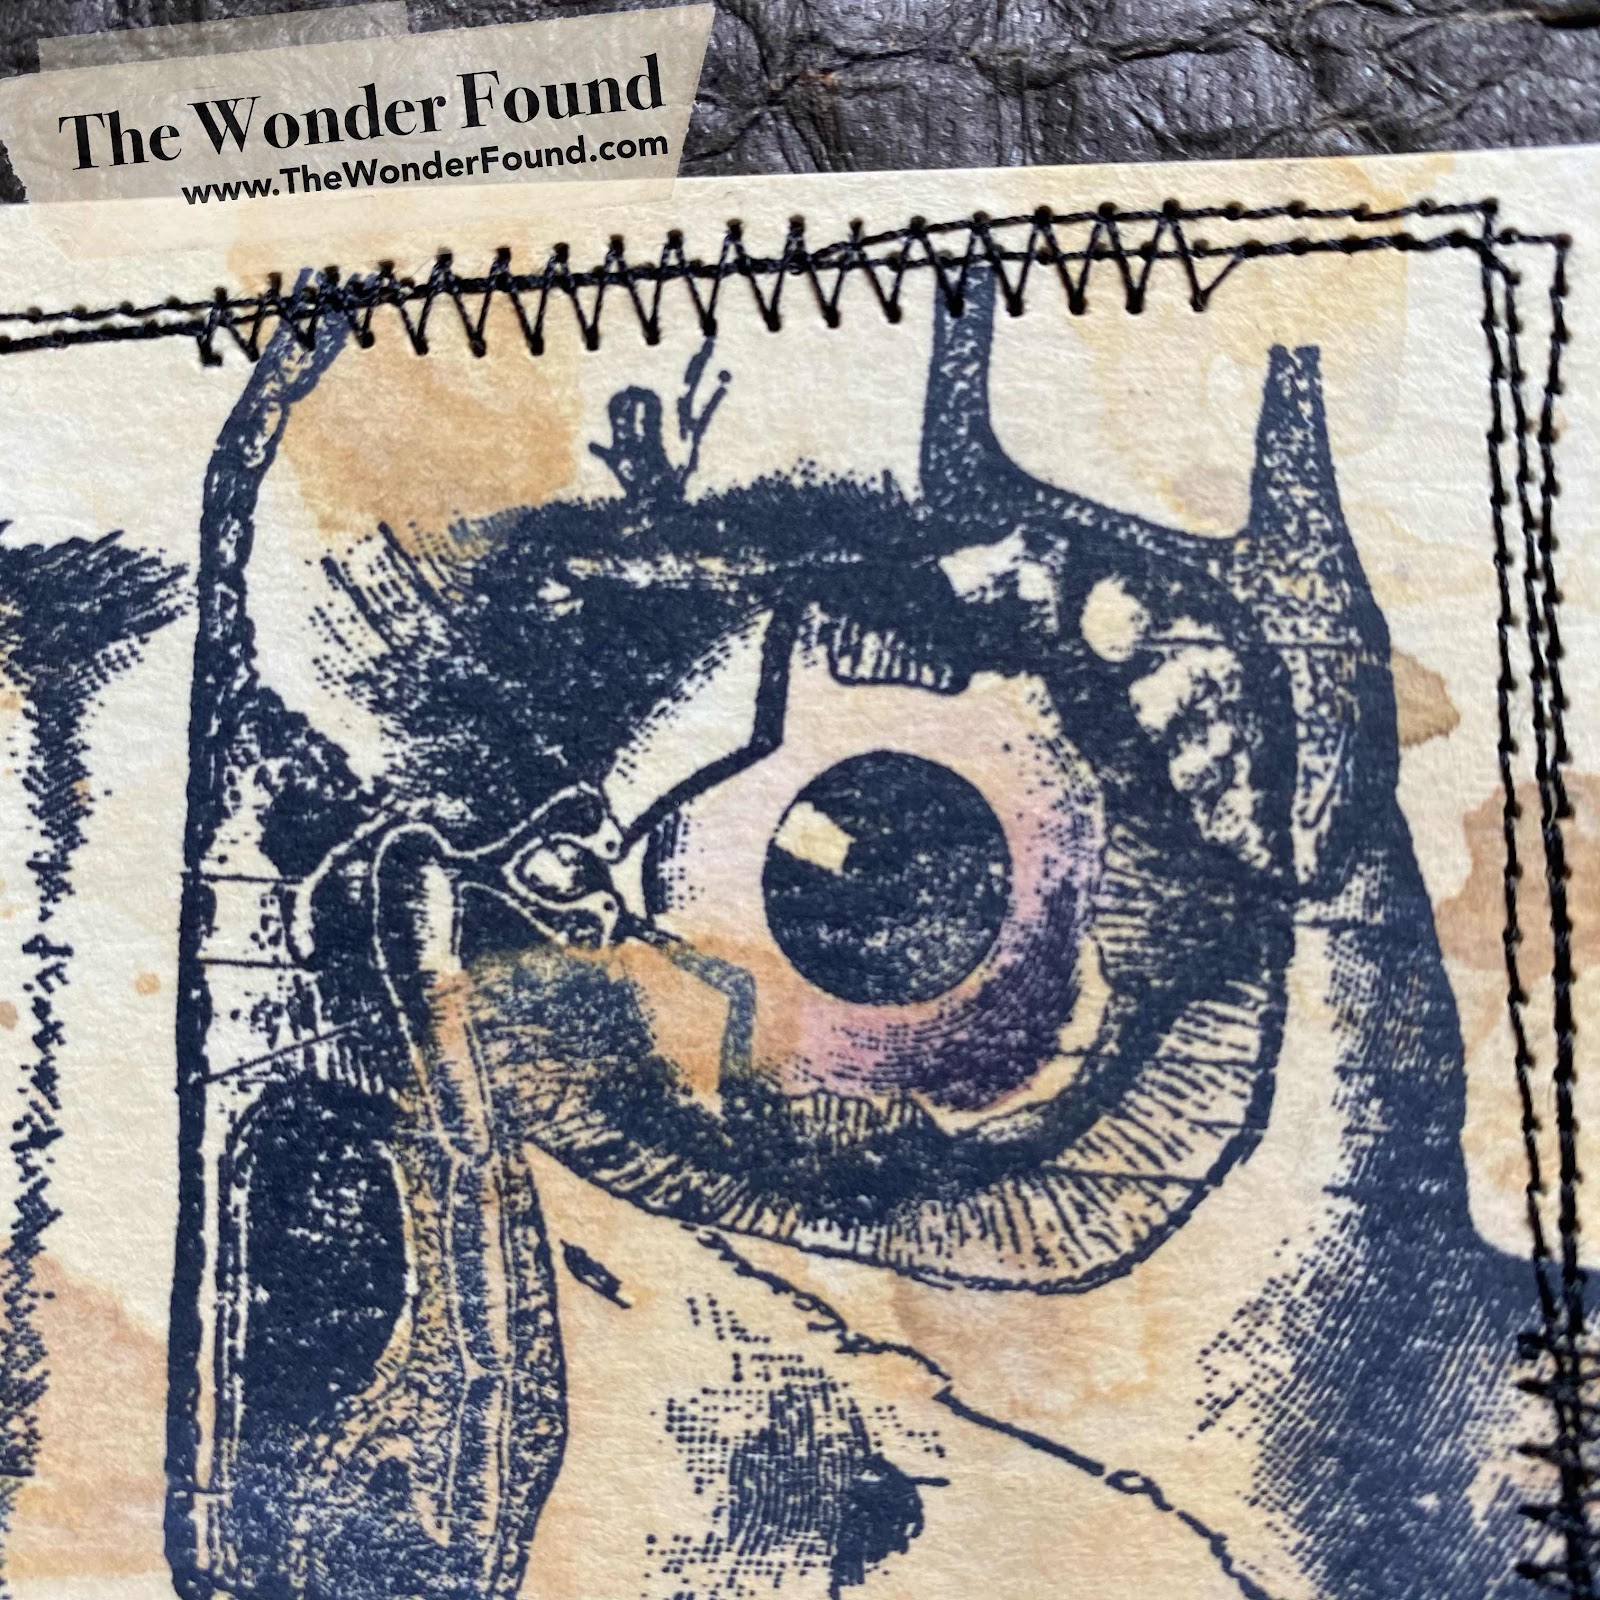
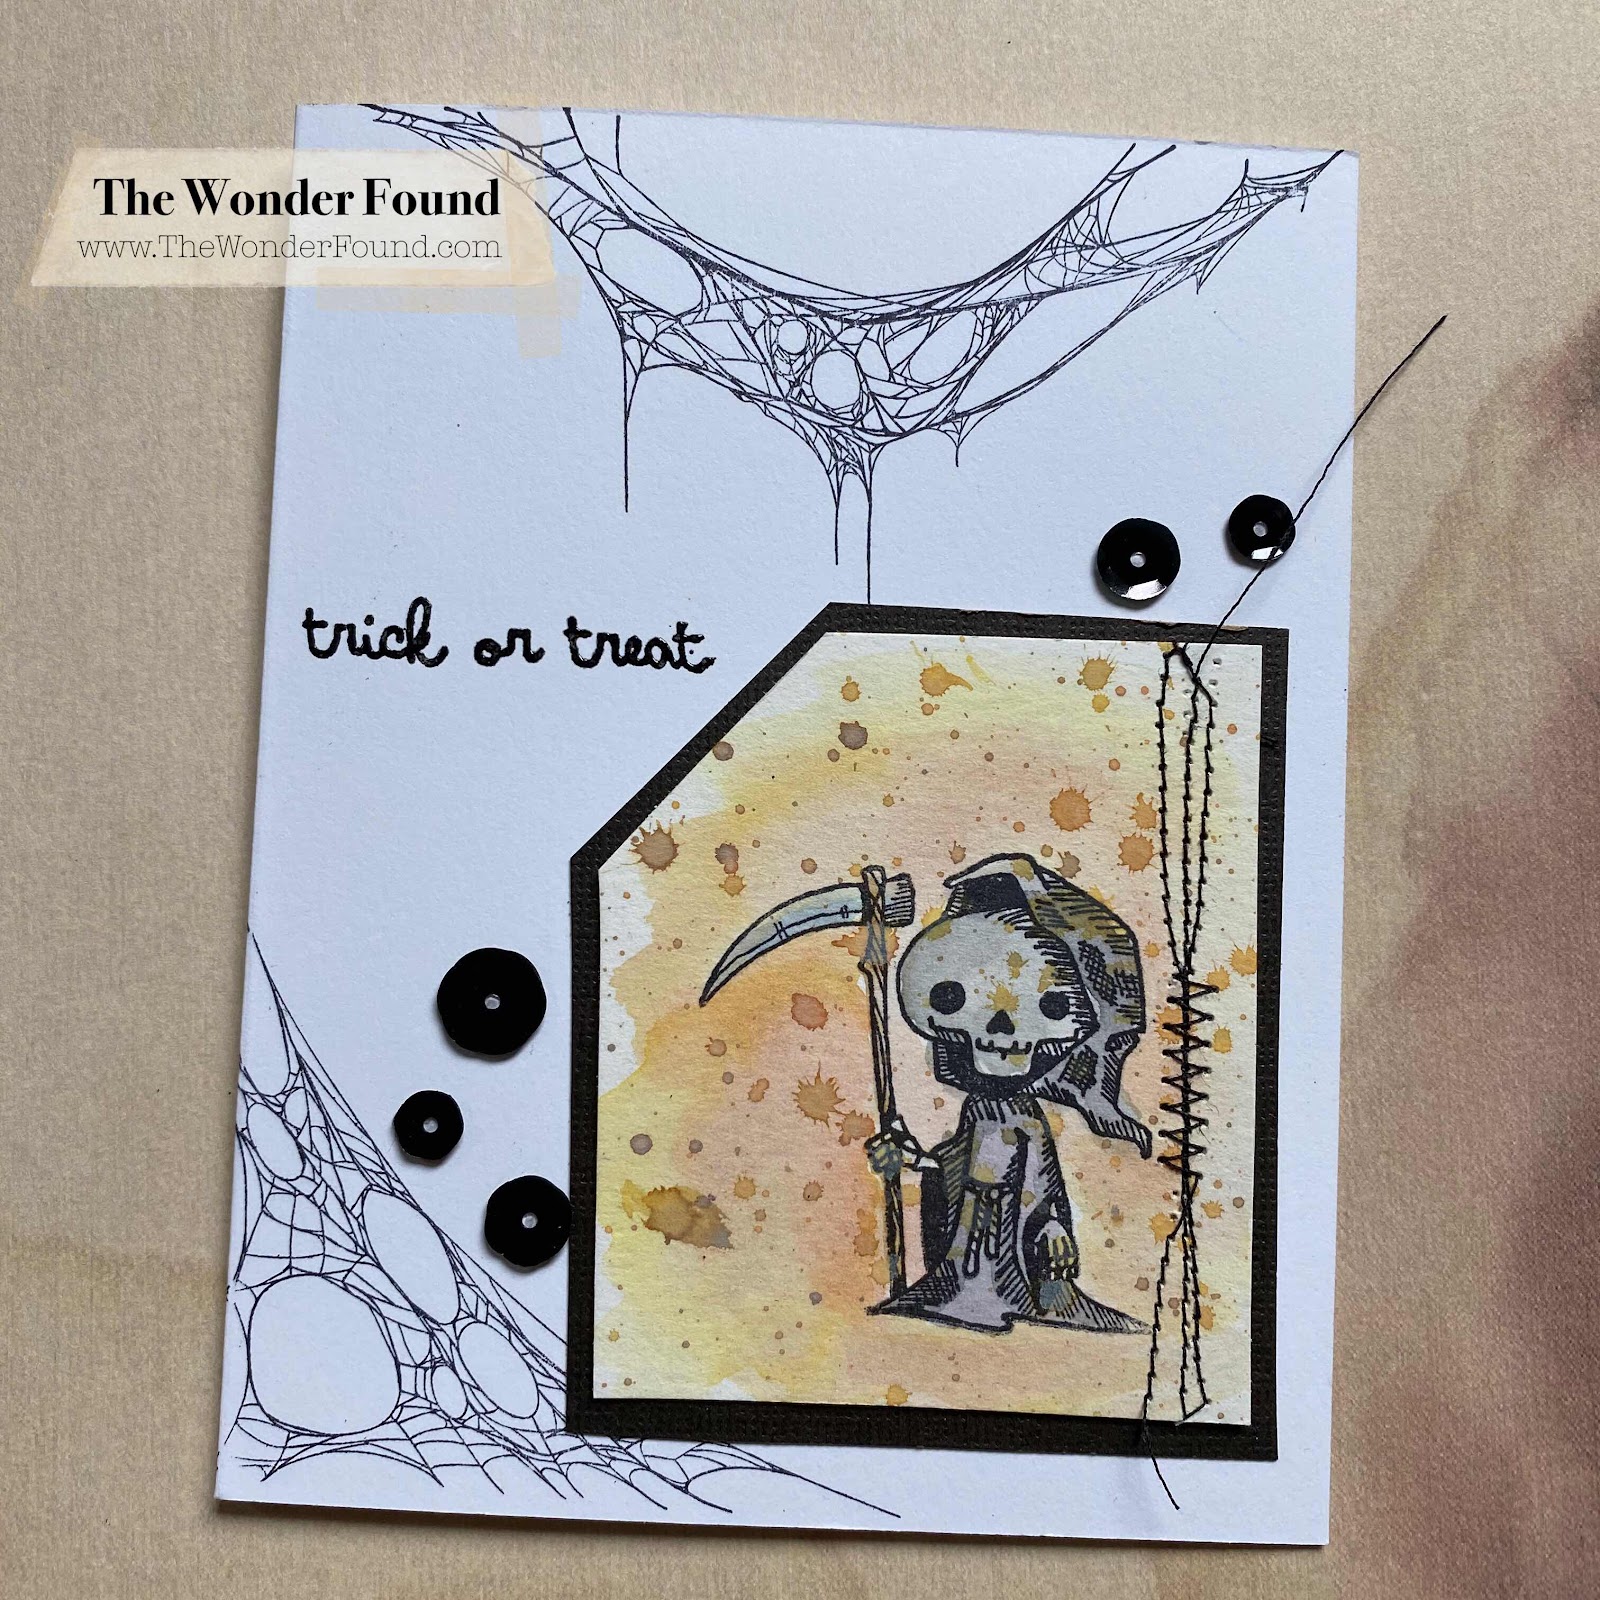
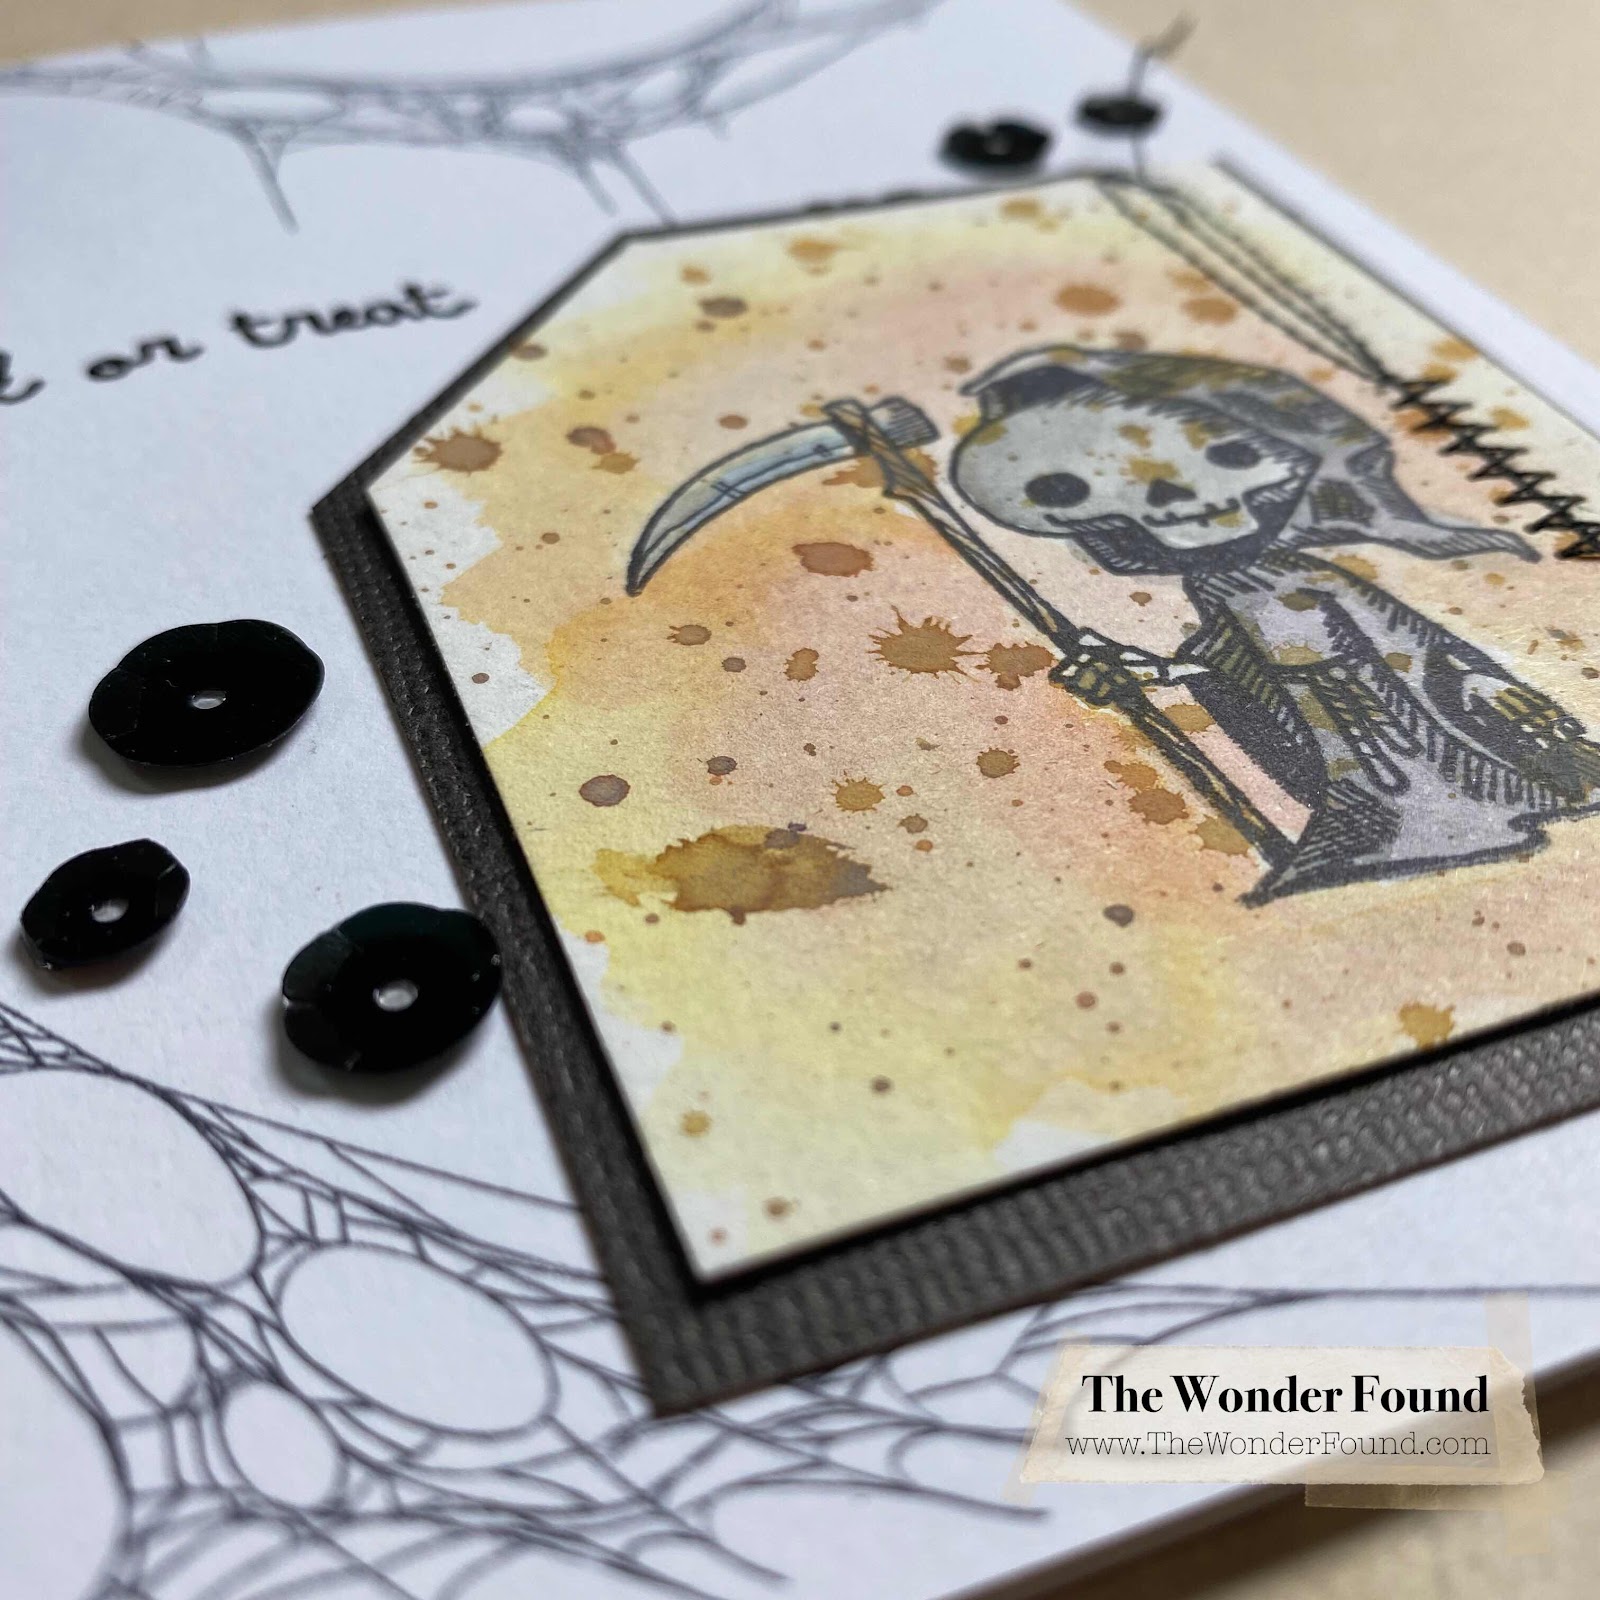
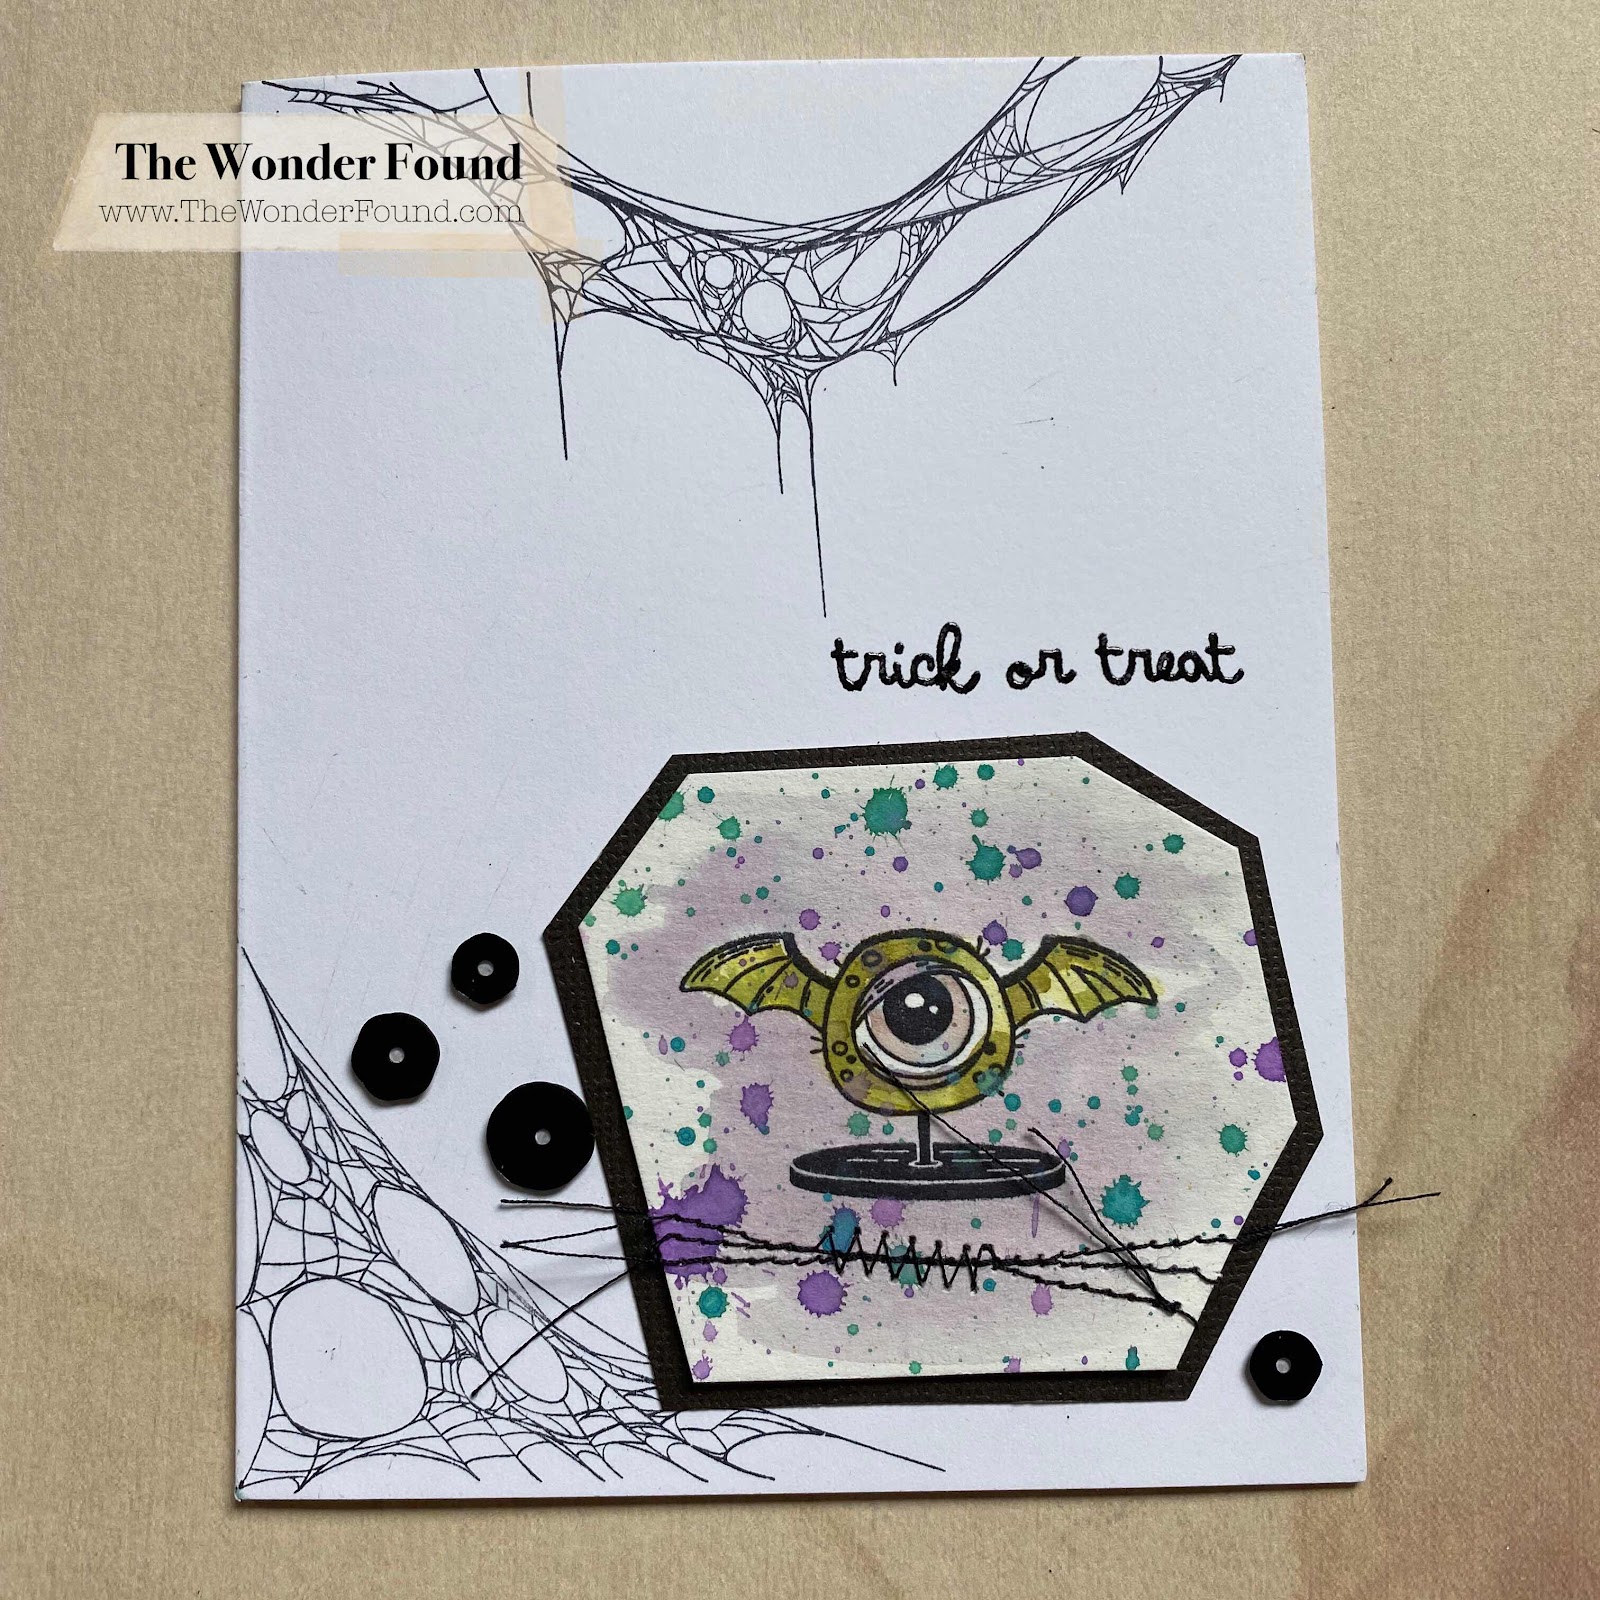
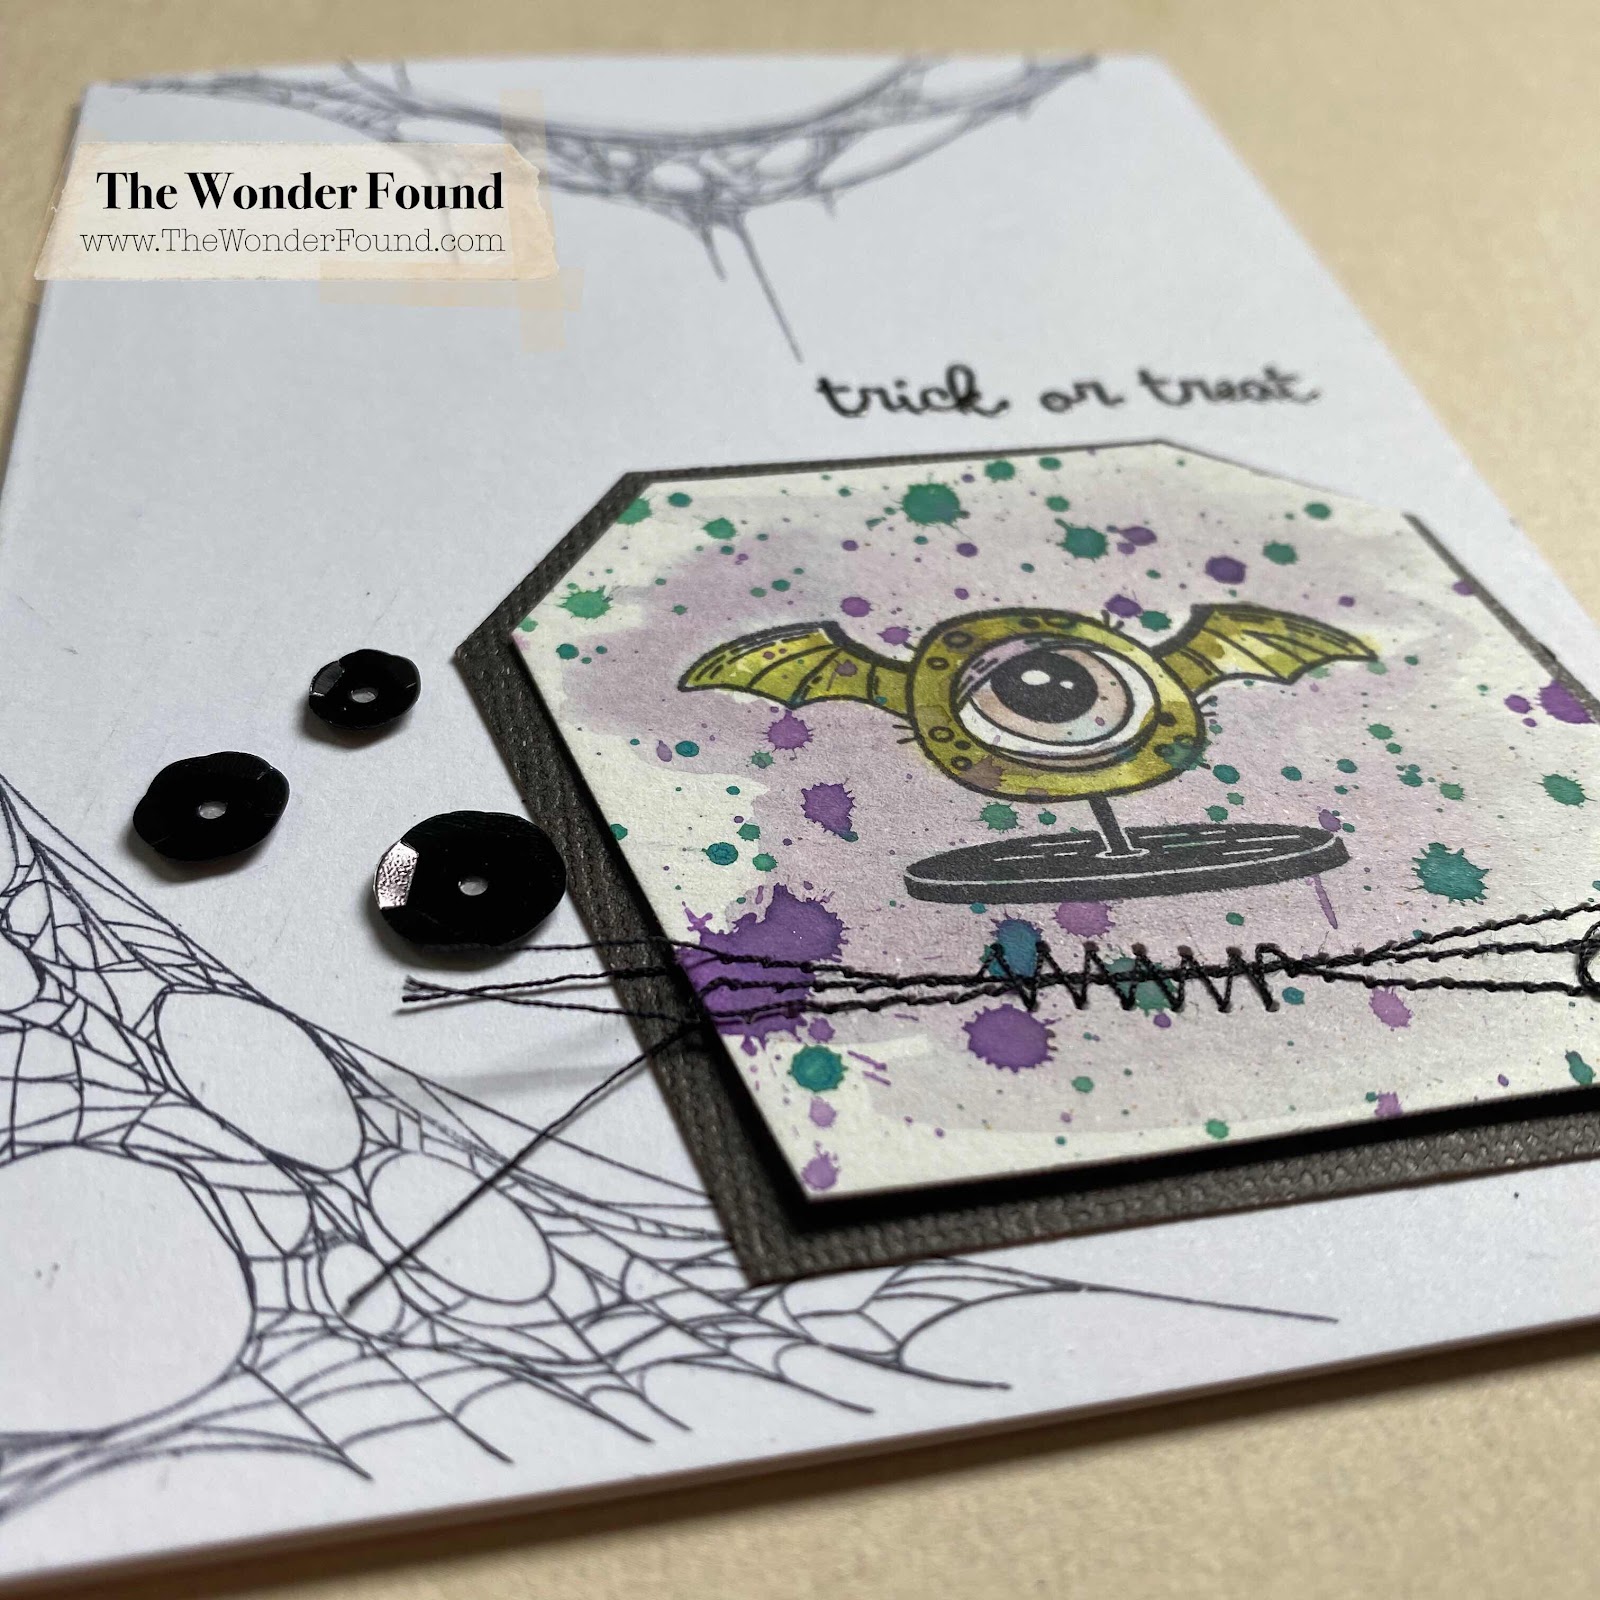
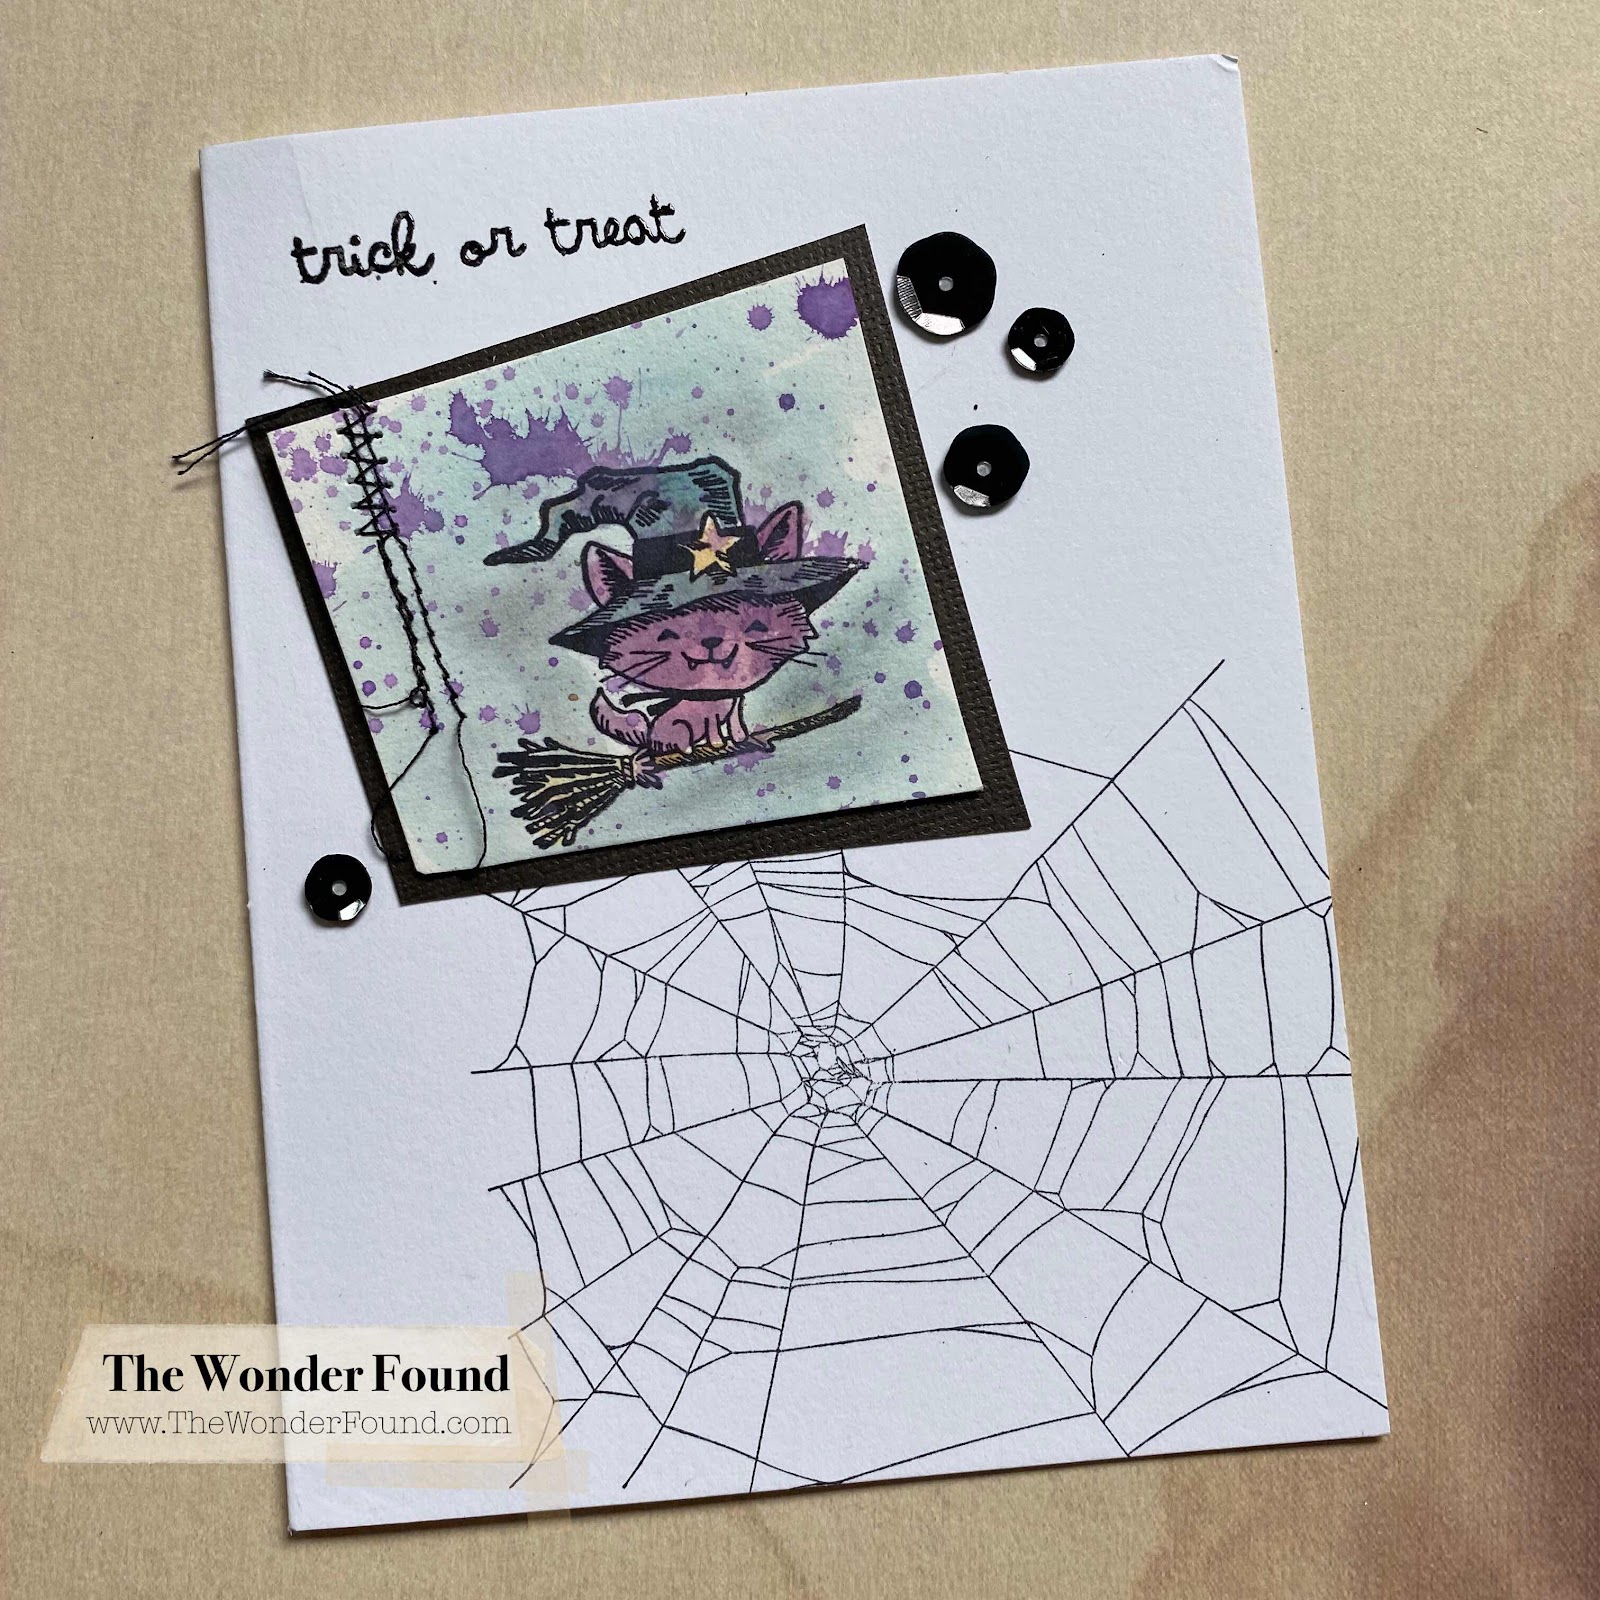
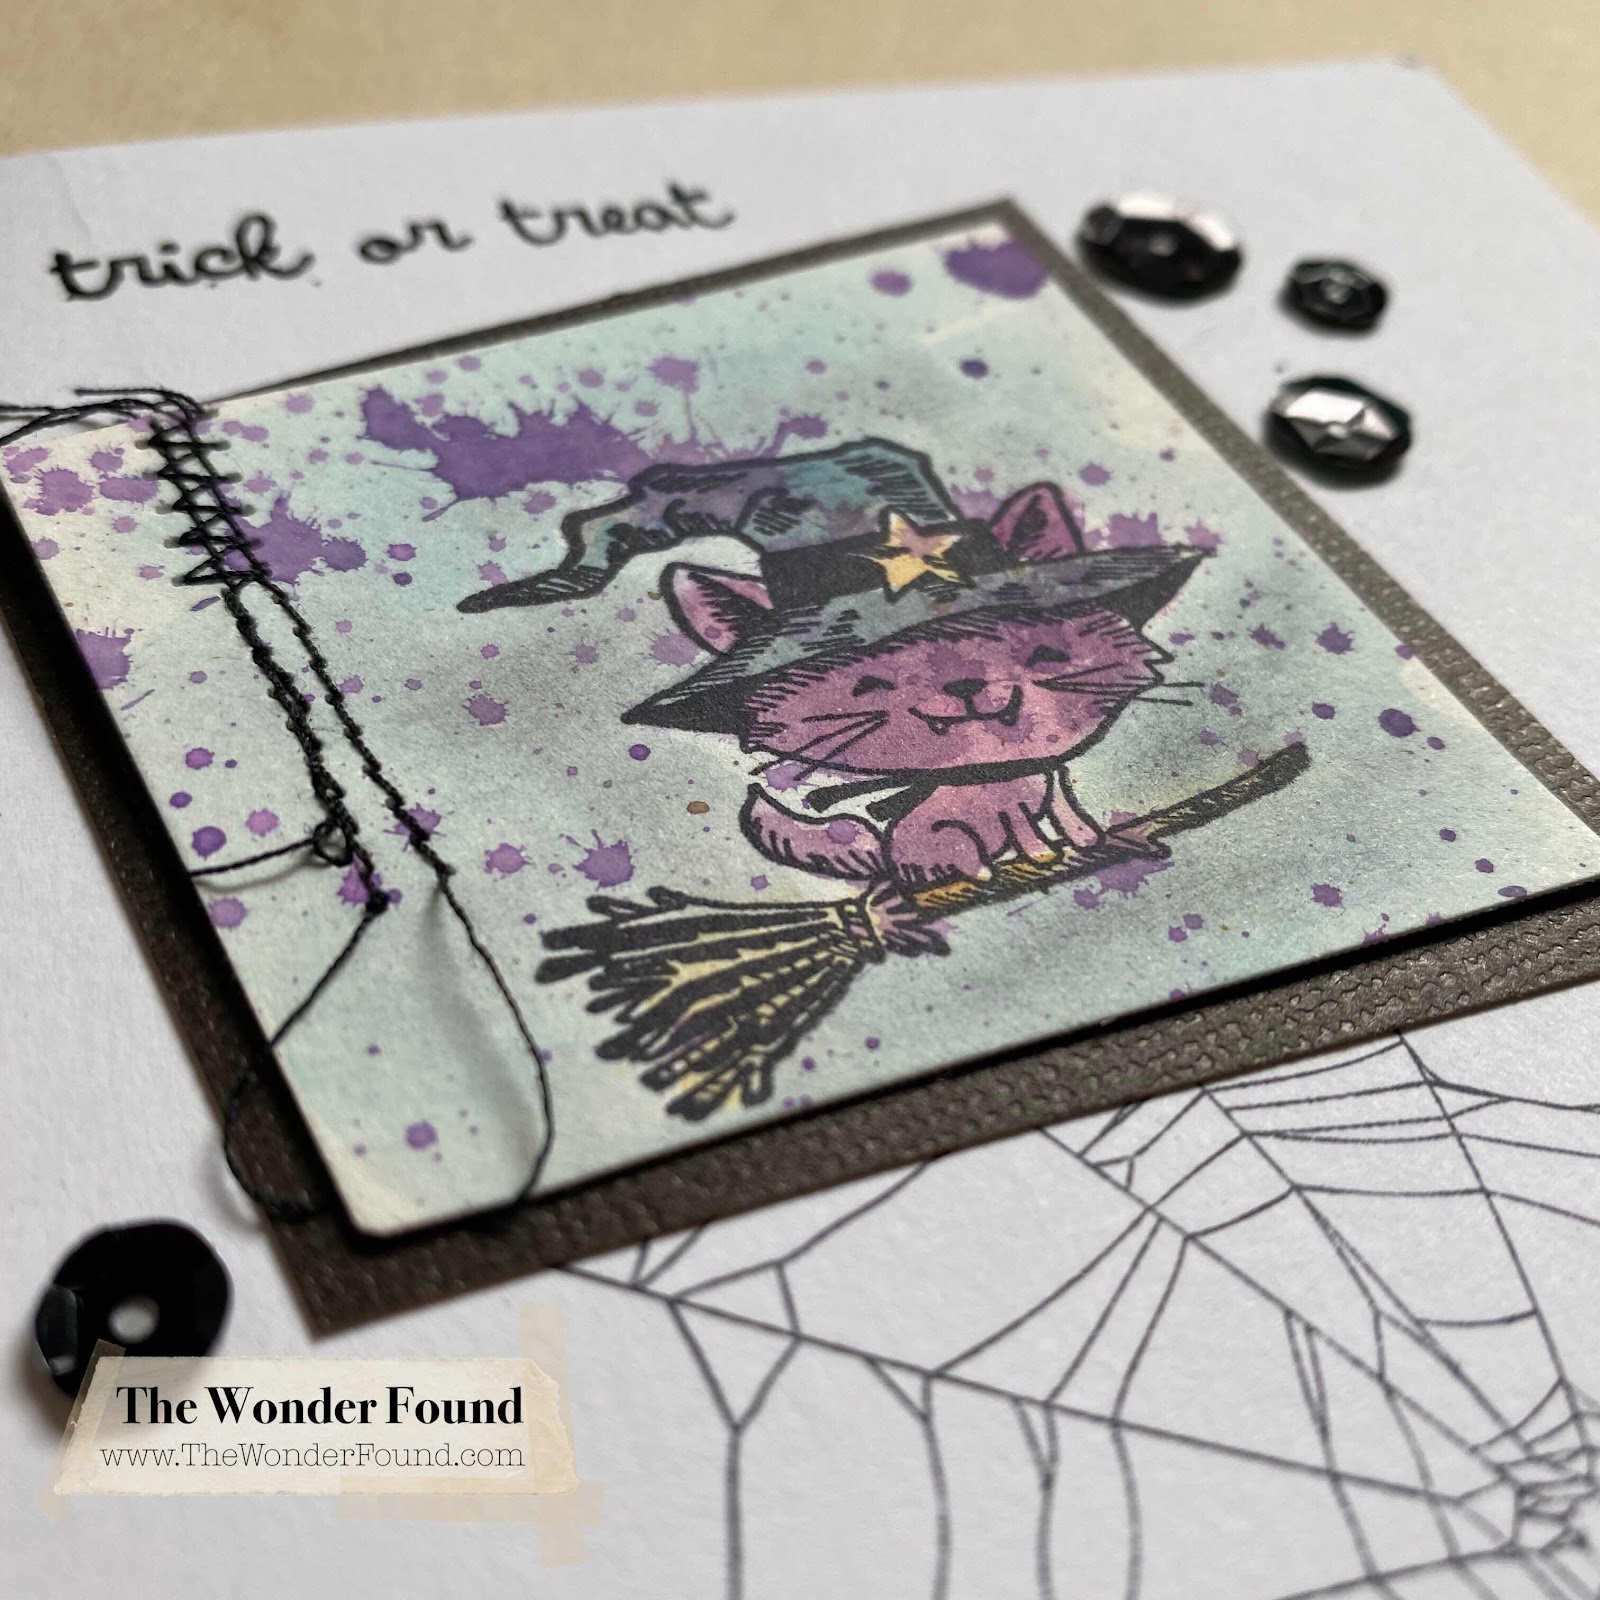
I created this Halloween card using the newly released ‘Dearly Departed’ stamp set.
I stamped the eye onto a piece of water color paper that I colored using distress inks. I stitched around the image and taped it into a piece of Black Out Kraft stock that I wrinkled up and smoothed out. I completed it with a sticker from the ideology Halloween curiosity sticker book.
For more project inspiration follow me on Instagram and don’t forget to subscribe to my YouTube channel!!
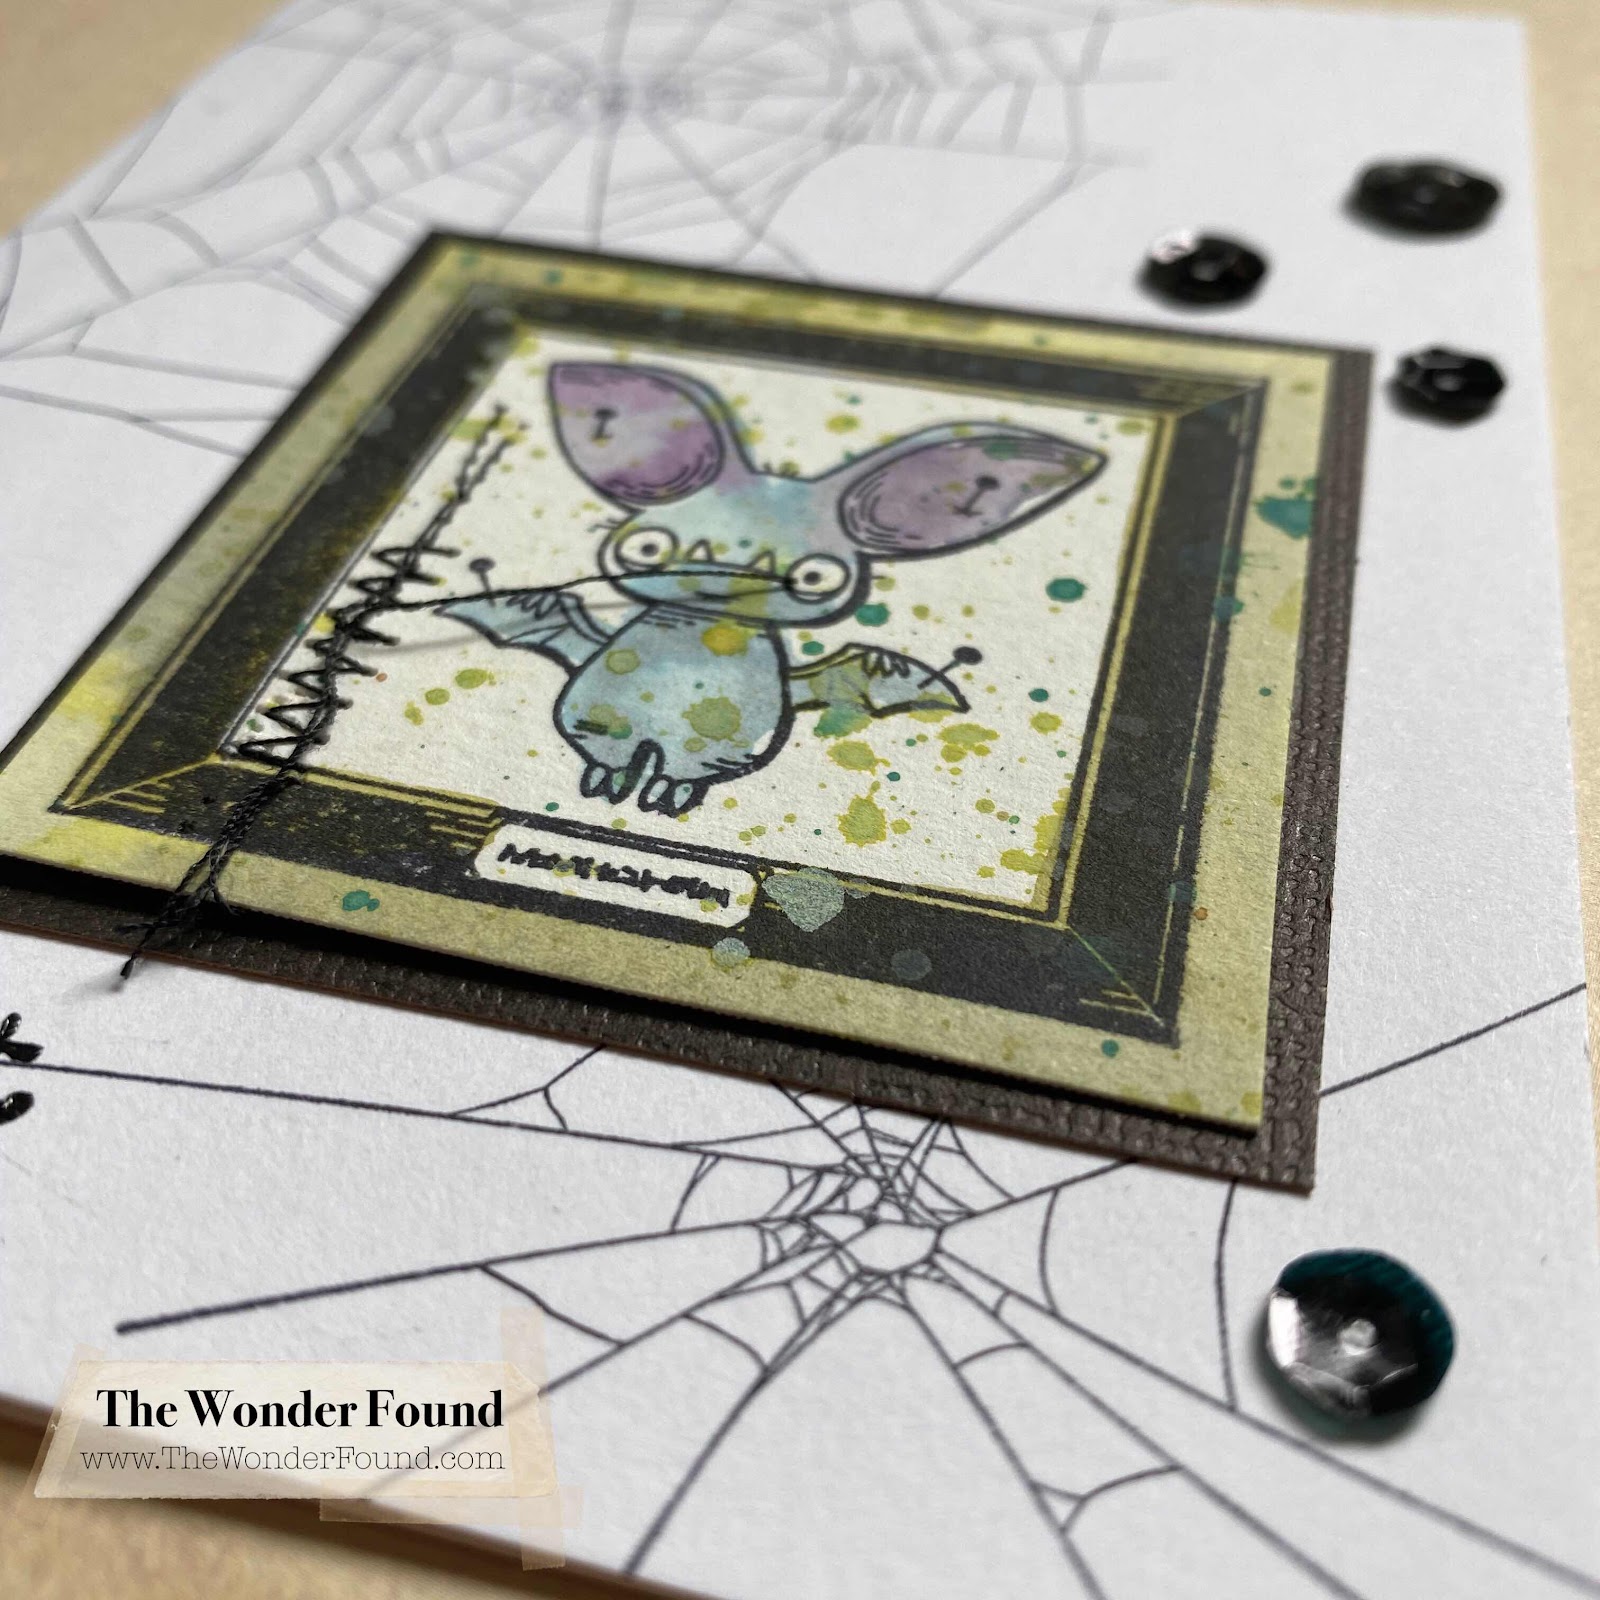
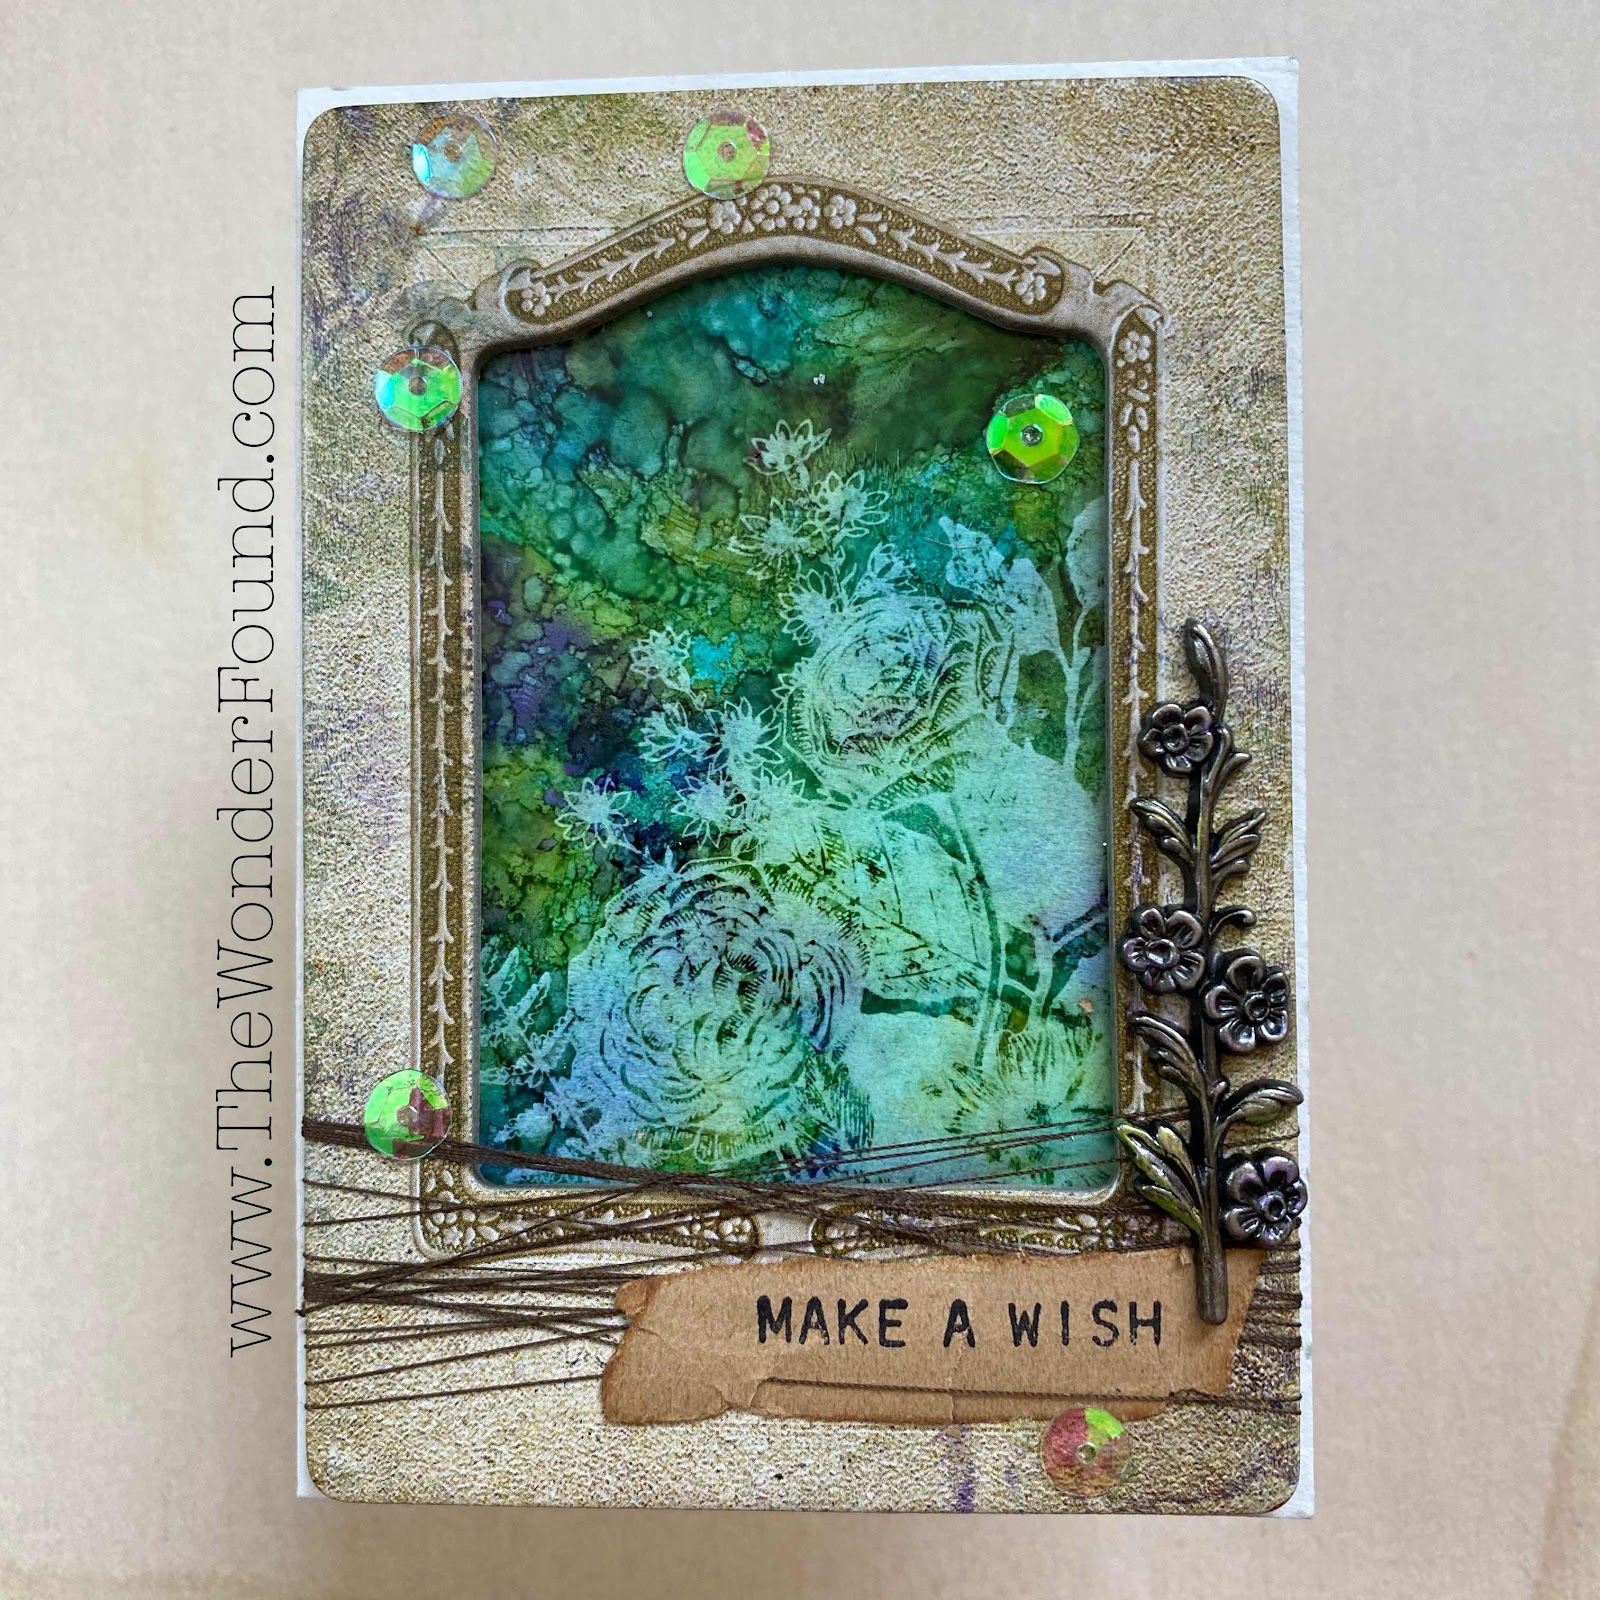
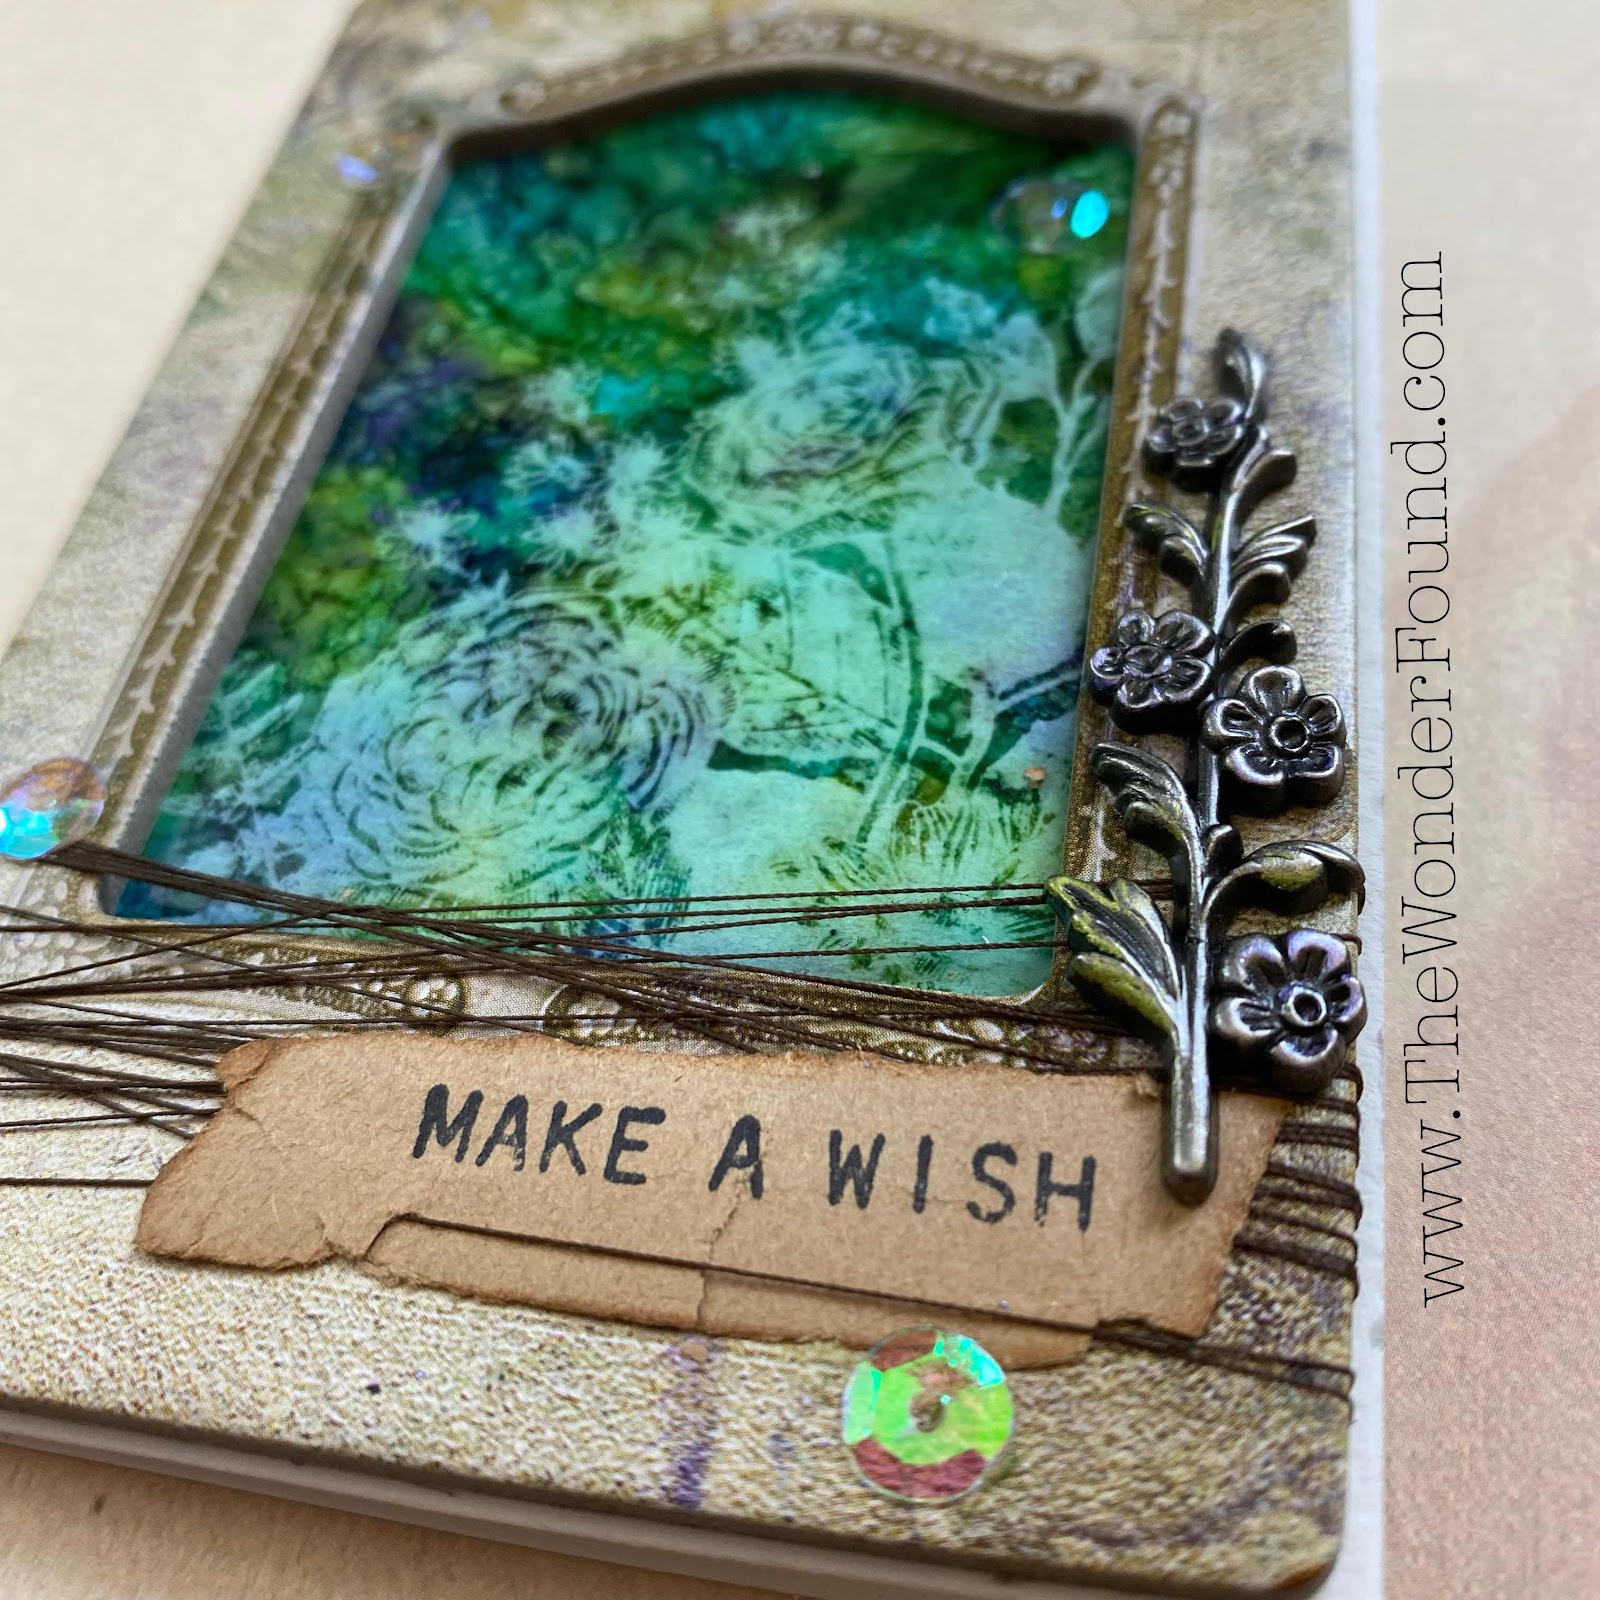
Then I took my glorious bouquet stamp and applied the alcohol lift ink and stamped an area of my dried alcohol ink design. Using a paper towel I dabbed the lift ink off the image and carefully rubbed more of the lift ink off the paper until I had a beautiful ghostly flower image. Since the alcohol ink was transferred onto my stamp, I stamped onto the baseboard photo frame.
Using tear tape I attached my paper to the frame. I added a small metal flower to the side, I used green & purple beeswax metal finish to add a some color to the adornment.
I wrapped the frame with some thread and stamped a little sentiment using the tiny text stamp onto a piece of old book page.
I finished it off with some sequins to add a little sparkle.
Check out my Instagram to see how I made a custom envelop for this mini card!
For more project inspiration follow me on Instagram and don’t forget to subscribe to my YouTube channel!!
So it’s been awhile I know. But I got busy today and used some of my stash!! No ones been going anywhere during this pandemic and what a great reason to dig into some old piles and turn them into something to cherish.
For this piece I used an old book, fabric scraps, some Tim Holtz goodies, some ephemera and an old photo of my grandparents. Can’t forget my go to glue these days to hold it all together!
We’ll start with this amazing metal accent piece, it’s actually a Halloween Vignette Accent.. not so spooky, I added a some inka gold with my finger to give it an antiqued golden feel. I attached a piece of chain with eyelets so it could be hung.
The photo is a scan of an old photo booth photo my grandparents took back in the 50’s! I just love it!! It is framed by a frame page from a vintage photo album. I added a stamped sentiment from the Tiny Text stamp set as well as a little nest of gold thread.
I used layers of fabric scraps to add texture. I stitched a few pieces together to add interest as well as more texture.
Once I thought I was done, I felt like it needed a little more of something at the bottom. So I added a Mini Plaquette as well as a Foundry Adornment.
We can’t forget everything is carefully layered onto a vintage book keeping book cover. It had the perfect amount of ware already on it, I just added a little distress ink to the outer edge to help grunge up the rough edge. Oh my how I love vintage well loved books!!
So let’s dig into our stash and make something totally awesome!
For more project inspiration follow me on Instagram and don’t forget to subscribe to my YouTube channel!!
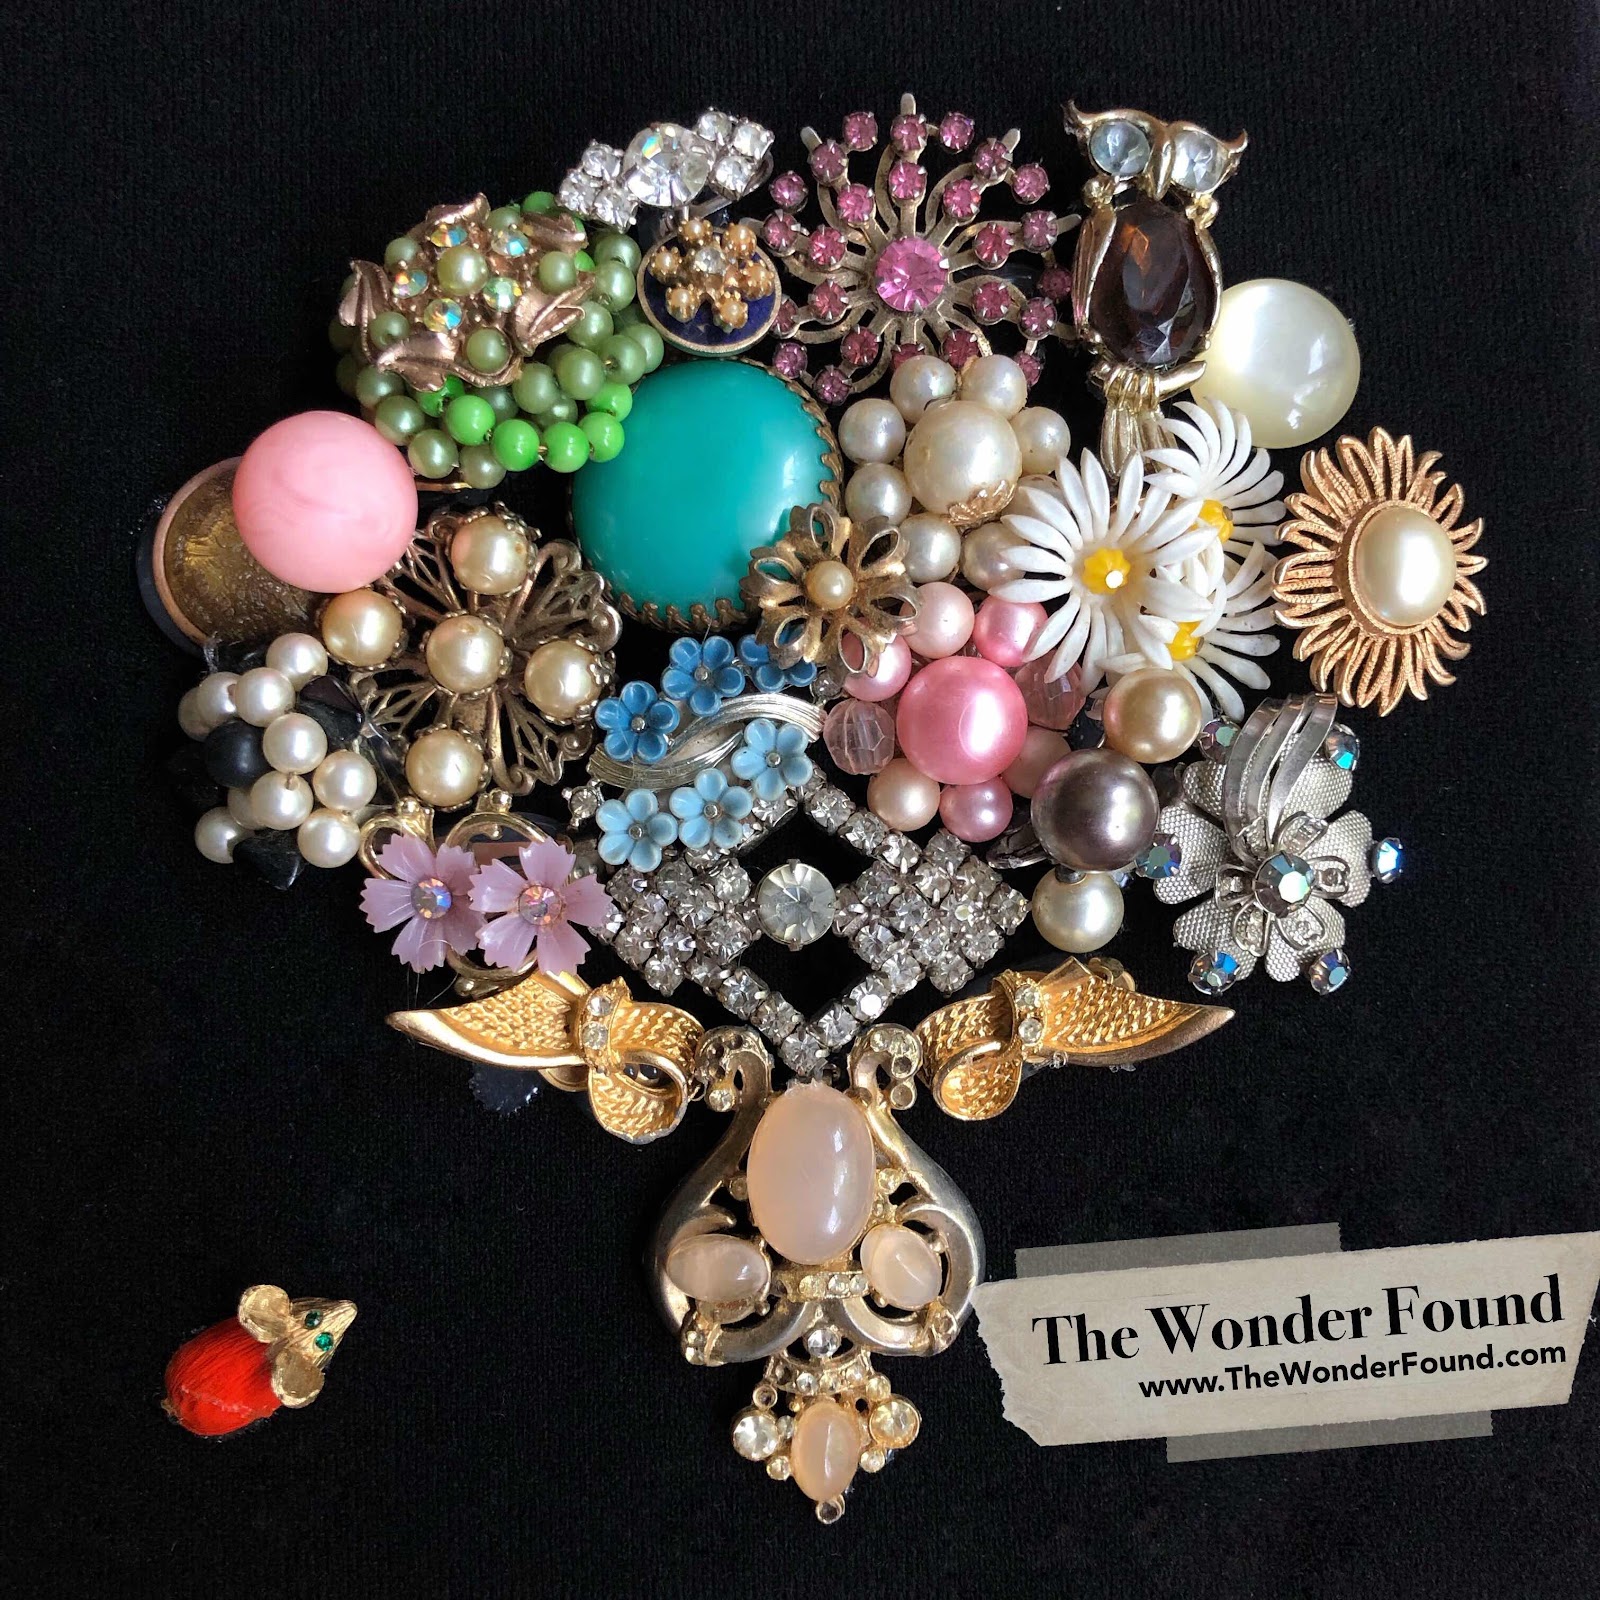
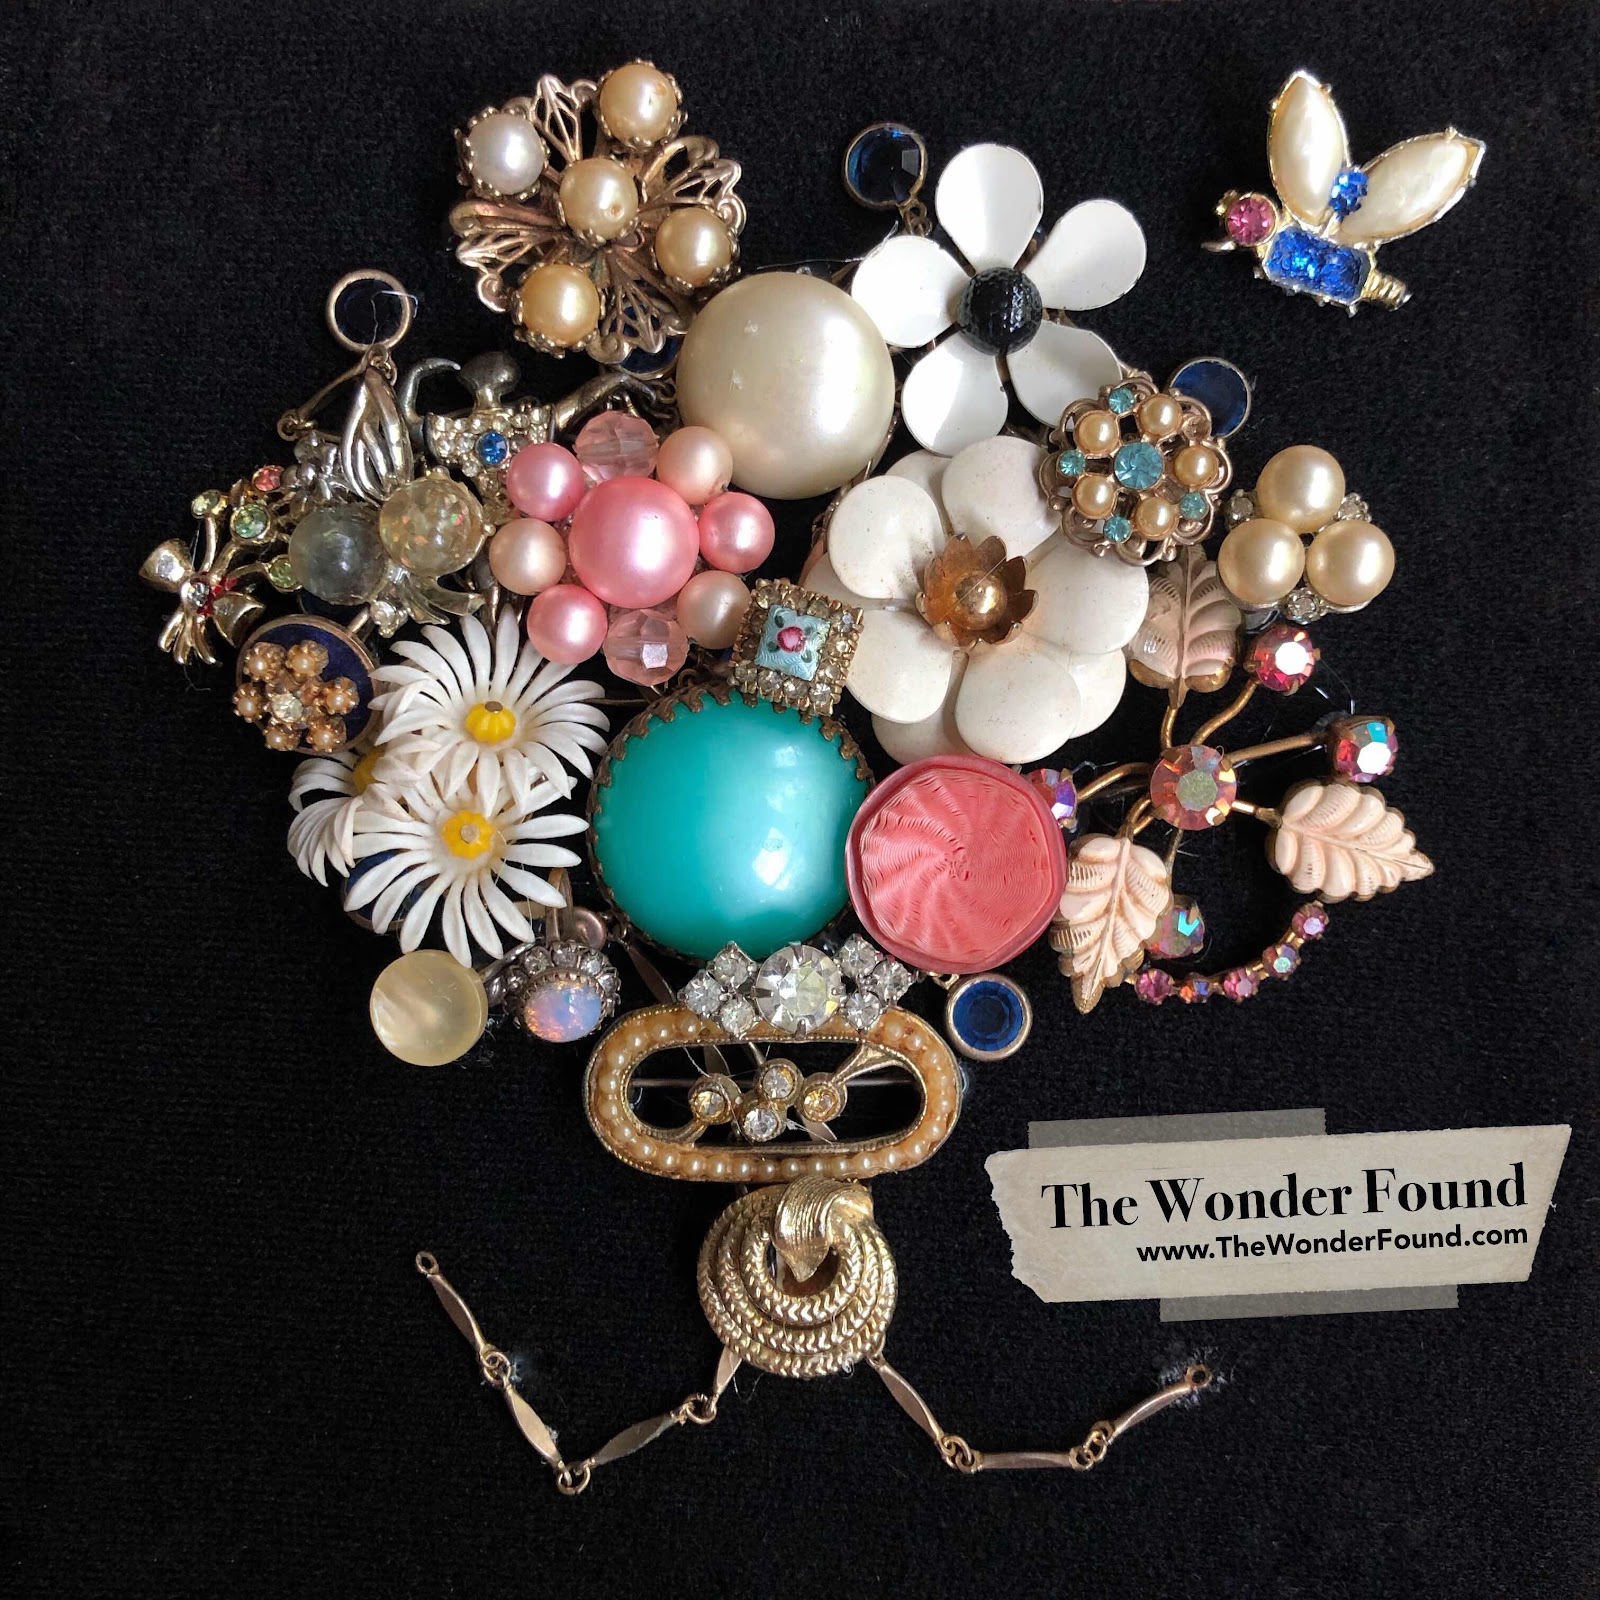
We were going through and cleaning out my father in laws attic, and we found the mother load of costume jewelry! It all belonged to my husbands granny. Boy did she have tons of brooches and clip on earrings!
Granny was born in 1926 and passed away in 2012. As soon as I saw the stash I knew something special needed to be done with it! So I purchased 7x7 shadow boxes and with the help of my 5 year old assistant, spread all the jewelry out and matched up all the earrings.
We looked at all the beautiful colors and beads and pointed out our favorites.
I began placing the jewelry on the black background of the shadow box. Once I was happy with the composition, I went back with the glue gun and secured everything.
I am absolutely in LOVE with the shadow boxes we put together. We put together three in all, one for each of Granny’s great granddaughters.
For more project inspiration follow me on Instagram and don’t forget to subscribe to my YouTube channel!!
Hello! I haven't been making as much as I'd like to right now... but I'm sure I'm not the only one.
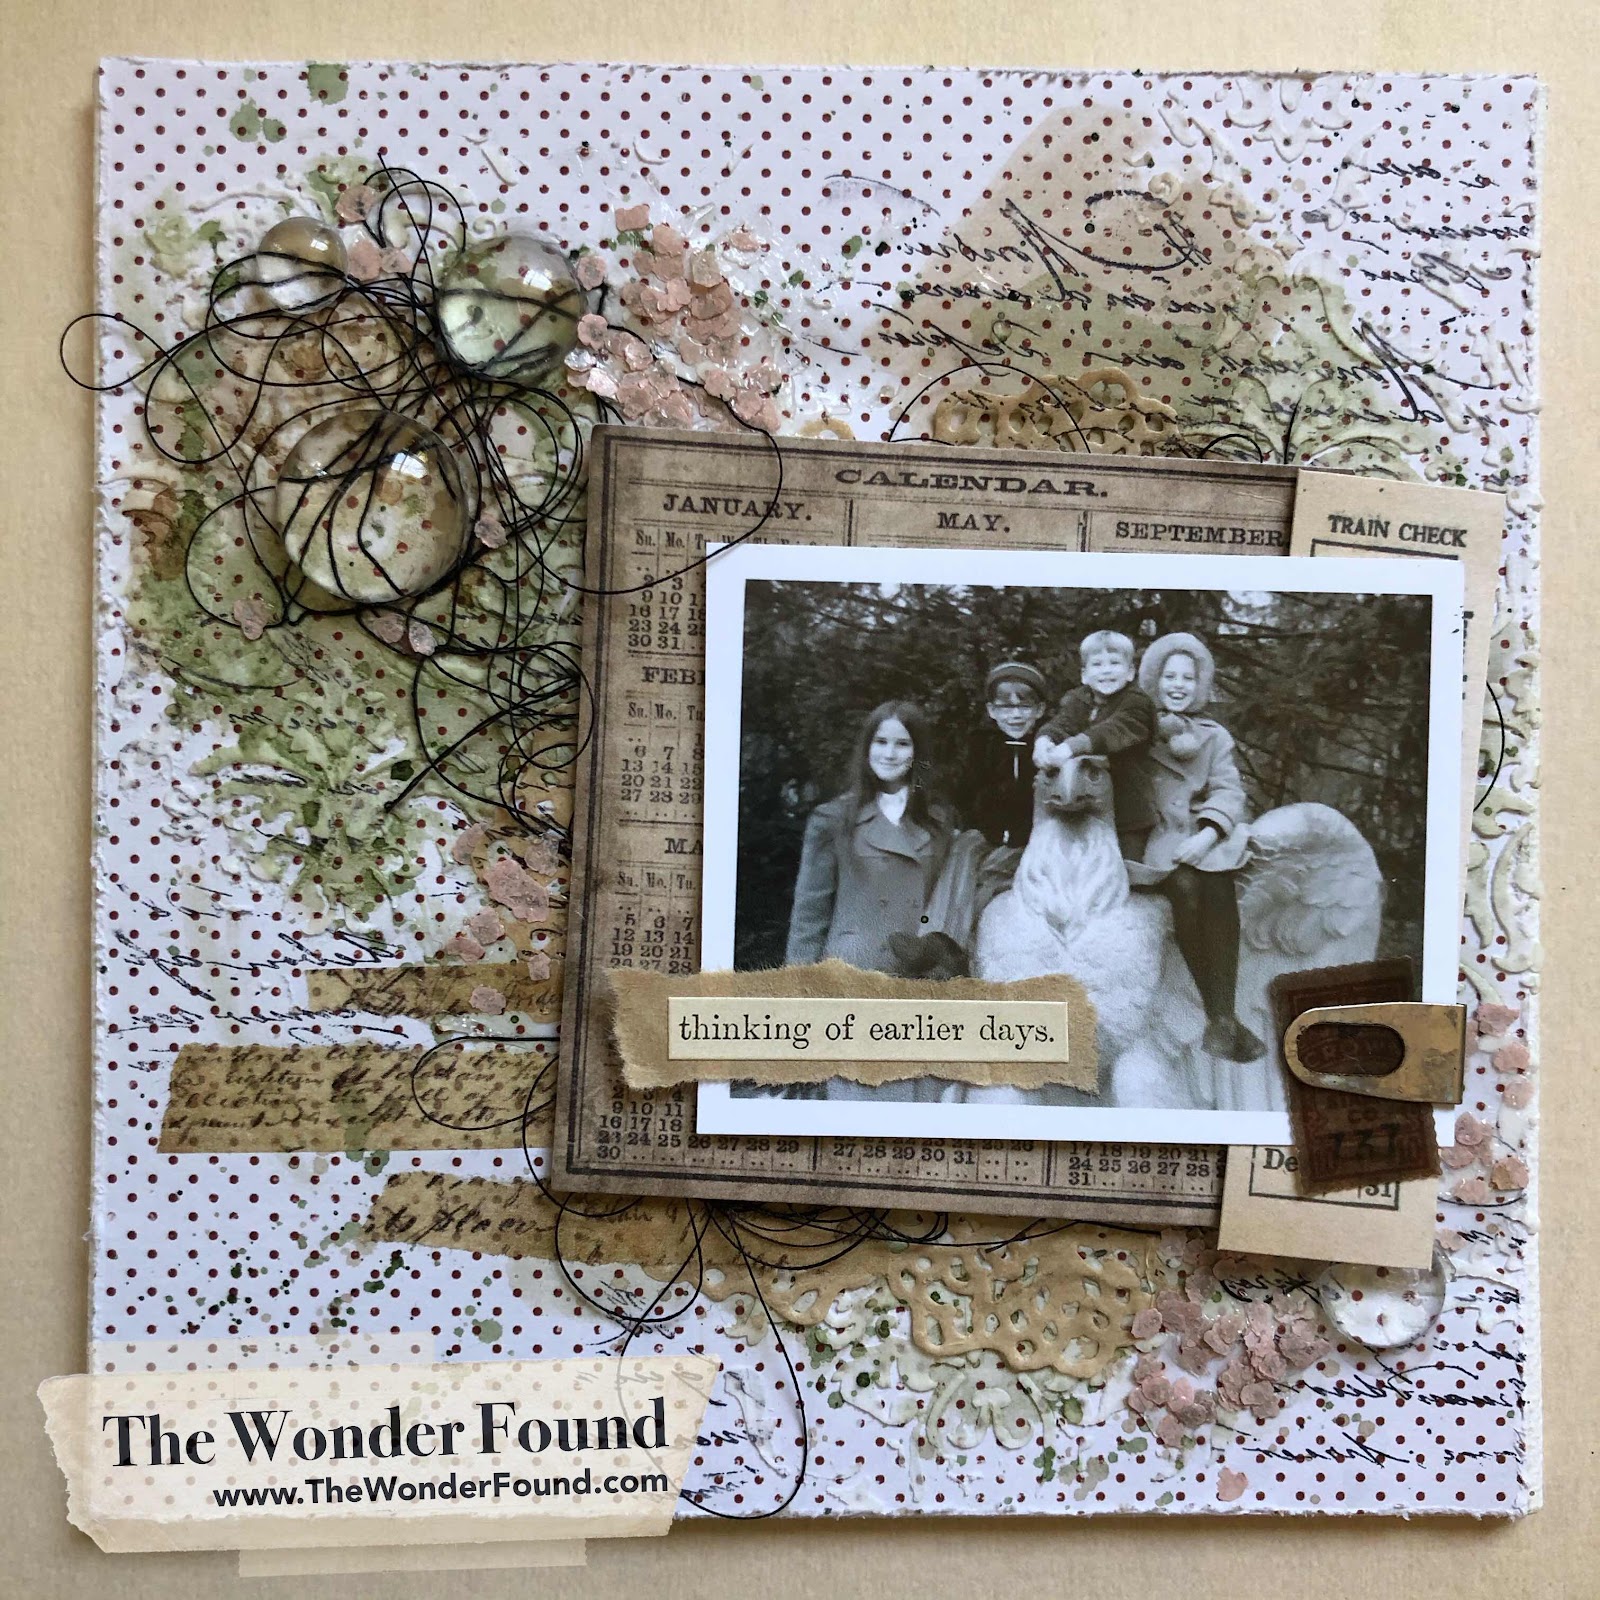
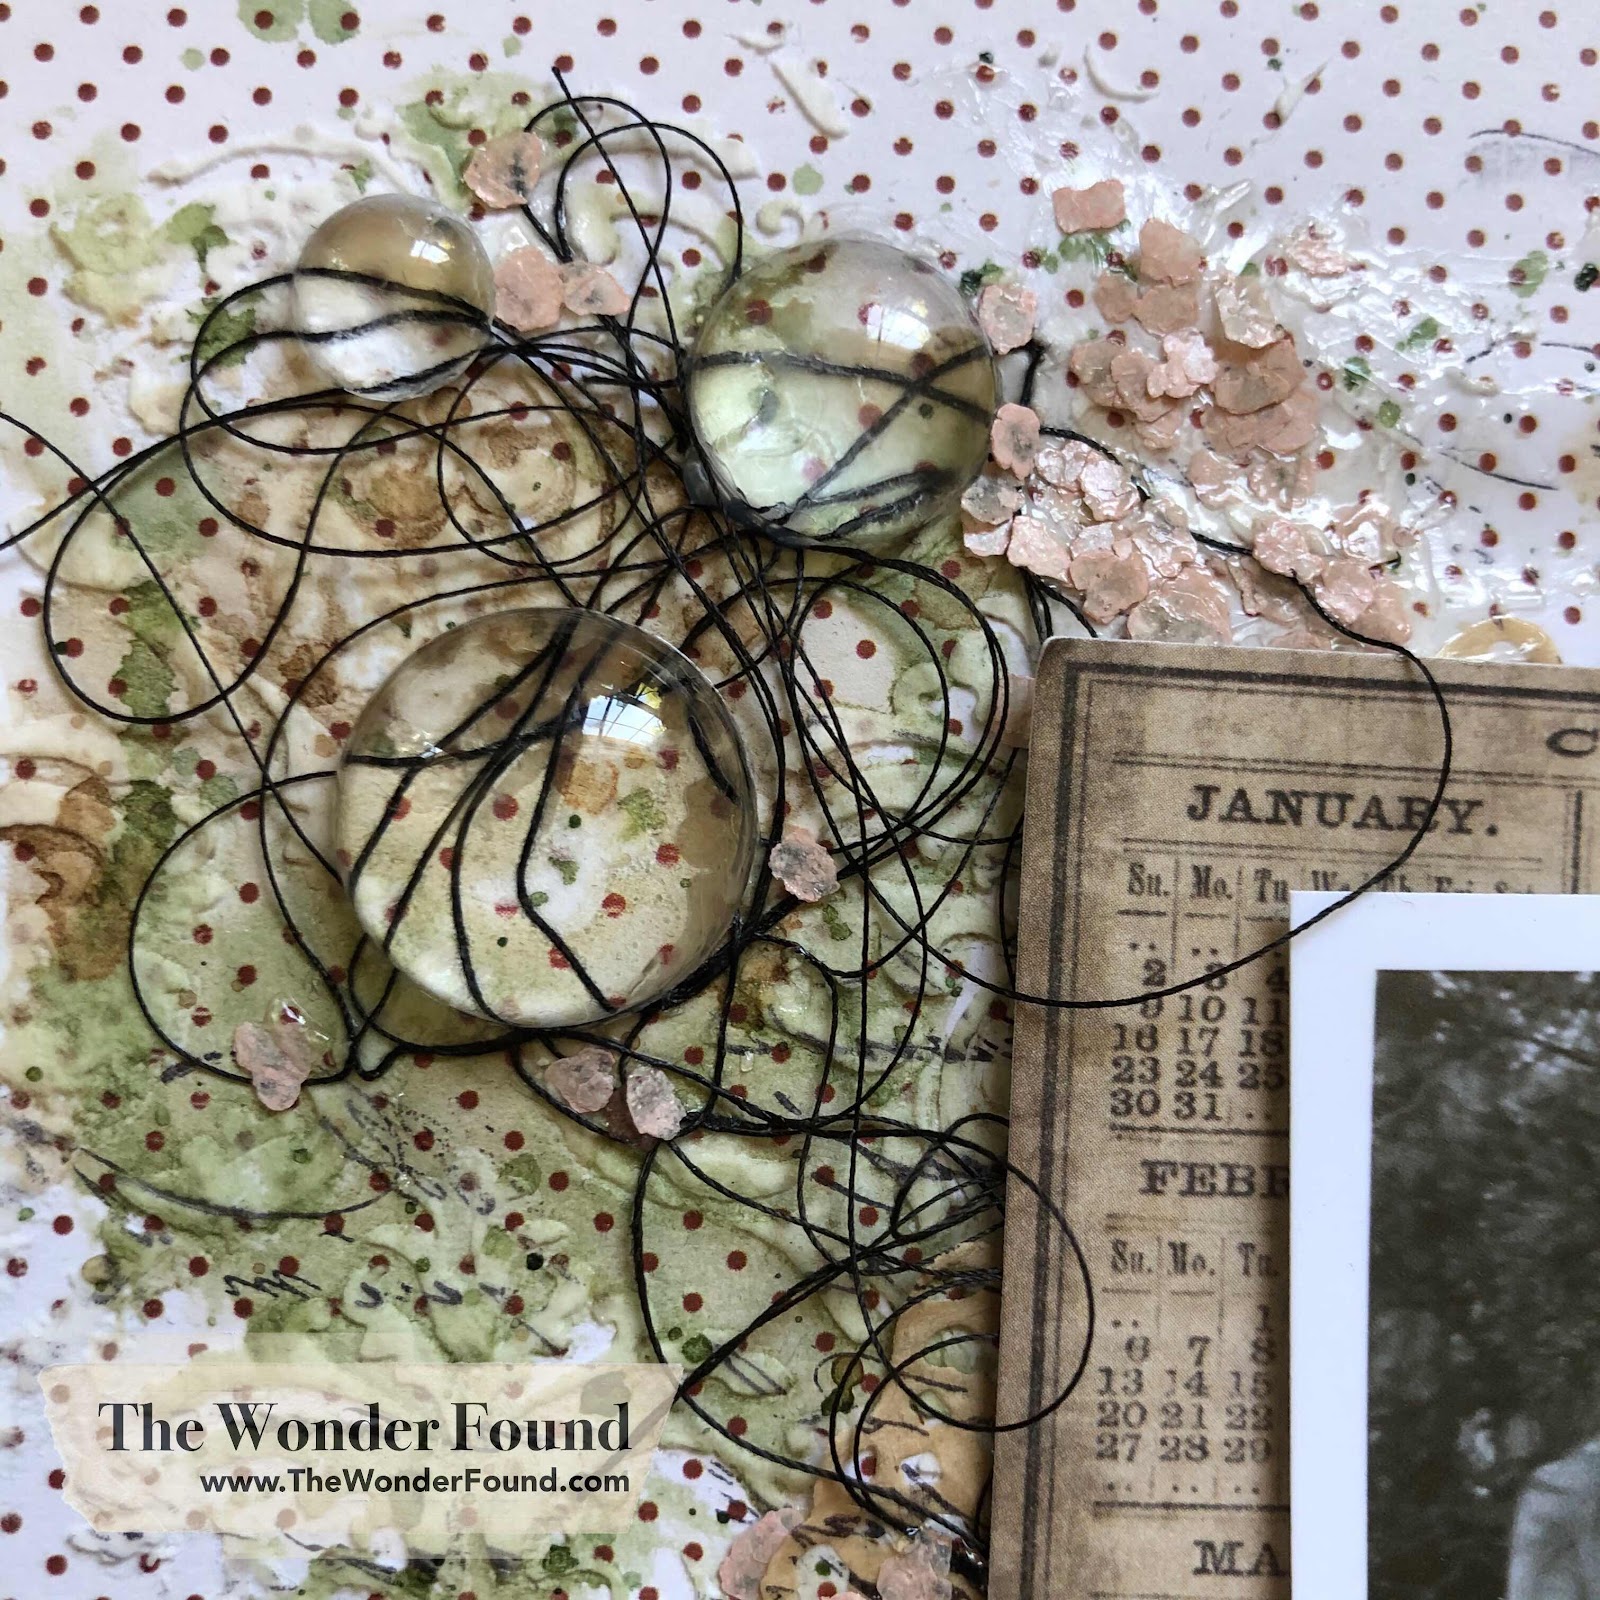
I started thinking about what to gift to my mother on Mother Day and since most everywhere is closed, I decided to make a little mixed media piece for her. Here's what I came up with:
I started with a canvas panel, I used a piece of patterned paper for the back ground. I secured the paper onto the tile using tear tape. Then I used a stencil and opaque texture paste to add a layer. Once the paste dried I added a little bit of color using watercolors in different greens and browns. I cut out a doily and glued it in place with collage medium. I added a few pieces of paper tape to help draw your eye into the main focal point. I used the handwriting stamp the Tim Holtz Reflections stamp set and randomly stamped on the background to break up the watercolor a bit.
I took my old photo and layered it onto a few different pieces of ephemera. I clipped them all together using a small clip. The "thinking of earlier days" clippings quote fit this piece perfectly.
Using some double sided sticky foam I popped the main focal point up to add some dimension. Using the collage medium I added a some mica flakes around a few of the corners to add a little texture change.
This piece was made for my mom for Mothers Day, it was fun to make and even more fun to gift! Please leave me a comment and let me know what you think!
For more project inspiration follow me on Instagram and don’t forget to subscribe to my YouTube channel!!
Xo- Megan
**This post contains affiliate links, which means that if you click on one of the product links, I’ll receive a tiny commission at no extra cost to you. Thank you for the support!**